Portable GPS with Built-in DVD Player MGX-0550 Operation Manual 20060201
Important safety instructions CAUTION: to reduce the risk of electric shock, do not remove cover. No user-serviceable parts inside. Refer servicing to qualified service personnel. ELECTROCUTION HAZARD: The lightning flash with an arrowhead symbol inside of an equilateral triangle alerts you to the presence of uninsulated dangerous voltage within the case that may be strong enough to be a risk of electrocution.
CAUTION FOR LASER PRODUCTS • Class 1 laser product. • DANGER: Visible laser radiation when open and interlock failed or defeated. Avoid direct exposure to beam. Do not stare into beam. • CAUTION: Do not open the top cover. There are no user serviceable parts inside the unit. Leave all servicing to qualified service personnel. GPS WARNING • Failure to avoid the following potentially hazardous situations may result in injury or property damage. • The unit is designed to provide you with route suggestions.
• • • • • • • • • • • • • Don’t expose the system to moisture, and don’t place liquid containers on the system. If you use an AC power adapter, the power outlet that it’s connected to should be near the system and easily accessible. Protect the power cord from being walked on or pinched, especially at the ends of the power cables. To reduce the risk of electric shock, do not remove the cover (or back). No user-serviceable parts inside. Refer servicing to qualified service personnel.
Caring for discs Holding discs When handling discs, always hold them by their outside or inside edges. Cleaning • • Dirt and fingerprints on the disc may affect the quality of disc playback. Use a soft, clean cloth to wipe discs clean. If necessary to remove heavy dirt or fingerprints, moisten the cloth with diluted, neutral detergent. Do not wipe discs in a circular direction, because scratches that follow the direction of the track grooves tend to cause noise.
Contents Important safety instructions ................................1 Caring for discs....................................................................4 Contents...................................................................5 Features ...................................................................7 Package contents.................................................................8 Overview ................................................................10 Left ................................
Playing audio CDs................................................ 57 Playing CDs ........................................................................57 Viewing a photo CD.............................................. 59 Troubleshooting ................................................... 61 Specifications ....................................................... 63 Glossary ................................................................ 65 Copyright .......................................................
Features • • • • GPS navigation o Supports address destination, waypoints, route suggestions, and Favorites. o Audio prompts to help you keep your eyes on the road while providing helpful navigation cues. o Pre-loaded maps of North America o Keep track of up to 50 routes. o Accurate to within about 11 yards (10 meters). o Includes internal compass, internal antenna, and external antenna. High-quality audio and video o Dolby Decoder for excellent sound.
• Other special features o High resolution: MPEG-2 decoding format achieves more than 500 lines of horizontal resolution. o Power adapter switch: Automatically adapts to voltage requirements in U.S and other countries. o SD Card and USB Input: designed with SD card and USB ports, can be connected to SD card or other USB device for map updates. o FM transmitter: supports 88.0-108.0 MHz FM transmission.
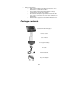
DC power cord Mounting cradle Windshield mount bracket Dashboard mount disk Carrying case Note: Accessories are subject to change without prior notice.
Overview 1 Speakers 2 LCD touch screen 3 Mode button Press to change between DVD, AV In, or GPS mode. 4 BACK button In GPS mode, press to return to the previous menu. 5 Control knob In GPS mode, use to zoom in or zoom out the map and change selections within menus. In the DVD mode, used to select items. In Setup, use to adjust settings. 6 MAP button Press to display the map on the screen. 7 SETUP button Press to enter or exit the general menu.
8 DC 12V input jack Connect to the power adapter or cord. 9 AV OUT jack Connect to an external AV device for audio and video output. 10 AV IN jack Connect to an external AV signal source for audio and video input. 11 Headphone jack Used to connect headphones for private listening. When headphones are connected, the speakers are automatically turned off. 12 Volume control Used to adjust the volume of the headphones and speakers. 13 OPEN button Press to open the disc tray cover.
Back 1 PUSH button Press to open the LCD screen. 2 Power indicator 3 POWER switch Slide to turn power on or off. Bottom 1 Rechargeable battery contacts For connecting the rechargeable battery pack. Do not touch the contacts.
Remote control For best results, aim the remote control directly at the front of the GPS within about 15 feet, within a 60-degree arc, and with no obstacles between the remote control and the remote sensor. Not used in GPS mode. For more information, see “Playing DVDs” on page 52.
1 PWR button Press to access standby mode or playback mode. 2 INFO button Press to display the detailed information of the disc during playback. Press this button again to close the information window. 3 TITLE button Press to display the title menu (if it exists). 4 Direction buttons Press to select options. 5 ENTER button Press to access playback or confirm your menu or setting selection. 6 SETUP button Press to enter the player’s DVD setup.
STOP button Press to stop playback, then press PLAY to resume playback. Press twice to stop playback completely and return you to the main DVD menu. 18 PLAY button Press to begin play. 19 GOTO button Press to select a starting time, track, or title. 20 +10 button Press this button and additional number buttons to enter values greater than 9. 21 Forward scan button 22 Reverse scan button Press to search forward quickly. Press to search backward quickly.
Setting up the system Installing the remote control battery 1. Pull the battery holder out of the remote control in the direction of the arrow. 2. Load a new battery with the (+) side up. 3. Slide the battery holder back into the remote control. Caution • • • • • Improper use of the battery may cause overheating, leakage, explosion, or ignition, which can result in an injury or fire. Battery leakage may damage the remote control. Do not expose the remote control to direct sunlight.
Connecting power Using the AC power adapter The GPS has an AC adapter included for powering the GPS and charging the battery. 1. Connect the AC adapter to the right side of the GPS in the jack marked DC 12V IN. 2. Plug the two-prong end of the power cord into a grounded electrical outlet. The battery LED lights green (if the battery is fully charged) or red (if the battery is not fully charged).
Using the DC power cord The GPS has a DC power cord (car adapter) for powering the GPS while in a vehicle. 1. Connect the car adapter (DC power cord) to the right side of the GPS in the jack marked DC 12V IN. 2. Plug the other end into the vehicle’s 12V accessory/cigarette lighter socket Using the rechargeable battery Your portable GPS comes with a lithium-ion polymer rechargeable battery that attaches to the bottom of the GPS player. Charge the battery fully before initial use.
• • Do not open the battery. When charging the battery pack, the charge light turns red. When charging is complete, the light turns green. Detach the battery when it is not in use. • • appears on the When the battery is weak, the battery low icon LCD screen. After about five minutes, the GPS automatically turns off. Do not touch any metal objects to the battery connectors, because it will put the battery into standby mode.
Charging the battery The battery must be attached to the GPS to be recharged. 1. Attach the battery to the GPS. 2. Plug the supplied AC power adapter or DC power cord into the GPS’s “DC 12V IN” power jack (on the right side of the GPS). 3.
Installing the system in your car Use the windshield mount bracket to mount the GPS in your car. 1. Loosen the nuts on the bracket hinges. 2. Slide the mounting cradle onto the bracket’s rotating head until it’s locked into place. 3. Clean the bracket’s suction cup using the enclosed alcohol prep pad or a cotton ball moistened with isopropyl (rubbing) alcohol. A dirty suction cup won’t stick to any surface. 4.
Connecting external audio and video • • Always make sure that the GPS, TV, and any other electrical equipment to be connected are turned off and unplugged from the power supply. Make sure that you observe the color coding when connecting audio and video cables. Connecting to a TV Audio/Video connections for audio and video output Follow the illustrations below to connect the GPS to a TV's Audio/Video inputs with the A/V cable.
Connecting to an amplifier 1. See your audio equipment’s documentation for connecting the GPS. 2. Connect your GPS as shown in the diagram below.
Connecting to an external video source You can connect this GPS to an AV signal source such as a video cassette player, video camera, or video game. 1. Connect the audio/video cable to the GPS AV In jack and to the external AV signal source. Make sure that you match the color-coded ports and plugs while connecting audio and video cables. 2. Press the MODE button to change the video source to AV IN.
Connecting to headphones 1. Connect the headphones to the headphone jack on the right side of the GPS for private listening. When headphones are connected, the speakers automatically turn off. Using the FM transmitter You can transmit your system’s audio over an FM radio frequency, so you can listen to its audio in stereo over any nearby FM radio. 1. Tune a nearby FM radio to a frequency that doesn’t receive a station. 2. Press the SETUP button on the front of the GPS. 3.
Changing system settings 1. Press the SETUP button on the GPS. The screen will display a menu, as shown below: 2. In the menu, tap one of the six submenus: 3. o Tap to adjust the volume. o Tap to adjust brightness. o Tap to adjust the contrast. o Tap to set the touch screen sound on or off. o Tap to set the FM transmitter frequency. o Tap to set the screen aspect ratio. (not available in GPS mode) Turn the knob to adjust the selected setting.
Navigating with GPS Your GPS system is a convenient way to navigate to a location, determine your current location, and plan a travel route. Getting ready for GPS navigation 1. Connect the system to power. 2. Rotate the built-in GPS antenna (on the underside of the system) out until it’s horizontal, or plug in the external GPS antenna. (The external antenna is magnetized, so you can mount it on the outside of your vehicle.
Understanding the map Icon Meaning Indicates Car mode. It shows your current location or your last known GPS location (when there is no valid GPS information at the current time) while in Navigation Mode. The icon becomes elongated at higher speeds and wider at lower speeds. or Indicates Pedestrian mode. shows your current location while in Navigation mode. shows your last known GPS location while in Navigation mode, when there is no currently valid GPS information. Tap to enter the main menu.
Using the Main Menu 1. Tap Menu on the map to enter the main menu. The main map menu opens. 2. Tap Go To Address to enter an address and create a route to an address. 3. Tap My Favorites, Recent Locations, or Gas, Food, Lodging, etc. to select a destination from a list. 4. Tap Cancel Route to cancel the current route. 5. Tap Map Options to change between 2D and 3D modes, Day and Night modes, and other settings. 6. Tap Map to return to the map view.
Using the front knob control The knob on the front of your GPS can perform several functions, depending on the active GPS mode. GPS mode Knob function Map Zoom the map in (rotate clockwise) and out (rotate counter-clockwise). Menu Scroll through lists and menus. Navigation Mode – Provides voice instructions as you drive. The unit uses the satellite-based global positioning system (GPS) to constantly detect your current position.
3. Tap Enter to select the state (or Canada) and open the City screen, then enter names the same way you did in the previous step. 4. Tap Enter to select the city and open the Street screen, then enter names the same way you did in the previous steps. Tip: Enter the name of the street only (for example, “Oak”), without a N, S, E, or W direction, and without the road type (avenue, street, way, etc.). Then press the up or down arrows or the scroll knob to browse through the resulting streets.
Setting search order for entering addresses 1. To change the order in which address information is entered, tap the Search By button after you have entered a state. The Search By screen opens. 2. Tap City-Street to search for an address by entering in the sequence of city, street, then the number. 3. Tap Street-City to search for an address by entering in the sequence of street, city, then the number. 4.
3. In the driving list, tap Route to see the route overview. The overview shows information about the current route, including the distance, the time to travel, and the destination address. The icon represents the route origin and the the destination. icon represents 4. You can see a specific turn by tapping the turn in the turn-by-turn menu, then tapping Turn. 5. Tap Prior or Next to view the prior or next turn. 6. If you want to avoid one turn, select it and tap Avoid in the turn-by-turn menu.
Driving demo 1. Instead of tapping Go at the end of your address entry, tap the Demo button to run a demonstration of navigating the currently selected route in the map view. When nearing each turn, a visual notice and a voice prompt will inform you about the direction change. 2. Press Menu to stop demo playback. You can then tap Go to enter the route and begin navigating. Navigating to location on the map You can navigate to any point on the map by tapping its location directly on the map screen.
4. If you need to reset the point of origin, tap the map screen to open the dialog, then select Set As Origin. All new route calculations will use this as the starting point, but only if you do not have a GPS signal (typically only indoors). In Navigation Mode, your current GPS location is always your origin. Navigating to a point of interest The Points of Interest (POI) list is a collection of potential destinations of interest in predefined categories.
3. To restrict the area in which the POI is searched for, tap Near, set the search radius, then tap Done. You can also choose to search near where you are (Current Location) or near your destination if you have set a navigation route. 4. The selected POI category can be shown or hidden in the map by tapping the Show Symbol on Map or Hide Symbol on Map button. 5. Tap Done to save your selection.
Navigating to a recent location The Recent Locations list allows you to select an existing destination from a list of previously traveled or entered addresses or POIs. The software automatically stores the last few destinations in memory. As each new route is added to the top of the list, the older destinations at the bottom are erased. To navigate to a recent location: 1. Tap Recent Locations on the main menu. 2. Tap a location, then tap Show or Next to see this location in the map view.
Using Favorites Saving a Favorite When selecting a Destination which you may use regularly, you can save it to your personalized Favorites list. Method one: 1. On the map, tap any point in the map screen. A context menu appears. 2. Tap Add To My Favorites. The Favorites editing menu opens. 3. In the Favorites editing menu, use the on-screen keyboard to type the name for the Favorite. Use the Add to Group arrows to select the Favorite group to add it to. 4. Tap Save to save your Favorite.
Method two: 1. Tap a POI, then tap Actions. The Actions menu opens. 2. Tap Add to My Favorites. 3. In the Favorites editing menu, use the on-screen keyboard to type the name for the Favorite and select the Favorite group to add it to. 4. Tap Save to save your Favorite. Method three: 1. When entering a new address from the Go To Address menu, tap Actions after you enter the house/business number (before you tap Go), and tap Add to My Favorites. 2.
Navigating to a Favorite You can select a destination from your list of stored Favorites. A Favorite is an address or destination previously stored by you for quick and easy retrieval. You can also save, edit, or delete destinations from this folder. To navigate to a Favorite: 1. In the main menu, tap My Favorites to view the list of Favorites groups. 2. Tap a Favorites group, then tap Next. The default group is called My Favorites, but you can add your own groups.
Map options You can customize your map view with several route and map options. 1. In the main menu, tap Map Options. The map options menu opens. The Map Options menu provides choices for display mode, avoiding roads, displaying your driving directions, a route overview, playing and recording a route. 2. Tap Map to switch the screen to the map view. 3. Tap Back to return to the previous menu. 4. Tap Settings to enter the Settings menu. 2D and 3D modes 1.
Day and night modes 1. In the Map Options menu, tap Day Mode or Night Mode to choose between the two color schemes for viewing maps. Day mode is the brightest display, and uses white and yellow. Night Mode is the darkest display, but shows streets and landmarks in bright colors, which is best for nighttime navigation. Avoid roads You can specify that certain roads be excluded from your route calculations. For example, you may prefer to not travel on any toll roads.
3. Tap Next to list all the roads in a highlighted group. 4. To specify restrictions for a particular road, highlight it and tap Allow or Avoid. 5. To preview a highlighted road on the map screen, tap Actions and select Show on the map. In the Actions menu, you can also add a new road or edit an existing road. 6. To add a new road to the My Roads to Avoid list, select the group and tap Actions, tap Add Group, then follow the on-screen prompts.
Settings You can easily change the default settings of maps, views, and route parameters to suit your personal preferences. 1. From the map, tap Menu, Map Options, then tap Settings. The Settings menu opens. 2. Tap More for additional settings options. Changing map and route settings The Map/Route Settings menu allows you to change the settings that determine the map orientation, U turn usage, system units automatic zoom and large labels. 1. In the Settings menu, tap Map/Route Settings.
Route Select Faster or Shorter for your desired route. For driving, the Faster setting usually selects the best route and optimizes the use of highways while minimizing unnecessary turns. The Shorter setting allows you to reach your destination in the shortest distance, using as many turns as required to approximate a safe route between your location and the destination. This setting is best for the Pedestrian mode. U-Turn enabled Adds U-turn as an option for driving directions.
2. To define your home location, you can enter an address or the nearest POI. For example, you can enter your home address here for quick navigation. When you select To Nearest POI Category, you can, for example, locate the closest gast station each time you tap the Home icon on the right side of the map screen. Setting navigation prompts 1. In the Settings menu, tap Prompts. The Prompts menu opens. 2.
Setting language, voice, and appearance 1. In the Settings menu, tap Look & Feel. The Look & Feel menu opens. 2. Change settings for language text and voice guidance to select between English, Spanish, and French for on-screen text and voice guidance. Note: The Skins option is reserved for future use, and is not a feature that can currently be used. 3. After changing the settings, tap Done.
Setting travel modes 1. Tap More in the Settings menu, the screen will display as below: 2. In the menu, tap Pedestrian Mode or Vehicle Mode. In Pedestrian Mode, the navigation radius is restricted to 6 miles (10 kilometers) and some functions are not available, such as Turn by Turn, Avoid Roads, and Route overview. However, you will not be restricted by one-way streets, since this is a mode for walking. Multistop Planner Trip planning is useful when you have more than one destination along your route.
2. The scroll list shows the list of existing trips. If this is the first time you are using Multistop Planner, you will need to create a Multistop route to store your trip details. You can use any name. For example, you can enter My trip plan. 3. Tap Actions to add, edit, or delete a Multistop route. 4. After you have created a route, tap Next from the scroll list to select a route. 5. Tap Actions for more actions such as Set as Origin, Add Stop, Rename or Delete Stop, and Optimize Route. 6.
7. When you’re done adding stops, tap Show or Next to see the Multistop plan overview in the map. No route is calculated yet. Note: In this procedure, the icon represents the highlighted stop in the plan list, not a destination. 8. Tap Go to navigate from the origin to the plan. stop with this multistop Favorites alerts An Favorites Alert refers to setting a favorite up so that the GPS will alert you when you are within a certain distance of the location. You can set two distances for each Alert.
Note: The 1st Alert distance must be greater than the 2nd Alert distance. 4. To display the map position of items in the Auto Alerts category, tap Show Symbol on Map. To hide the map position, tap Hide Symbol on Map. 5. Tap Done to save your settings. Finding your software version 1. In the main navigation window, tap Menu, Map Options, then Settings. The Settings menu opens. 2. Tap More, then tap About. The screen will display the software version and details about your GPS software.
Playing DVDs Read the following instructions carefully before using the GPS with DVD player for the first time. For information on caring for your DVDs, see “Caring for discs” on page 4. WARNING: Do not play poor-quality discs to avoid damaging the lens. Playing a DVD Note: The player will not play DVDs while it’s mounted in the car mount cradle. This is a safety feature. 1. Connect the player to a power supply using the AC adapter or the DC power cord. 2.
PLAY button Press to start playing, or press 0-9 buttons to select a title and chapter directly. PAUSE button Press once to pause during playback, then press it again for frame-by-frame playback. Press PLAY to resume normal playback. STOP button Press once to stop playing, then press PLAY to resume normal playback from the point where playback stopped.
SUBT button Press to select a subtitle language or to turn the subtitle off. A DVD can have up to 32 subtitles. Each time you press the SUBT button, the next available subtitle is selected. REP button Press REP to repeat a Chapter, Title, or cancel the repeat sequence. ANGLE button Press ANGLE to play the movie from alternate angles (if the DVD has that feature). GOTO button Press to select a specific disc title, chapter, or time. Press or to select TT (disc title), CH (chapter), or time.
To set up your DVD system: 1. While the player is in DVD mode, press the SETUP button on the remote control. The SYSTEM SETUP menu opens. 2. Press or (direction buttons) to select a submenu that you want to set up, then press to enter that submenu. 3. Press or to highlight an item in the submenu, then press ENTER to select it. 4. To exit the setup menu, press SETUP on your remote control. 5. Highlight one of the menu items, then press Enter to open the submenu.
Digital Setup 1. While the player is in DVD mode, press the SETUP button on the remote control to open the SYSTEM SETUP menu, then press to open the DIGITAL SETUP menu. 2. Press or (direction buttons) to select a submenu that you want to set up, then press to enter that submenu. DYNAMIC RANGE Use to adjust the linear dynamic compression rate to get various signal compression effects. Press ENTER to confirm your settings and return to the previous menu.
Playing audio CDs When a CD disc is loaded, the player will play it automatically by the default sequence of the disc. You can use , , or number buttons to select a certain track to play. For information on caring for your CDs, see “Caring for discs” on page 4. Playing CDs 1. Connect the player to a power supply using the AC adapter or the DC power cord. 2. On the back of the player, slide the POWER switch to ON. 3. Press the MODE button on the player to change to DVD mode. 4.
Play button Press to play the CD. Pause button During playback, press PAUSE to pause the playback, then press PLAY to resume playback. buttons Press to fast forward. Press it again to fast forward at speeds of 2X, 4X, 8X, 20X, and normal. Press to fast reverse. Press it again to fast reverse at speeds of 2X, 4X, 8X, 20X, and normal. Press PLAY to return to normal playback. REP button Press REP to repeat a track. Press it again to repeat all tracks, and press it again to cancel the repeat.
Viewing a photo CD For information on caring for your CDs, see “Caring for discs” on page 4. Viewing photos on a CD 1. Load the photo CD in the disc tray. The player searches for photos automatically, and the screen displays the root (lowest) folder with several subfolders. 2. Press the and buttons on the remote control to select a folder, then press ENTER. The player opens the subfolder you selected. You can also press the button to return to the last folder. 3.
ZOOM Press the ZOOM button to zoom in or zoom out the photo. GOTO Press GOTO button to select the desired folder or picture. 0-9 Press 0-9 buttons to select your favorite folder or picture directly. Press to rotate the photo clockwise, and press to rotate the photo counter-clockwise. Press to flip the photo vertically, and press to flip the photo horizontally.
Troubleshooting STOP! If you have any problems with this GPS, do not return to the retailer. Follow the troubleshooting steps below, or call 1-866-289-5168 for fast, friendly service. If you think something may be wrong with the system: • • • • Immediately turn off the power. Disconnect the power, remove the battery, and make sure that there is no smoke nor extreme heat. Find the problem in the troubleshooting table below, then follow the solution steps.
The player has poor AV performance. The disc is dirty or warped. Clean or change the disc. The remote control doesn’t work Some obstructions are between the remote control and the player. Remove the obstructions to clear the line of sight. The remote control isn’t pointed at the player. Point the remote control directly at the player. The batteries of the remote control aren’t inserted correctly. Make sure that the polarity of each battery is correct.
Specifications TFT screen size 7 inches diagonal Laser wavelength 780/650 nm Video system NTSC Frequency response 20 Hz~20 kHz ±2.5 dB Audio signal-to-noise rate ≥85 dB Audio distortion+noise ≤70 dB (1 kHz) Channel separation ≥70 dB (1 kHz) Dynamic range ≥80 dB (1 kHz) Audio out Analog Audio Out Video out Video Out 0.2 Output Level: 1.5V±1.0 , Load: 10KΩ Output Level:1VP-P±0.
Compatible disc formats DISC LOGO DIAMETER 12 cm DVD 8 cm PLAYBACK TIME/ PLAYABLE SIDES 133 m i n (S S -S L) 242 m i n (S S -D L) 266 m i n (D S -S L) 484 mi n (DS -D L) 41 min (SS-SL) 75 min (SS-DL) 82 min (DS-SL) 150 min (DS-DL) 12 cm 74 min 8 cm 20 min CD JPEG 12 cm Design and specifications are subject to change without notice. Manufactured under license from Dolby Laboratories. “Dolby” and the double-D symbol are trademarks of Dolby Laboratories. Confidential unpublished works.
Glossary Dolby Digital Dolby Digital is a technology developed by Dolby Laboratories. Soundtracks encoded in Dolby Digital can reproduce from one to 5.1 discrete channels of excellent quality audio. ETA Estimated Time of Arrival. The estimate time to complete the journey, excluding any detours, stops, or delays along the route. ETR Estimated Time Remaining. Estimated time remaining to complete route. Does not allow for any delays. EULA End-User License Agreement.
Pan & Scan screen This refers to a screen on which the playback picture of wide-screen DVDs is cut off at the left and right sides. POI Point Of Interest. A place or item of interest along the selected route. Sat Satellite. See also GPS. A man-made object or device that orbits the Earth, such as a GPS satellite that orbits the earth in a fixed pattern, height, and speed. Title, Chapter (DVD) DVDs are divided into large sections (titles) an small sections (chapters).
Copyright This product incorporates copyright protection technology that is protected by U.S. patents and other intellectual property rights. Use of this copyright protection technology must be authorized by Macrovision, and is intended for home and other limited viewing uses only unless otherwise authorized by Macrovision. Reverse engineering or disassembly is prohibited.
"Polaroid" and “Polaroid and Pixel,” and “Polaroid Simplicity” are trademarks of Polaroid Corporation, Waltham, MA, USA. For service, support, and warranty information, visit www.polaroid.com or in the U.S. call 1-866-289-5168. Para información relacionada al mantenimiento, soporte y garantía, visite www.polaroid.com o al 1-866-289-5168.