PDC 640 Digital Camera PhotoMAX Digital Camera Creative Kit User Guide Rev.
PDC640TOC.fm Page 1 Monday, October 5, 1998 8:53 AM Contents Getting started ..................................................................................... 1 What’s in the Polaroid PhotoMAX Digital Camera Creative Kit ...... 2 All about the camera ............................................................................ 3 Attaching the wrist strap ..................................................................... 6 All about batteries ...........................................................
PDC640.FM Page 1 Wednesday, September 30, 1998 1:23 PM Getting started Your Polaroid PhotoMAX PDC 640 Digital Camera Creative Kit contains everything you need to take digital photographs. After you take pictures, you will find it easy to transfer them to your computer or display them on a TV. Once the images are on your computer, use the Polaroid PhotoMAX Image Maker software to change them in many creative ways, include them in e-mail, or use them to create greeting cards and T-shirts.
PDC640.FM Page 2 Wednesday, September 30, 1998 1:23 PM What’s in the Polaroid PhotoMAX Digital Camera Creative Kit Your Polaroid PDC640 Digital Camera Creative Kit contains everything you need to take digital pictures and transfer them to your computer.
PDC640.
PDC640.
PDC640.
PDC640.FM Page 6 Wednesday, September 30, 1998 1:23 PM Bottom view of the camera a b a Tripod socket b Battery compartment Attaching the wrist strap The PDC 640 Digital Camera comes with a handy wrist strap.
PDC640.FM Page 7 Wednesday, September 30, 1998 1:40 PM All about batteries You can operate your PDC 640 Digital Camera on battery power or with AC current using the AC adapter. To conserve battery life, the camera shuts itself off after a preset number of minutes of inactivity. To activate the camera again, close and reopen the lens cover. The camera displays a low battery icon on the LCD viewfinder when battery power is weak.
PDC640.FM Page 8 Wednesday, September 30, 1998 1:23 PM 2. Load four AA-size batteries into the compartment. Make sure the + and – terminals are oriented correctly in the compartment, or the camera will not function. Do not mix old and new batteries, or batteries of different types. 3. 8 Close the battery compartment cover. Make sure it is closed securely.
PDC640.FM Page 9 Wednesday, September 30, 1998 1:23 PM Connecting the AC adapter To conserve battery life, use the AC adapter whenever possible. The AC adapter can become warm to the touch after extended periods of use. This is normal and is no cause for alarm.
PDC640.FM Page 10 Wednesday, September 30, 1998 1:23 PM Inserting the memory card The images you take with your PDC 640 camera are stored on a removable 3.3V SSFDC or SmartMedia 2 MB memory card (also available in 4 MB and 8 MB). Note: You must insert the memory card before you can turn on the camera. If camera beeps is enabled, the camera beeps if the card is not installed and displays the →[ ] message on the Status panel. To insert the memory card: 1. 2.
PDC640.FM Page 11 Wednesday, September 30, 1998 1:23 PM 3. Insert the memory card into the slot (gold side of the card facing the front of the camera). Make sure the card is pushed firmly into the slot. Note: The camera prompts you to format the memory card if it is not formatted. The camera displays the format menu on the LCD viewfinder. Press the button next to Format. 4. Close the memory compartment cover.
PDC640.FM Page 12 Wednesday, October 7, 1998 12:54 PM Turning on the camera You must insert the memory card before you can turn on the camera. To turn on the power to the camera: 1. 2. Insert the memory card as described in the previous section, if it is not installed. Turn on the camera. Icons appear on the Status panel.
PDC640.FM Page 13 Wednesday, September 30, 1998 1:23 PM Setting the date and time You need to set the date and time the first time you turn on the camera. To set the date and time: 1. Turn on the camera. If this is the first time you are turning on the camera, go to step 6. 2. Press the Menu button. 3. Press the down arrow button to display the next set of options. 4. Press the button next to Settings. 5. Press the button next to Date & Time. 6.
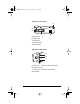
PDC640.FM Page 14 Wednesday, September 30, 1998 1:23 PM About the camera controls For more information about these options, refer to the online Image Maker Products User’s Guide. a b e c d a You use the following Menu options to: • Review images • Delete images • Lock images • Use the self-timer • Change settings You can change the date and time, enable or disable camera beeps, change the quick review, set the video mode (NTSC or PAL), and set the language of the menu options.
PDC640.FM Page 15 Wednesday, September 30, 1998 1:23 PM c You can view images on the LCD viewfinder one image at a time. Press the Review button to turn on the LCD viewfinder. Use the down arrow and the up arrow to scroll through the images on the viewfinder. Use the Review menu option to review nine thumbnail images at a time on the LCD viewfinder.
PDC640.FM Page 16 Wednesday, September 30, 1998 1:23 PM Displaying the Menu options 1. 2. Turn on the camera. Press the Menu button. The LCD viewfinder appears as follows (an image may appear on the viewfinder): 3. Press the up arrow or down arrow button to go to the next set of options or the previous set of options. 4. Press the button that is next to the menu option that you want to change.
PDC640.FM Page 17 Wednesday, September 30, 1998 1:23 PM Viewing images on the LCD viewfinder You can view images stored in memory one image at a time or nine thumbnail images at a time: 1. 2. Turn on the camera (slide the lens cover to the right). Press the Review button. 3. Press the down arrow or the up arrow button to view the next or previous images stored in memory. 4. To view thumbnail images: Press the Menu button to display the menu of options. b. Press the button next to Review.
PDC640.FM Page 18 Wednesday, September 30, 1998 1:23 PM To delete the current image: 2. Turn on the camera. Press the up arrow or the down arrow button to select the image that you want to delete. 3. Press the Menu button. 4. Press the button next to Delete. 1. Note: This does not delete any images. It takes you to the next screen on the LCD viewfinder. 5. Press the button next to Delete Current. 6. Press the button next to Delete Now to delete the image.
PDC640.FM Page 19 Wednesday, September 30, 1998 1:23 PM Locking images Use this feature to prevent images from being deleted from memory. To lock images: 2. Turn on the camera. Press the Menu button. 3. Press the button next to Lock. 4. Do the following: 1. To... Lock the image that is displayed on the LCD viewfinder Lock all images stored on the memory card Then... Press the button next to Lock Current. Press the button next to Lock All.
PDC640.FM Page 20 Wednesday, September 30, 1998 1:48 PM Taking pictures Your PhotoMAX PDC 640 Digital Camera Creative Kit contains everything you need to take pictures and transfer them to your computer where you can edit them, send them over the Internet, print them, and store them. You can take pictures using the optical viewfinder or using the LCD viewfinder.
PDC640.FM Page 21 Wednesday, September 30, 1998 1:48 PM 3. Press the Resolution button to set the resolution to one of the following: Icon Resolution 640 x 480 Super-High resolution with minimal compression Stores up to 12 images 640 x 480 High resolution with medium compression Stores up to 24 images 640 x 480 Standard resolution with moderate compression Stores up to 36 images 320 x 240 Stores up to 96 images 4.
PDC640.FM Page 22 Wednesday, September 30, 1998 1:23 PM 5. 6. Take a picture: If you want to... Then... Use the optical viewfinder Look through the optical viewfinder and frame the image the way you want. Use the LCD viewfinder Press the LCD viewfinder button to turn on the LCD viewfinder. Point the camera at your subject and frame the image the way you want. Once you have composed your picture, press the shutter button. Once you take the picture, the green LED in the optical viewfinder blinks.
PDC640.FM Page 23 Wednesday, September 30, 1998 1:23 PM Tips for taking great pictures Some tips that can help you take great pictures! • Keep the sun behind you or at your side. Avoid having the sun directly overhead. • Use the fill flash if there is a light behind your subject. • In low light level conditions, use a tripod to avoid camera movement during exposure. • Avoid extreme temperatures, which can affect battery performance. • Keep the subject within the flash range (3 ft. to 10 ft.
PDC640.FM Page 24 Wednesday, September 30, 1998 1:23 PM Transferring pictures to your computer The following sections describe how to install the Polaroid PhotoMAX software and use the software to transfer the images in your camera to your computer. Installing the PhotoMAX software The driver for the PDC 640 Digital Camera is installed automatically when you install the Polaroid PhotoMAX software supplied with this kit. To install the Polaroid PhotoMAX software: 1. 2.
PDC640.FM Page 25 Wednesday, September 30, 1998 1:23 PM Using the software to transfer pictures You can transfer pictures directly from your PDC 640 Digital Camera to your computer. Use the AC adapter whenever possible to extend the life of your batteries. To transfer pictures: 1. Double-click the Polaroid PhotoMAX icon on your desktop to open the Polaroid PhotoMAX software. Note: Make sure that your PDC 640 Digital Camera is plugged in to your computer and both are turned on.
PDC640.FM Page 26 Wednesday, September 30, 1998 1:23 PM Click... Then... Camera or Scanner a. b. c. d. 26 Select Twain device on the Acquire From window, and then click OK. Select PDC 640 from the Sources: list on the Select Sources window, and then click Select. The Album window opens and then the PDC 640 Twain Driver window opens. Click Get All to transfer all the images to your computer. Note: You also can select the images you want to transfer to your computer and click Get Selected.
PDC640.FM Page 27 Wednesday, September 30, 1998 1:23 PM Click... Then... From Album a. b. c. d. e. Select the album in which you want to save your images, or create a new album. Click the Acquire button on the Album window button bar. Select PDC 640 from the Sources: list on the Select Sources window, and then click Select. The PDC 640 Twain Driver window opens. Click Get All to transfer all the images to your computer.
PDC640.FM Page 28 Wednesday, September 30, 1998 1:23 PM Displaying images on a TV You can view the images stored in your camera on any TV equipped with a video input terminal. For more information about using your TV for video input, refer to the manufacturer’s manual for your TV. 1. 2. Turn off the TV and the power to the camera. Set the video mode, if needed. 3. Plug one end of the video cable into the video input connection on the TV. 4.
PDC640.FM Page 29 Wednesday, September 30, 1998 1:23 PM Troubleshooting Problem Cause Solution PhotoMAX software does not see the PDC 640 Digital Camera. • The power to the camera was not turned on before you powered on the computer. • Ensure that you turn on the camera and then your turn on your computer. Ensure that the AC power adapter is connected to the power socket on the camera and to an AC power outlet. • The serial cable is not connected properly to the computer.
PDC640.FM Page 30 Wednesday, September 30, 1998 1:23 PM Problem Cause Solution Low Battery indicator on Status Panel. Low battery power. Replace the batteries. Cannot take a picture. • The flash may be recharging. • Wait until the green LED stops blinking. • Memory card may be full. The camera beeps three times when you press the shutter button. • If you have taken the maximum number of images, transfer the images to your computer and erase the images from memory.
PDC640.FM Page 31 Wednesday, September 30, 1998 1:23 PM Problem Cause Solution Flash does not work. • Flash is not turned on. • Check the flash mode icon on the Status Panel. Cycle through the flash options to turn on the flash if it was disabled. • Flash is recharging. • Batteries are weak. • Wait until the green LED on the viewfinder stops blinking. • Replace the batteries. No signal on the TV monitor while the camera is on. Bad connection between the camera and the TV monitor.
PDC640.FM Page 32 Wednesday, September 30, 1998 1:23 PM Appendixes FCC Notice This equipment has been tested and found to comply with the limits for a Class B digital device, pursuant to part 15 of the FCC Rules. For detailed information about FCC compliance, see the online Polaroid PhotoMAX Image Maker Products User’s Guide. Camera precautions Observe the following precautions when you use the Polaroid PDC 640 Digital Camera: 32 • Do not open the case of the camera or attempt your own repairs.
PDC640.FM Page 33 Wednesday, September 30, 1998 1:23 PM • Turn off the power to the camera and unplug the AC adapter immediately if water or any foreign substances get into the camera. Using the camera under these conditions creates the danger of electrical shock or fire. • Do not open the battery compartment or unplug the AC adapter when the green LCD light on the back of the camera is flashing.
PDC640.FM Page 34 Wednesday, September 30, 1998 1:23 PM Contacting Polaroid You can call Polaroid toll-free within the U.S.A. at 1-800-432-5355, 7 days a week, 8 A.M. to 8 P.M. Eastern Standard Time. When calling with a technical question, ask for an Electronic Imaging or a Digital Imaging Specialist. Please identify the Polaroid product and its serial number (if applicable). If possible, have your system running the software when you call. We offer a variety of Customer Support Services.
PDC 640 Technical Support Information (This information replaces that found on Page 34) Polaroid Corporation provides technical support for digital cameras at http://www.polaroid.com/, and within the United States by calling 800-897-0356 from 10 A.M. to 7 P.M. EST, (Mon - Fri) and 10 A.M. to 4 P.M. EST (Sat). Please note that phone support and repair services are regional and may not be available for a particular product outside the country where it was purchased.