Pololu AVR C/C++ Library User’s Guide © 2001–2019 Pololu Corporation Pololu AVR C/C++ Library User’s Guide 1. Introduction . . . . . . . . . . . . . . . . . . . . . . . 2. Getting Started . . . . . . . . . . . . . . . . . . . . . 2.a. Download Instructions . . . . . . . . . . . . . . 2.b. Manual Installation . . . . . . . . . . . . . . . . 3. Functional Overview and Example programs . . . . . 3.a. Orangutan Analog Input Functions . . . . . . . 3.b. Orangutan Buzzer Control Functions . . . . . . 3.c.
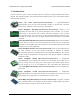
Pololu AVR C/C++ Library User’s Guide © 2001–2019 Pololu Corporation 1. Introduction This document is a guide to using the Pololu AVR C/C++ library, including installation instructions, tutorials, and example programs. The Pololu AVR Library makes it easy for you to get started with the following Pololu products: Pololu 3pi robot [https://www.pololu.com/product/975]: a mega168/328-based programmable robot.
Pololu AVR C/C++ Library User’s Guide © 2001–2019 Pololu Corporation Pololu Baby Orangutan B-328 [https://www.pololu.com/product/1220]: a mega328 version of the above. The mega328 offers more memory for your programs (32 KB flash, 2 KB RAM). This library also supports the Baby Orangutan B-168 [https://www.pololu.com/ product/1216], which was replaced by the Baby B-328. Pololu QTR-1A product/960] [https://www.pololu.com/product/958] and QTR-8A [https://www.pololu.
Pololu AVR C/C++ Library User’s Guide © 2001–2019 Pololu Corporation 2. Getting Started Please see the Pololu AVR Programming Quick Start Guide [https://www.pololu.com/docs/0J51] for detailed instructions on how to get started using the library in Linux, Windows, and Mac OS X. That guide also explains how to get started with Pololu USB AVR Programmer [https://www.pololu.com/ product/1300]. 2.a.
Pololu AVR C/C++ Library User’s Guide © 2001–2019 Pololu Corporation • libpololu-avr-131009.zip [https://www.pololu.com/file/0J680/libpololu-avr-131009.zip] (3MB zip) • libpololu-avr-130508.zip [https://www.pololu.com/file/0J637/libpololu-avr-130508.zip] (3MB zip) • libpololu-avr-121115.zip [https://www.pololu.com/file/0J594/libpololu-avr-121115.zip] (3MB zip) • libpololu-avr-120913.zip [https://www.pololu.com/file/0J579/libpololu-avr-120913.zip] (3MB zip) • libpololu-avr-120821.zip [https://www.pololu.
Pololu AVR C/C++ Library User’s Guide © 2001–2019 Pololu Corporation First, determine the location of your avr-gcc files. This will typically be one of: • C:\Program Files (x86)\Atmel\Atmel\Studio\7.0\toolchain\avr8\avr8-gnu-toolchain\avr • C:\Program Files (x86)\Atmel\Atmel Toolchain\AVR8 GCC\Native\3.4.2.1002\avr8-gnu- toolchain\avr • C:\Program Files (x86)\Atmel\Atmel Studio 6.0\extensions\Atmel\AVRGCC\3.4.0.65\ AVRToolchain\avr • C:\Program Files (x86)\Atmel\AVR Studio 5.1\extensi
Pololu AVR C/C++ Library User’s Guide © 2001–2019 Pololu Corporation 3. Functional Overview and Example programs 3.a. Orangutan Analog Input Functions Overview This section of the library provides a set of methods that can be used to read analog voltage inputs, as well as functions specifically designed to read the value of the trimmer potentiometer (on the 3pi Robot [https://www.pololu.com/product/975], Orangutan SV [https://www.pololu.com/product/1227], Orangutan LV-168 1325] [https://www.pololu.
Pololu AVR C/C++ Library User’s Guide 1 2 3 4 5 6 7 8 9 10 11 12 13 14 15 16 17 18 19 20 21 22 23 24 25 26 27 28 29 30 31 32 33 34 35 36 37 38 39 40 41 42 43 44 45 46 47 48 49 50 51 © 2001–2019 Pololu Corporation #include ? /* * analog1: for the Orangutan LV/SV-xx8 or Baby Orangutan B * * This example uses the OrangutanAnalog functions to read the voltage * output of the trimpot in the background while the rest of the main * loop executes.
Pololu AVR C/C++ Library User’s Guide © 2001–2019 Pololu Corporation output in millivolts and the temperature sensor output in degrees Farenheit. If you hold a finger on the underside of the Orangutan LV-168’s PCB near the center of the board, you should see the temperature reading slowly start to rise.
Pololu AVR C/C++ Library User’s Guide © 2001–2019 Pololu Corporation a note or a frequency for a specified duration at a specified volume, or you can use the play() method to play an entire melody in the background. Buzzer control is achieved using one of the Timer 1 PWM outputs, and duration timing is performed using a Timer 1 overflow interrupt.
Pololu AVR C/C++ Library User’s Guide 1 2 3 4 5 6 7 8 9 10 11 12 13 14 15 16 17 18 19 20 21 22 23 24 25 26 27 28 29 30 31 32 33 34 35 36 37 38 39 40 41 42 43 44 45 46 47 48 49 50 51 52 53 54 55 56 57 58 59 60 61 62 © 2001–2019 Pololu Corporation #include /* * buzzer1: * * This example uses the OrangutanBuzzer library to play a series of notes * on the Orangutan's/3pi's buzzer.
Pololu AVR C/C++ Library User’s Guide 63 64 65 66 67 68 69 70 71 72 73 74 75 76 77 78 79 80 81 82 83 84 85 86 87 88 89 90 91 92 93 94 95 96 97 98 99 100 101 102 103 int main() { currentIdx = 0; print("Music!"); © 2001–2019 Pololu Corporation // run once, when the sketch starts while(1) // run over and over again { // if we haven't finished playing the song and // the buzzer is ready for the next note, play the next note if (currentIdx < MELODY_LENGTH && !is_playing()) { // play note at max volume play_
Pololu AVR C/C++ Library User’s Guide 1 2 3 4 5 6 7 8 9 10 11 12 13 14 15 16 17 18 19 20 21 22 23 24 25 26 27 28 29 30 31 32 33 34 35 36 37 38 39 40 41 42 43 44 45 46 47 48 49 50 51 52 53 54 55 56 57 58 59 60 61 62 © 2001–2019 Pololu Corporation ? #include /* * buzzer2: * * This example uses the OrangutanBuzzer functions to play a series of notes * on the Orangutan's/3pi's buzzer. It uses the OrangutanPushbuttons * library to allow the user select which melody plays.
Pololu AVR C/C++ Library User’s Guide 63 64 65 66 67 68 69 70 71 72 73 74 75 76 77 78 79 80 81 © 2001–2019 Pololu Corporation else { play_note(A(5), 200, 15); print("note A5"); } } } int main() { print("Press a"); lcd_goto_xy(0, 1); print("button.."); // run once, when the program starts while(1) loop(); return 0; } 3. buzzer3 Demonstrates the use of this library’s playMode() and playCheck() methods.
Pololu AVR C/C++ Library User’s Guide 1 2 3 4 5 6 7 8 9 10 11 12 13 14 15 16 17 18 19 20 21 22 23 24 25 26 27 28 29 30 31 32 33 34 35 36 37 38 39 40 41 42 43 44 45 46 47 48 49 50 51 52 53 54 55 56 57 58 59 60 61 62 © 2001–2019 Pololu Corporation ? /* * buzzer3: for the Orangutan LV, SV, SVP, X2, and 3pi robot. * * This example program is indended for use on the Orangutan LV, SV, * SVP, X2, and 3pi robot and will NOT work under the Arduino environment.
Pololu AVR C/C++ Library User’s Guide 63 64 65 66 67 68 69 70 71 72 73 74 75 76 77 78 79 80 81 82 83 84 85 86 87 88 89 90 91 92 93 94 95 96 97 98 99 100 101 102 103 104 105 106 107 108 109 110 111 112 113 114 115 116 117 118 119 120 121 122 123 124 © 2001–2019 Pololu Corporation const char rhapsody[] PROGMEM = "O6 T40 L16 d#bd#f#c#b-b-c#8 c>c#c#c#c#c>c#c#c#c#" "c>c#c#c#c#c>c#c#c#c#" "c>c#<
Pololu AVR C/C++ Library User’s Guide 125 126 127 print(" "); © 2001–2019 Pololu Corporation // overwrite any left over characters } } 3.c. Orangutan Digital I/O Functions Overview This section of the library provides commands for using the AVR’s pins as generic digital inputs and outputs. Every pin on the AVR that has a name starting with P, followed by a letter and number (e.g. PC2) can be configured as a digital input or digital output.
Pololu AVR C/C++ Library User’s Guide © 2001–2019 Pololu Corporation Caveats To use your digital I/O pins correctly and safely, there are several things you should be aware of: • Maximum voltage ratings: Be sure to not expose your input pins to voltages outside their allowed range, which is -0.5 V – 5.5 V (assuming a VCC of 5 V). For example, do not connect any AVR pins directly to an RS-232 output, which varies between -12 V and 12 V. You can use a voltage divider circuit to overcome this limitation.
Pololu AVR C/C++ Library User’s Guide 1 2 3 4 5 6 7 8 9 10 11 12 13 14 15 16 17 18 19 20 21 22 23 24 25 26 27 28 29 30 31 32 33 34 © 2001–2019 Pololu Corporation ? #include /* * digital1: for the Orangutan controllers and 3pi robot * * This example uses the OrangutanDigital functions to read a digital * input and set a digital output. It takes a reading on pin PC1, and * provides feedback about the reading on pin PD1 (the red LED pin).
Pololu AVR C/C++ Library User’s Guide © 2001–2019 Pololu Corporation C++ users: See Section 5.c of Programming Orangutans and the 3pi Robot from the Arduino Environment [https://www.pololu.com/docs/0J17] for examples of this class in the Arduino environment, which is almost identical to C++. Complete documentation of this library’s methods can be found in Section 5 of the Pololu AVR Library Command Reference [https://www.pololu.com/docs/0J18].
Pololu AVR C/C++ Library User’s Guide 3.
Pololu AVR C/C++ Library User’s Guide 1 2 3 4 5 6 7 8 9 10 11 12 13 14 15 16 17 18 19 20 21 22 23 24 25 26 27 28 29 30 31 32 33 34 35 36 37 38 39 40 41 42 43 44 45 46 47 48 49 50 51 52 53 54 55 56 57 58 59 60 61 62 © 2001–2019 Pololu Corporation ? #include // get random functions #include /* * lcd2: for the Orangutan controllers and 3pi robot * * This example uses the OrangutanLCD functions to display custom * characters on the LCD.
Pololu AVR C/C++ Library User’s Guide 63 64 65 66 67 68 69 70 71 72 73 74 75 76 77 78 79 80 81 82 83 84 85 86 87 88 89 90 91 92 93 94 95 96 97 98 99 100 101 102 103 104 105 106 107 108 109 110 111 112 113 © 2001–2019 Pololu Corporation const char mocking[] PROGMEM = { 0b00000, 0b01010, 0b01010, 0b01010, 0b00000, 0b11111, 0b00101, 0b00010 }; char prevMood = 5; int main() { lcd_load_custom_character(happy, 0); lcd_load_custom_character(sad, 1); lcd_load_custom_character(indifferent, 2); lcd_load_custom_ch
Pololu AVR C/C++ Library User’s Guide [https://www.pololu.com/product/1220]. © 2001–2019 Pololu Corporation On the Orangutan SV-xx8 and LV-168, there are two user LEDs are on the top side of the PCB with the red LED on the bottom left and the green LED on the top right. On the 3pi, there are two user LEDs on the bottom side of the PCB with the red LED on the right (when looking at the bottom) and the green LED on the left.
Pololu AVR C/C++ Library User’s Guide 1 2 3 4 5 6 7 8 9 10 11 12 13 14 15 16 17 18 19 20 21 22 23 24 25 26 27 28 29 30 31 32 © 2001–2019 Pololu Corporation ? #include /* * led1: for the 3pi robot, Orangutan LV 168, Orangutan SV-xx8, Orangutan SVP, * or Baby Orangutan B * * This program uses the OrangutanLEDs functions to control the red and green * LEDs on the 3pi robot or Orangutan.
Pololu AVR C/C++ Library User’s Guide © 2001–2019 Pololu Corporation Complete documentation of these functions can be found in Section 7 of the Pololu AVR Library Command Reference [https://www.pololu.com/docs/0J18]. Usage Examples This library comes with two examples in libpololu-avr\examples . 1. motors1 Demonstrates controlling the motors using the trimmer potentiometer and uses the red LED for feedback.
Pololu AVR C/C++ Library User’s Guide © 2001–2019 Pololu Corporation 2. motors2 Demonstrates controlling the motors using the trimmer potentiometer, but it uses the LCD for most of the feedback, so it will not fully work on the Baby Orangutan. 1 2 3 4 5 6 7 8 9 10 11 12 13 14 15 16 17 18 19 20 21 22 23 24 25 26 27 28 29 30 31 32 33 34 35 36 37 38 39 40 41 42 43 44 45 46 47 48 49 50 51 52 ? #include
Pololu AVR C/C++ Library User’s Guide © 2001–2019 Pololu Corporation 3.g. Orangutan Pushbutton Interface Functions Overview This library allows you to easily interface with the three user pushbuttons on the 3pi robot [https://www.pololu.com/product/975], Orangutan SV [https://www.pololu.com/product/1227], Orangutan SVP [https://www.pololu.com/product/1325], and Orangutan LV-168 [https://www.pololu.
Pololu AVR C/C++ Library User’s Guide 1 2 3 4 5 6 7 8 9 10 11 12 13 14 15 16 17 18 19 20 21 22 23 24 25 26 27 28 29 30 31 32 33 34 35 36 © 2001–2019 Pololu Corporation ? #include /* * OrangutanPushbuttonExample: for the Orangutan LV-168, * Orangutan SV-xx8, Orangutan SVP, and 3pi robot * * This example uses the OrangutanPushbuttons library to detect user * input from the pushbuttons, and it uses the OrangutanLCD library to * display feedback on the LCD. * * http://www.pololu.
Pololu AVR C/C++ Library User’s Guide © 2001–2019 Pololu Corporation On the Orangutan SVP, using these functions to control UART0 will cause the red user LED functions to stop working, because the red LED is on the same pin as the UART0 transmitter (PD1/TXD0). When the AVR is not transmitting bytes on TXD0, the red LED will be off. When the AVR is transmitting bytes on TXD0, the red LED will flicker.
Pololu AVR C/C++ Library User’s Guide © 2001–2019 Pololu Corporation serial1 3.
Pololu AVR C/C++ Library User’s Guide 1 2 3 4 5 6 7 8 9 10 11 12 13 14 15 16 17 18 19 20 21 22 23 24 25 26 27 28 29 30 31 32 33 34 35 36 37 38 39 40 41 42 43 44 45 46 47 48 49 50 51 52 53 54 55 56 57 58 59 60 61 62 © 2001–2019 Pololu Corporation #include ? /* * serial1: for the Orangutan controllers and 3pi robot. * * This example listens for bytes on PD0/RXD. Whenever it receives a byte, it * performs a custom action.
Pololu AVR C/C++ Library User’s Guide 63 64 65 66 67 68 69 70 71 72 73 74 75 76 77 78 79 80 81 82 83 84 85 86 87 88 89 90 91 92 93 94 95 96 97 98 99 100 101 102 103 104 105 106 107 108 109 110 111 112 113 114 115 116 117 118 119 120 121 122 123 124 © 2001–2019 Pololu Corporation // If the character 'c' is received, play the note c. case 'c': play_from_program_space(PSTR("c16")); break; // If the character 'd' is received, play the note d.
Pololu AVR C/C++ Library User’s Guide 125 126 127 128 129 130 131 132 133 134 © 2001–2019 Pololu Corporation // Wait for the user to release the button. While the processor is // waiting, the OrangutanSerial library will take care of receiving // bytes using the serial reception interrupt. But if enough bytes // arrive during this period to fill up the receive_buffer, then the // older bytes will be lost and we won't know exactly how many bytes // have been received.
Pololu AVR C/C++ Library User’s Guide © 2001–2019 Pololu Corporation limits. Orangutan Servo Control The OrangutanServos section of the library allows you to generate the control pulses for up to 16 servos. On every Orangutan except the Orangutan SVP, each servo requires one free I/O pin. The library allows you to choose which I/O pins to use for your servos. On the Baby Orangutan B, there are enough free I/O lines for you to control the full 16 servos.
Pololu AVR C/C++ Library User’s Guide 1 2 3 4 5 6 7 8 9 10 11 12 13 14 15 16 17 18 19 20 21 22 23 24 25 26 27 28 29 30 31 32 33 34 35 36 37 38 39 40 41 42 43 44 45 46 47 48 49 50 51 52 53 54 55 56 57 58 59 60 61 62 © 2001–2019 Pololu Corporation ? #include /* * svp-one-servo: for the Orangutan SVP. * * This example uses the OrangutanServos functions to control one servo. * The servo pulse signal is sent on pin PD5, which is hardwired to the * input of the demux.
Pololu AVR C/C++ Library User’s Guide 63 64 65 66 67 68 69 70 71 72 73 © 2001–2019 Pololu Corporation set_servo_target(0, 1300); } } } // // // // // // Local Variables: ** mode: C ** c-basic-offset: 4 ** tab-width: 4 ** indent-tabs-mode: t ** end: ** 2. svp-eight-servo This example program demonstrates how to control up to eight servos on the Orangutan SVP using the hardware demultiplexer. 3.
Pololu AVR C/C++ Library User’s Guide 1 2 3 4 5 6 7 8 9 10 11 12 13 14 15 16 17 18 19 20 21 22 23 24 25 26 27 28 29 30 31 32 33 34 35 36 37 38 39 40 41 42 43 44 45 46 47 48 49 50 51 52 53 54 55 56 57 58 59 60 61 62 © 2001–2019 Pololu Corporation #include ? /* * svp-eight-servo: for the Orangutan SVP. * * This example uses the OrangutanServos functions to control eight servos.
Pololu AVR C/C++ Library User’s Guide 63 64 65 66 67 68 69 70 71 72 73 74 75 76 77 78 © 2001–2019 Pololu Corporation set_servo_target(4, set_servo_target(5, set_servo_target(6, set_servo_target(7, 1800); 1800); 1800); 1800); delay_ms(350); delay_ms(350); delay_ms(350); delay_ms(1000); set_servo_target(0, set_servo_target(1, set_servo_target(2, set_servo_target(3, set_servo_target(4, set_servo_target(5, set_servo_target(6, set_servo_target(7, 1300); 1300); 1300); 1300); 1300); 1300); 1300); 1300); de
Pololu AVR C/C++ Library User’s Guide 1 2 3 4 5 6 7 8 9 10 11 12 13 14 15 16 17 18 19 20 21 22 23 24 25 26 27 28 29 30 31 32 33 34 35 36 37 38 39 40 41 42 43 44 45 46 47 48 49 50 51 52 53 54 55 56 57 58 59 60 61 62 © 2001–2019 Pololu Corporation ? #include /* * svp-sixteen-servo: for the Orangutan SVP. * * This example uses the OrangutanServos functions to control sixteen servos.
Pololu AVR C/C++ Library User’s Guide 63 64 65 66 67 68 69 70 71 72 73 74 75 76 77 78 79 80 81 82 83 84 85 86 87 88 89 90 91 92 93 94 95 96 97 98 99 100 101 102 103 104 105 106 107 108 109 110 111 112 113 114 115 116 117 118 119 120 set_servo_targetB(0, set_servo_targetB(1, set_servo_targetB(2, set_servo_targetB(3, set_servo_targetB(4, set_servo_targetB(5, set_servo_targetB(6, set_servo_targetB(7, © 2001–2019 Pololu Corporation 1300); 1300); 1300); 1300); 1300); 1300); 1300); 1300); while(1) // Loop fo
Pololu AVR C/C++ Library User’s Guide © 2001–2019 Pololu Corporation 3.j. Orangutan SVP Functions Overview The Orangutan SVP [https://www.pololu.com/product/1325] is based on the AVR ATmega324 or ATmega1284 processor. It has an auxiliary processor that provides the USB connection, five configurable input lines, and battery voltage reading.
Pololu AVR C/C++ Library User’s Guide © 2001–2019 Pololu Corporation You can use the setMode() command at the beginning of your program to set the mode of the auxiliary processor. See the Pololu AVR Library Command Reference for details. Powered by SPI Whenever you call a function in the Pololu AVR Library that uses the auxiliary processor, the function might initiate SPI communication to the auxiliary processor.
Pololu AVR C/C++ Library User’s Guide 1 2 3 4 5 6 7 8 9 10 11 12 13 14 15 16 17 18 19 20 21 22 23 24 25 26 27 28 29 30 31 32 33 34 35 36 37 38 39 40 41 42 43 44 45 46 47 48 49 50 51 52 53 54 55 56 57 58 59 60 61 62 © 2001–2019 Pololu Corporation #include ? /* * svp1: for the Orangutan SVP.
Pololu AVR C/C++ Library User’s Guide 63 64 65 66 67 68 69 © 2001–2019 Pololu Corporation print("Channel D: "); print_long(analog_read_millivolts(CHANNEL_D)); // Wait for 100 ms, otherwise the LCD would flicker. delay_ms(100); } } 3.k. Pololu QTR Sensor Functions Overview This set of functions provides access to the QTR family of reflectance sensors, which come as single-sensor units (QTR-1A [https://www.pololu.com/product/958] and QTR-1RC [https://www.pololu.
Pololu AVR C/C++ Library User’s Guide © 2001–2019 Pololu Corporation calibration routine would be: 1 2 3 4 5 6 7 8 9 10 11 12 13 14 15 16 17 18 19 20 21 22 23 24 25 26 27 28 29 30 31 ? #include
Pololu AVR C/C++ Library User’s Guide © 2001–2019 Pololu Corporation provides calibrated values for each sensor and returns an integer that tells you where it thinks the line is. If you are using N sensors, a returned value of 0 means it thinks the line is on or to the outside of sensor 0, and a returned value of 1000 * (N-1) means it thinks the line is on or to the outside of sensor N-1.
Pololu AVR C/C++ Library User’s Guide © 2001–2019 Pololu Corporation Explaining the nature of PID control is beyond the scope of this document, but Wikipedia has a very good article [http://en.wikipedia.org/wiki/PID_controller] on the subject. The following code gives a very simple example of PD control (I find the integral PID term is usually not necessary when it comes to line following).
Pololu AVR C/C++ Library User’s Guide © 2001–2019 Pololu Corporation 3.l. Pololu Wheel Encoder Functions The PololuWheelEncoders class and the associated C functions provide an easy interface for using the Pololu Wheel Encoders [https://www.pololu.com/product/1217], which allow a robot to know exactly how far its motors have turned at any point in time. Note that this library should work with all standard quadrature encoders, not just the Pololu Wheel Encoders.
Pololu AVR C/C++ Library User’s Guide © 2001–2019 Pololu Corporation 1. wheel_encoders1 1 2 3 4 5 6 7 8 9 10 11 12 13 14 15 16 17 18 19 20 21 22 23 24 25 26 27 28 29 30 31 32 33 34 #include ? int main() { // Initialize the encoders and specify the four input pins. encoders_init(IO_C2, IO_C3, IO_C4, IO_C5); while(1) { // Read the counts for motor 1 and print to LCD. lcd_goto_xy(0,0); print_long(encoders_get_counts_m1()); print(" "); // Read the counts for motor 2 and print to LCD.
Pololu AVR C/C++ Library User’s Guide © 2001–2019 Pololu Corporation 4. Using the Pololu AVR Library for your own projects After getting one of the example projects to work with an Orangutan controller or 3pi robot, you can start working on more complicated programs of your own. The library provides easy access to all of the features of the Orangutans and 3pi, including the LCD screen, buttons, LEDs, motors, and buzzer.
Pololu AVR C/C++ Library User’s Guide © 2001–2019 Pololu Corporation Select the file that matches the microcontroller you are programming and click “add library” to add it to your project. Note: • 3pi robots with serial numbers less than 0J5840 use the ATmega168 microcontroller; 3pi robots with serial number 0J5840 or greater use the ATmega328P microcontroller.
Pololu AVR C/C++ Library User’s Guide © 2001–2019 Pololu Corporation to the list. This linker option is included in both the AVR Studio and Linux-based example programs described earlier. gc-sections Recommended AVR Studio 4 linker options for projects using the Pololu AVR Library.
Pololu AVR C/C++ Library User’s Guide © 2001–2019 Pololu Corporation This picture shows how to configure AVR Studio 4 to use the -D_X2_1284 option, which is required when compiling a program a newer Orangutan X2 that has a ATmega1284p. 4.
Pololu AVR C/C++ Library User’s Guide © 2001–2019 Pololu Corporation 5. Compiling the Pololu AVR Library (Optional) This section is optional, for people who want to modify the library or get a better understanding of how it works. If you just want to install the library, proceed to Section 3.b for Windows, Section 4.b for Linux, or Section 5.b for Mac OS X.
Pololu AVR C/C++ Library User’s Guide © 2001–2019 Pololu Corporation 6. Additional resources To learn more about programming AVRs and using the Pololu AVR Library, see the following list of resources: • Pololu AVR Library Command Reference [https://www.pololu.com/docs/0J18]: detailed information about every function in the library. • Programming Orangutans and the 3pi Robot from the Arduino Environment [https://www.pololu.