
User's Manual


RealPresence Collaboration Server (RMX) 1500/2000/4000 Administrator’s Guide
J-6 Polycom, Inc.
The Comprehensive Restore to Factory Defaults deletes the following files:
•CDR
• Address Book
• Log Files
• Faults
• Dump Files
•Notes
In addition all the conferencing entities are deleted:
• Entry Queues
•Profiles
• Meeting Rooms
• IVR Services
• Default Network IP Service
• Log Files
• CFS license information
• Management Network Service
The RMX is restored to the settings it had when shipped from the factory. The Product
Activation Key is required to re-configure the Management Network Service during the First
Entry Configuration.
Performing a Comprehensive Restore to Factory Defaults
To perform a Comprehensive Restore to Factory Defaults:
Restoring the RMX to Factory Defaults consists of the following steps:
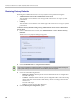
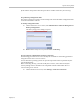
Step 1: Backup Configuration Files. These files will be used to restore the system in Step 10.
Step 2: Configure a workstation for Direct Connection.
Step 3: Connect to the RMX and the workstation using a LAN cable.
Step 4: Into the RMX’s USB port, insert a USB key containing a file named
RestoreToFactoryDefault.txt and also containing a lan.cfg file.
Step 5: Restart the RMX.
Step 6: If you are not using an RMX4000 continue with Step 9.
Step 7: Into the RMX’s USB port, insert a USB key containing a file named lan.cfg file only.
Step 8: Restart the RMX.
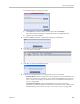
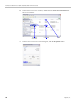
Step 9: From the workstation, connect to the RMX’s Alternate Management Network.
Step 10: Apply the Product Activation Key.
Step 11: Unplug the USB key.
Step 12: Restart the RMX.
Step 13: Restore the System Configuration from the backup by applying the backup files
created in procedure Step 1.
Step 14: Restart the RMX.
Do not insert a USB key containing a file named RestoreToFactoryDefault.txt if the USB key does
not also contain a lan.cfg file.