
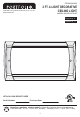
Installation Guide


B
A
2
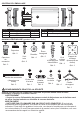
BULB REPLACEMENT INSTRUCTIONS
You may want to periodically clean the fixture using a mild, non-abrasive soap based cleaner and
soft cotton cloth. Do NOT use solvents, cleaners containing abrasive agents, ammonia, or
surfactants. When cleaning the fixture, make sure you have the power turned off and do not spray
liquid cleaner directly onto the diffuser, bulb, socket, ballast, or wiring.
CARE AND MAINTENANCE
4. Dispose of the old bulb(s) in accordance with local, state, and/or federal laws, or go to
www.lamprecycle.org for more information.
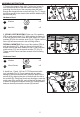
2. Remove the defective bulb by
using your thumbs to
press and roll the bulb 90 degrees inside the
socket
(B)
(Fig. 2). This will disengage the bulb contact
pins from the socket
(B)
contacts. Then slide the bulb pins
out of the socket
(B)
slot.
Minor problems often can be fixed without the help of an electrician. Before doing any work on the
fixture, shut off power supply at the circuit breaker panel to avoid electrical shock.
TROUBLESHOOTING
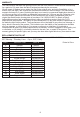
Fixture doesn’t light.
Circuit breaker trips
when light is turned on.
1. Power is off.
2. Bad wire connection.
3. Defective bulb(s).
4. Defective wall switch.
1. Crossed wires or power wire
is grounded out.
1. Check circuit breaker or wall switch.
2. Check wire splices.
3. Replace bulb(s).
4. Replace switch.
1. Check wiring connections.
In the unlikely event that your fixture’s ballast or lamp socket(s) fail, they can be replaced by a
qualified electrician. For further information regarding these replaceable parts, please have your
electrician contact our technical support number at 1-800-643-0067.
PROBLEM POSSIBLE CAUSE CORRECTIVE ACTION
3. Install the new bulb in the same manner you removed the old bulb.
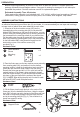
To install the diffuser (C), line
up the holes at either end on the end caps (E) with the protruding carriage bolts (II). Secure the
diffuser (C) to the fixture (A) with the finial caps (BB). Note: Diffuser (C) installation may require two
people.
7