
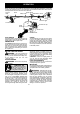
Owner's Manual


5
ate power tools on a continual and regular basis
must monitor closely their physical condition
and the condition of this tool.
SPECIAL NOTICE: This unit is equipped
with a temperature limiting muffler and spark ar-
resting screen which meets the requirements of
California Codes 4442 and 4443. All U.S. forest
land and the states of California, Idaho, Maine,
Minnesota, New Jersey, Oregon, and Washing-
ton require by law that many internal combus-
tion engines be equipped with a spark arresting
screen. If you operate in a locale where such
regulations exist, you are legally responsible for
maintaining the operating condition of these
parts.Failuretodosoisaviolationofthelaw.
For normal homeowner use, the muffler and
spark arresting screen will not require any ser-
vice. After 50 hours of use, we recommend that
your muffler be serviced or replaced by an au-
thorized service dealer.
ASSEMBLY
WARNING: If received assembled,
repeat all steps to ensure your unit is properly
assembled and all fasteners are secure.
Examine parts for damage. Do not use dam-
aged parts.
NOTE: If you need assistance or find parts
missing or damaged, call 1-800-554-6723.
It is normal for the fuel filter to rattle in the
empty fuel tank.
Finding fuel or oil residue on muffler is normal
due to carburetor adjustments and testing
done by the manufacturer.
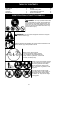
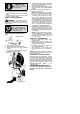
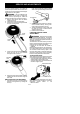
ADJUSTING THE HANDLE
WARNING: When adjusting the assist
handle, be sure it remains above the safety label
and below the mark or arrow on the shaft.
1. Loosen wing nut on handle.
2. Rotate the handle on the shaft to an upright
position; retighten wing nut.
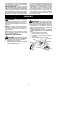
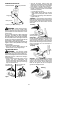
ATTACHING SHIELD
WARNING: The shield must be prop-
erly installed. The shield provides partial protec-
tion to the operator and others from the risk of
thrown objects, and is equipped with a line limit-
er blade which cuts excess line to the proper
length. The line limiter blade (on underside of
shield) is sharp and can cut you.
For proper orientation of shield, see KNOW
YOUR TRIMMER illustration in OPERA TI ON
sectio n.
1. Remove wing nut from shield.
2. Insert bracket into slot as shown.
3. Pivot shield until bolt passes through hole
in bracket.
4. Securely tighten wing nut onto bolt.
Wing Nut
Bracket
Slot
Shield
Gearbox
PI
V
OT