ENGLISH R Instruction Manual Manual de Instrucciones Manuel d’Instructions PP135 ESPAÑOL For Occasional Use Only Electrolux Home Products, Inc. 250 Bobby Jones Expressway Augusta, GA 30907 Copyright E2002 Electrolux Home Products, Inc. 530163516 11/8/02 FRANÇAIS WARNING: Read and follow all Safety Rules and Operating Instructions before using this product. Failure to do so can result in serious injury.
UL CLASSIFIED PRODUCT NOTICE Only the following Gasoline Powered Combination Gardening Appliance powerhead models and their respective attachments have been Classified by Underwriters Laboratories, Inc., in accordance with the applicable safety requirements. Powerhead including trimmer attachment . . . . . . . . . . . . . . . . . . . . . . . . . . . PP135 Optional blower attachment . . . . . . . . . . . . . . . . . . . . . . . . . . . . . . . . . . . . . . . . . PP3000B Optional brushcutter attachment . . .
weather has been linked to blood vessel damage in otherwise healthy people. If symptoms occur such as numbness, pain, loss of strength, change in skin color or texture, or loss of feeling in the fingers, hands, or joints, discontinue the use of this tool and seek medical attention. An anti--vibration system does not guarantee the avoidance of these problems. Users who operate power tools on a continual and regular basis must monitor closely their physical condition and the condition of this tool.
S Never place any object in air intake opening as this could restrict proper air flow and cause damage to the unit. S Never use for spreading chemicals, fertilizers, or other substances which may contain toxic materials. S To avoid spreading fire, do not use near leaf or brush fires, fireplaces, barbecue pits, ashtrays, etc. EDGER SAFETY WARNING: Inspect the area to be edged before each use. Remove objects (rocks, broken glass, nails, wire, etc.
terial when the blade is in motion. Make sure the switch is in the OFF position, the spark plug wire is disconnected, and the blade has stopped moving before removing jammed material from the cutting blade. Do not grab or hold the unit by the cutting blade. Blades move Allow blades to stop momentarily before removing after the them from the cut. trigger is released. WARNING: Only use brushcutter attachments that provide a metal shield with proboscis nose.
WARNING: Never lean over discharge chute. Rocks or debris could be thrown into the eyes and face and cause serious injury or blindness. WARNING: Inspect the area where the unit is to be used. Remove objects that could be thrown or damage the unit. Some objects may be hidden by fallen snow -- be alert for the possibility. S Direct material discharge away from glass enclosures, automobiles, etc. S Do not run engine at high speed while not removing snow.
ASSEMBLY WARNING: If received assembled, repeat all steps to ensure your unit is properly assembled and all fasteners are secure. Examine parts for damage. Do not use damaged parts. NOTE: If you need assistance or find parts missing or damaged, call 1-800-554-6723. It is normal for the fuel filter to rattle in the empty fuel tank. Finding fuel or oil residue on muffler is normal due to carburetor adjustments and testing done by the manufacturer.
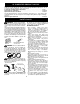
OPERATION KNOW YOUR TRIMMER READ THIS INSTRUCTION MANUAL AND SAFETY RULES BEFORE OPERATING YOUR UNIT. Compare the illustrations with your unit to familiarize yourself with the location of the various controls and adjustments. Save this manual for future reference.
Choke position decal ON/OFF Switch HOW TO START YOUR UNIT 8. Pull starter rope sharply until engine runs, but no more than 6 pulls. If the engine doesn’t start after 6 pulls (at the HALF CHOKE position), move the choke lever to the FULL CHOKE position and press the primer bulb 6 times. Squeeze and hold the throttle trigger and pull the starter rope 2 more times. Move the choke lever to the HALF CHOKE position and pull the starter rope until the engine runs, but no more than 6 pulls.
If the unit still doesn’t start, refer to TROUBLESHOOTING TABLE or call 1-800-554-6723. Coupler Primary Hole Guide Recess OPERATING THE COUPLER This model is equipped with a coupler which enables optional attachments to be installed. The optional attachments are: MODEL: Edger . . . . . . . . . . . . . . . . . . . . . . .PP1000E Cultivator . . . . . . . . . . . . . . . . . . . . PP2000T Blower . . . . . . . . . . . . . . . . . . . . . .PP3000B Brushcutter . . . . . . . . . . . . . . . . . .
S Tap the bottom of the trimmer head lightly on the ground one time. Approximately 2 inches (5 cm) of line will be advanced with each tap. Always tap the trimmer head on a grassy area. Tapping on surfaces such as concrete or asphalt can cause excessive wear to the trimmer head. If the line is worn down to 2 in. (5 cm) or less, more than one tap will be required to obtain the most efficient line length. WARNING: Use only 0.080” (2 mm) diameter line.
MAINTENANCE WARNING: Disconnect the spark plug before performing maintenance except for carburetor adjustments. CHECK FOR LOOSE FASTENERS AND PARTS S S S S S Spark Plug Boot Air Filter Housing Screws Assist Handle Screw Debris Shield CHECK FOR DAMAGED OR WORN PARTS 1. Clean the cover and the area around it to keep dirt from falling into the carburetor chamber when the cover is removed. 2. Remove parts by pressing button to release air filter cover.
REPLACING THE CUTTING HEAD 1. Align hole in the dust cup with the hole in the side of the gearbox by rotating the dust cup. 2. Insert a small screwdriver into aligned holes. This will keep the shaft from turning while removing and installing trimmer head. Screwdriver 3. While holding the screwdriver in position, remove trimmer head by turning clockwise. 4. Thread replacement trimmer head onto the shaft by turning counterclockwise. Tighten until secure. 5. Remove the screwdriver.
TROUBLESHOOTING TABLE WARNING: Always stop unit and disconnect spark plug before performing all of the recommended remedies below except remedies that require operation of the unit. TROUBLE CAUSE REMEDY Engine will not start. 1. ON/OFF switch in OFF position. 2. Engine flooded. 1. Move ON/OFF switch to ON. 2. See “Starting a Flooded Engine” in Operation Section. 3. Fill tank with correct fuel mixture. 4. Install new spark plug. 5. Check for dirty fuel filter; replace.
LIMITED WARRANTY ELECTROLUX HOME PRODUCTS, INC., warrants to the original purchaser that each new Poulan PROr brand gasoline tool or attachment is free from defects in material and workmanship and agrees to repair or replace under this warranty any defective gasoline product or attachment as follows from the original date of purchase. 2 YEARS-- Parts and Labor, when used for household purposes. 90 DAYS -- Parts and Labor, when used for commercial, professional, or income producing purposes.
replace as necessary” shall be warranted for 2 years. Any warranted part which is scheduled for replacement as required maintenance shall be warranted for the period of time up to the first scheduled replacement point for that part. DIAGNOSIS: The owner shall not be charged for diagnostic labor which leads to the determination that a warranted part is defective if the diagnostic work is performed at an approved POULAN/WEED EATER servicing center.