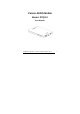
Canvio AERO Mobile Model: DTQ112 User Manual TOSHIBA Corporation –wireless SSD User Manual v0.1.
1. CanvioAERO Mobile Overview Toshiba Wi-Fi SSD (code name: CanvioAEROMobile) allows to wirelessly access your music, videos, pictures, data and stream it to your iPad®, iPhone®, tablets, smartphones, and notebooks – no cords or cables to tangle. With the internal SSD storage, there is no need to worry about running out of space on your mobile devices and the built-in USB 3.0 port makes the file transfer easier and much faster. 2.
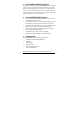
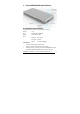
4. CanvioAEROMobile Specification 4.1 Hardware specification Product Dimension: 123.5mm (L)*63.0mm (W)*12.5mm (H) Weight: 1xxg CPU: MTK MT7620A (600MHZ) Battery: 3100mAh Li-ion type Wi-Fi: Standard: 802.11 b/g/n Frequency: 2.4 GHZ Speed: 1T1R up to 150Mbps On/Off button: Press it 2 seconds, Wi-Fi mode turn ON, Press it 2 seconds, Wi-Fi mode turn OFF from ON.
Reset button: In Wi-Fi mode, press it with 5S, system restore to factory settings USB3.0 Host: Compatible with USB3.0 and USB2.0 Connect to computer, It uses for transmit data between the computer and CanvioAEROMobile. Connect to AC adapter, it use for charging the product battery. SD Card Slot: Class 10 compatible, support SD memories, SDHC. In Wi-Fi mode, youcan access SD card. Battery Indicator Green color: The battery power is ≥30%.
White Light off: Safety Remove, system Sleep or standby. SD Card indicator: Only light in Wi-Fi Mode Violet color: without access. Violet color with blinking: SD card access Violet color off: SD Card goes into standby. Environment requirement: Temperature Operating: 5 to 35degree Celsius Storage: -20 to 60 degree Celsius Humidity Operating: 20-80% Storage: 8-90% 4.
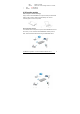
Mac: Safari 5.0 or later Others: Firefox 3.0 or later; Google Chrome 13 or later; iOS: 5.1and above Android: 2.3 and above 4.3 Function modes DAS mode (Direct-Attached Storage): Simply connect CanvioAEROMobile to computer’s USB port with attached USB 3.0 cable. It works in DAS mode automatically. You can start transferring data to and from the product.
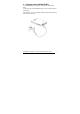
5. Charging CanvioAERO Mobile CanvioAEROMobilecan be charge via AC adaptor with attached USB cable. You should charge CanvioAEROMobile when you see the battery indicator is Yellow color. While charging, you can see the battery indicator will light with slowblinking (interval time is 2 seconds). TOSHIBA Corporation –wireless SSD User Manual v0.1.
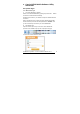
6. Canvio AERO Mobile Software Utility Instruction 6.1 System login 6.1.1 Web browser login A. Connecting Wirelessly to PC/Mac Switch-on the CanvioAEROMobile by pressing the power button. Wait for few minutes until the Wireless LED steady. Enable the Wi-Fi feature on your PC/Mac and open the Wireless Network Connection. Select “Toshiba-wssd-xxxx” wireless connection (default wireless SSID: Toshiba-wssd-xxxx) and enter the default password as 12345678.
Type the default User Name as admin and leave the User Password as blank, and you can select the language you want. Click on the “login” button to access the Web main Interface 6.1.2 iOS client login A. Install iOS application Search and locate the free TOSHIBA app called “WiFiSSD” from the Apple Store. Install the “WiFiSSD” app and follow the on-screen installation instructions. The “WiFiSSD” icon will appear on the desktop once the installation process has been completed B.
Click on the “OK” button to access the mainInterface. Android client login A. Install Android application Search and locate the free TOSHIBA application called “WiFiSSD” from the Google Play Store. Install the “WiFiSSD” app and follow the on-screen installation instructions. The “WiFiSSD” icon will appear on the desktop once the installation process has been completed. B. Connecting Wirelessly to Android device. Switch-on the CanvioAEROMobile by pressing the power button.
Run the applet “WiFiSSD” and log into the“WiFiSSD” as seen on the screenshot below. Default setting of the users is “admin” Default setting of the password is no password needed Click on the “OK” button to access the mainInterface. 6.2 Main interface When you enter the main interface, AEROMobile may inform you if there is a new Firmware. You can select to“OK” update, or select cancel, or never prompt. If you select OK to update, the system will inform you to wait 5mins.
upgrade. If you still want to upgrade firmware. You can go to setting page to upgrade firmware manually. Web main interface Application main interface: (For big screen) (For small screen) Display pictures preview. If it is not enough pictures, it will show the current pictures. Click on the pictures button to enter Pictures Management TOSHIBA Corporation –wireless SSD User Manual v0.1.
Display video files preview. If no video, it will use the default picture. If it is not enough videos, it will show the current videos. Click on the videos button to enter Videos Management. Display music files preview. If no music, it will use the default picture. If it is not enough 2 music, it will show the current music. Click on the music button to enter Music Management Display documents preview. If no document, it will use the default picture.
(iOS and Android only) You can switch to the local, access to the local files SD card is available Internet connection is available. No Internet connection Display the current battery capacity of CanvioAEROMobile Click on this button, you can enter the CanvioAEROMobile’s system settings 6.3 Pictures Management 6.3.1 pictures management interface TOSHIBA Corporation –wireless SSD User Manual v0.1.
Return to the main page “Sort by name” mode, “Sort by date” mode Click the button can switch to each other “Thumbnail” mode, “list” mode Click the button can switch to each other Enter the key letters or numbers in the search box, you can search out all the picture files contains the keyword Switch to SSD Storage of the CanvioAEROMobile Switch to SD Card of the CanvioAEROMobile Switch to the local iOS and Android device.
6.3.2 Picture Viewer Interface Click the picture to enter the Picture Viewer Interface. Click the "Back" button to return to Pictures Management Interface. Click the “Download" button, you can download the current picture to the local album. Click on the "play/pause" button, can start and stop photo slide show. “Loop playback” mode, “Sequential Mode” Click on the button, you can switch to each other. Click the”Share” button, you can share the current picture to Facebook/Twitter/Email.
6.4 Videos Management 6.4.1 Videos Management Interface Return to the main page “Sort by name” mode, “Sort by date” mode Click the button can switch to each other “Thumbnail” mode, “list” mode Click the button can switch to each other Enter the key letters or numbers in the search box, you can search out all the picture files contains the keyword Switch to SSD Storage of the CanvioAEROMobile Switch to SD Card of the CanvioAEROMobile TOSHIBA Corporation –wireless SSD User Manual v0.1.
Switch to the local iOS and Android device. (iOS and Android only) When switch to SSD “Storage” of the CanvioAEROMobile. You can choice the pictures from one of the 4 users. The 4 users default names are “Default”, “Owner1”, “Owenr2”, and “Owener3” 6.4.2 Video playback interface(iOS and Android device only) Click on the video file, switch to the video player interface. Click the "Back" button to return to the Videos Management Interface. Click the “Zoom” button; you can adjust the playback screen size.
Click the “Rewind” button and the video rewind at the speed of 20 seconds. Click the "Forward" button and the video forward at the speed of 20 seconds. Click the “Pause / Play “button to play / pause the current playing video. Playback progress bar, drag the progress bar, the video will jump to the drag position to play. Volume control bar, drag the control bar, you can adjust the volume of the video. The volume is divided into four states: quiet, small, medium and maximum volume.
Return to the main page “Thumbnail” mode, “list” mode Click the button can switch to each other Enter the key letters or numbers in the search box, you can search out all the picture files contains the keyword Switch to SSD Storage of the CanvioAEROMobile Switch to SD Card of the CanvioAEROMobile Switch to the local iOS and Android device. (iOS and Android device only) "All Songs", "All Songs" is the default mode. "Album": All the songs are classified by album.
6.5.2 Music Play Interface(iOS and Android device only) Click on the music file, enter into music player interface.
Music Playback Interface, the user can switch the songs. Click the "Previous" button to switch to the previous music. Click the “Next " button to switch to the next music. Click the “Rewind” button and the music rewind at the speed of 20 seconds. Click the "Forward" button and the music forward at the speed of 20 seconds. Click the “Pause / Play “button to play / pause the playing music. Playing progress bar, drag the progress bar, the music will jump to the drag position to play.
local device 6.6 Documents Management 6.6.1 Music Management Interface Return to the main page “Sort by name” mode, “Sort by date” mode Click the button can switch to each other “Thumbnail” mode, “List” mode Click the button can switch to each other Enter the key letters or numbers in the search box, you can search out all the picture files contains the keyword Switch to SSD Storage of the CanvioAEROMobile TOSHIBA Corporation –wireless SSD User Manual v0.1.
Switch to SD Card of the CanvioAEROMobile Switch to the local iOS and Android device. (iOS and Android device only) 6.6.2 Document Viewer(iOS and Android device only) Click the "Back" button to return to the Document management Interface. Click the "Share" button; you can share the current document by Email.
6.
Switch to the local iOS and Android device. (iOS and Android only) Refresh the screen. (Application only) Click the”Share” button, you can share the current file to Email. File or folder was selected Setting button, you can select all/unselect all, create new folders, copy, cut, paste, rename, delete file/folder. (Application) (Web browser) (Application only)Click on transmission button, you will enter file TOSHIBA Corporation –wireless SSD User Manual v0.1.
transmission interface. Or when the file or folder copy, cut, upload or download to the target directory, transmission interface will pop up. In the transmission interface you can see the progress, delete the transferring file; you can also view the successful and failed transfer file. (Icon in the queued files)Uploading file/ folder indicator (Icon in the queued files)Downloading file/ folder indicator Pause the upload and download file/ folder The file/folder waiting for uploads ordownloads.
In the transfer fail page. You can select re-translate by clicking button (Web browser only)Upload file from local. When you select local file and upload to AEROMobile. You can see the upload progress bar. (Web browser only)Download file from AEROMobile. Downloading method is depends on which web browser you are using TOSHIBA Corporation –wireless SSD User Manual v0.1.
6.8 SD Card Management You can back up the files in the SD Card to one of the four user directories: Default, Owner1, Owner2, and Owner3. The backup is an incremental backup. You can backup SD card manually or using automatic backup function. If the backup files size bigger than the empty space in SSD, you will see a warning message before the backup.
6.9 Backup Management (iOS and Android device only) You can back up the videos and pictures in the iOS and Android device to one of the SSD Air's four user directories: Default, Owner1, Owner2, and Owner3. Click the "Start Backup" button to start the backup, backup progress bar is displayed in the bottom of the interface. If the backup files size bigger than the empty space in SSD, you will see a warning message before the backup. TOSHIBA Corporation –wireless SSD User Manual v0.1.
6.10 Settings Management Click the “Settings" button on the top right corner of the “Main interface” to enter setting interface includingmodules: AEROMobileConfigurations, user image and name, cache (Application only), language (Application only), about and logout. 6.10.1 Configurations (Applications) 6.10.1.1 (Web browser) Wi-Fi Setting Wi-Fi setting For Application Click on Wi-Fi Settings, enter Wi-Fi setting page, which include Modify SSID、Modify Channel、Modify Mode、Modify Security.
Click on SSID button. Enter setting SSID page. You can enter your Own SSID. Default SSID is “Toshiba-wssd-xxxx” Click on Channel button. Enter setting Wi-Fi Channel page. You can select the Wi-Fi channel as you want. Or you can let it “Auto” Click on mode button. Enter setting Wi-Fi mode page. Click on security button. Enter setting Wi-Fi security page. You need to enter a password if you select WPA-PSK, WPA2-PSK or Mixed WPA/WPA2-PSK.
Wi-Fi setting for Web browser The setting functions are similar withApplication Wi-Fi setting. Even the UI design is difference. In Web browser, you can select the SSID is Hide or Shown. TOSHIBA Corporation –wireless SSD User Manual v0.1.
6.10.1.2 LAN Settings Click on LAN setting, you will enter LAN setting page. (Application) Web browser MAC address: This is for your reference. You could not change it. IP Address: Click on this button, you can modify the IP address of device. Subnet Mask: Click on this button, you can modify the Subnet Mask of device. TOSHIBA Corporation –wireless SSD User Manual v0.1.
6.10.1.3 Internet Setting For Application Click on Internet Settings, enter Internet setting page You can configure your network connection between CanvioAEROMobile and Wi-Fi router. Select the router from the Access Points list. You may be asked to input a password for the connection. If connect successfully, ahook icon will show in front of the access point. TOSHIBA Corporation –wireless SSD User Manual v0.1.
You can set to use Dynamic IP or static IP as you want in this internet setting. For web browser It has similar function, but only slight difference in UI design. TOSHIBA Corporation –wireless SSD User Manual v0.1.
6.10.1.4 System Setting In system setting, you can modify user’s password, change the host name, and check SSD capacity and remaining capacity, upgrade firmware. Modify Admin Password SSD capacity information: Modify Host name TOSHIBA Corporation –wireless SSD User Manual v0.1.
Firmware Upgrade: Click on the Online Upgrade button. You can upgrade Firmware of CanvioAEROMobile if there is a new Firmware. If no new firmware is found. You will see the message as below In web browser, you can also upgrade the firmware manually. With this button, you can update the firmware version as you want. Once you start the firmware upgrade, you will see below information. Restore factory setting (Web browser only) TOSHIBA Corporation –wireless SSD User Manual v0.1.
Time setting (Web browser only) You can select the time Zone for your AEROMobile manually. You can also set the date/time for it. By the default setting, your AEROMobile could synchronize data and time with your mobile device or Internet. TOSHIBA Corporation –wireless SSD User Manual v0.1.
6.10.1.5 Service Settings (Web browser only) You can set the DLAN service information and win file service here. Enable Win file service. Settingabout DLNA service TOSHIBA Corporation –wireless SSD User Manual v0.1.
6.10.1.6 DHCP Settings (Web browser only) You can set up DHCP server information. You can also check the client list TOSHIBA Corporation –wireless SSD User Manual v0.1.
6.10.2 User Image and Name Management Enter the user symbol and name page; you will see the page as below. In this page, you can change the four users’ Icon and name; this change will reflect in the picture management page, video management page, SD card page and Backup back up page There are total 12 Icons for your selection. You can also type a new name for each user. TOSHIBA Corporation –wireless SSD User Manual v0.1.
6.10.3 Cache (Applications only) Setting caches in local device will improve the response speed of the CanvioAEROMobile.You can adjust the size of the caches. 6.10.4 Language(Applications only) You can select the language as you want for the CanvioAEROMobile. Default language is English. 6.10.5 About You can visit the company's site, the company name, firmware version andApplication client version. 6.10.6 Logout Logout the current user, switch to the login screen.
FCC Statement This equipment has been tested and found to comply with the limits for a Class B digital device, pursuant to part 15 of the FCC Rules. These limits are designed to provide reasonable protection against harmful interference in a residential installation. This equipment generates, uses and can radiate radio frequency energy and, if not installed and used in accordance with the instructions, may cause harmful interference to radio communications.
provided instructions and the antenna(s) used for this transmitter must not be co-located or operating in conjunction with any other antenna or transmitter. End-users and installers must be provide with antenna installation instructions and consider removing the no-collocation statement. This device complies with Part 15 of the FCC Rules.
qu'aucune autre antenne ou émetteur. Cet équipement devrait être installé et actionné avec une distance minimum de 0 millimètres entre le radiateur et votre corps Canada Statement This device complies with Industry Canada licence-exempt RSS standard(s). Operation is subject to the following two conditions: (1) this device may not cause interference, and (2) this device must accept any interference, including interference that may cause undesired operation of the device.