
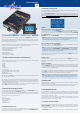
Quick Start Guide PowerBox Royal SRS

What’s the quickest method of installing and setting up the Royal SRS in a new model?
These instructions describe the most effective sequence of operations. Details of the set-
up procedure can be found in the main instructions. We also include a few tips which cover
the most frequently asked questions.
Whether your aircraft is a jet or a conventional power model, both can be set up completely
in about thirty to sixty minutes, depending on the number of functions.
1. Setting up the base functions at the transmitter
2. Selecting the radio control system
3. Setting the battery type
4. Gyro Basic Setup Assistant
5. Servo matching
6. Door Sequencer Assistant
7. Setting up the iGyro in ight
1. SETTING UP THE BASE FUNCTIONS AT THE TRANSMITTER
The transmitter needs to be set up in such a way that all the functions and associated
channels are dened. These include:
- Throttle
- Aileron
- Elevator
- Rudder
- Landing ap
- Retract switch
- iGyro ight mode switch (three-position)
- iGyro gain adjuster (slider or rotary knob)
- Smoke pump
- Lighting control system
The channels for the iGyro and the retract switch must be set to the range -100% to +100%
(Futaba may require +/- 105%).
For the aileron, elevator, rudder / nosewheel and landing ap functions you can save chan-
nels by dening just one channel for each function. The other side is then assigned to the
same channel at the backer, after which it can be reversed and adjusted as required with
the help of the servo-matching function.
If your model is a delta or has a V-tail, the transmitter mixer should be disabled, as the
integral iGyro carries out the essential delta / V-tail mixing.
2. SELECTING THE RADIO CONTROL SYSTEM
The appropriate radio control system has to be selected In the RX/TX Settings menu. No
servos should be connected to the PowerBox at this point.
The receiver or receivers can now be connected to the backer, and bound to the transmit-
ter. You may need to make adjustments at the receiver to ensure that the serial output is
operating; this varies from system to system.
- P²BUS
- HoTT (SUMD OF 16)
- M-Link (digital output)
- Futaba (S-BUS)
- Jeti (UDI)
- JR (X-BUS Type A)
3. SETTING THE BATTERY TYPE
It is important to avoid deep-discharging the batteries while you are carrying out the set-up
procedure. You can avoid this by selecting the battery type under the PowerManager point,
and entering the capacity and type of your packs.
4. GYRO BASIC SETUP ASSISTANT
The Assistant denes the essential system functions, such as channel assignment for the
primary functions, and the output sequence.
Start the Basic Setup Assistant, and enter the information in the order displayed by the
Assistant. Please note that the servos should not be connected to the output sockets until
you reach the Output Mapping menu point. This is accomplished by moving the cursor
over the Output eld, and selecting the corresponding socket:
Examples:
Setting up two aileron channels at the transmitter:
For the right-hand aileron select GY AILERON A; by default the two outputs G and H are pro-
vided. For the left-hand aileron select GY AILERON B, and outputs V and W. If the model is
tted with multiple aileron servos per side, all of them should be assigned to GY AILERON
A or GY AILERON B as appropriate. If a third output is required, simply set output I to GY
AILERON A, and output X to GY AILERON B.
Caution: at this point connect only the inboard servo to the aileron; don’t install the
other servo linkages, as this runs the risk of tension between the servos. The servo
linkages are completed later during the servo matching procedure.
Note: the procedure for the elevator is exactly analogous: outputs K and L, S and T
are assigned by default to GY ELEVATOR A and GY ELEVATOR B. If only one elevator
channel is used at the transmitter, the second elevator will be reversed, but this can be
corrected later during the servo matching procedure.
Note: if, for example, one elevator channel is used for both sides, the direction of ef-
fect must be rechecked if you subsequently reverse that output in the servo matching
menu. The direction of effect can then be corrected manually using the iGyro menu.
All the other functions can now be connected and set up using the DIRECT outputs, which
pass on the transmitter signal 1 : 1.
Quickstart guide
12/2020
2. Fernsteuersystem einstellen
Im Menüpunkt RX/TX Settings stellt man das richtige Fernsteuersystem ein.
Servos sind zu diesem Zeitpunkt noch keine an der PowerBox angesteckt.
Der oder die Empfänger werden nun an der Weiche angesteckt und an den
Sender gebunden. Abhängig vom System müssen noch die Empfänger so
eingestellt werden damit der serielle Ausgang arbeitet.
- HoTT (SUMD OF 16)
- M-Link (Digitaler Ausgang)
- Futaba (S-BUS)
- Jeti (UDI oder EX)
- JR (X-BUS Typ A)
3. Einstellen des Akkutyps
Damit man während der Einstellarbeiten nicht die Akkus tiefentlädt, sollte
vorher unter dem Punkt PowerManager der Akkutyp und die richtige Kapazität
eingestellt werden.
4. Gyro Basic Setup Assistent
Damit werden wesentliche Funktionen eingelernt, wie z.B. Kanalzuordnung für
die Hauptfunktionen und die Belegung der Ausgänge.
Führen Sie den Basic Setup Assistenten aus und lernen Sie die Funktionen
der Reihe nach ein- wie vom Assistenten angezeigt. Erst bei dem Menüpunkt
Output Mapping werden die Servos am Ausgang eingesteckt. Dabei fahren Sie
mit dem Cursor über das Ausgangsfeld und suchen den richtigen Steckplatz:
-03-
Setting one aileron channel at the transmitter:
For the right and left ailerons: GY AILERON A; the two outputs G and H are provided by
default. Both ailerons can simply be plugged in here.
5. SERVO MATCHING
At this juncture you can reverse the landing aps and elevators, and adjust the servos’
centre and end-points if necessary.
If your model is tted with more than one servo per control surface, this is the time to
ne-tune the servos to match each other, and connect the control surface linkages.
6. DOOR SEQUENCER ASSISTANT
Start the Assistant, carry out each step exactly as described on-screen, and then connect
the servos and / or valves one by one. As of Version 07 the system incorporates a second
front wheel door, which makes it possible to complete the set-up procedure for the whole
retract sequence in about ten minutes.
If you also need to adjust the process times, we suggest that you visit our Forum, where
you will nd a list of all tasks in the FAQ section. It is a very simple matter to adjust the
pause and running times for the doors manually.
7. SETTING UP THE IGYRO IN FLIGHT
The nal step is to adjust the gyro’s settings in ight. This is accomplished by selecting the
TEST FLY ASSISTANT, and adjusting all three axes while the model is in the air. We recom-
mend that you carry out several ‘dry runs’ on the ground in order to familiarise yourself with
the sequence of operations.
The Royal SRS is now fully set up and we wish you great fun and success with the system!
Example - throttle:
The throttle function is channel 1 at the transmitter. If you assign DIRECT 1 to any output,
the throttle can be plugged in at that socket. The end-points can be adjusted at the trans-
mitter itself.
Example - landing aps:
Both landing aps are to be controlled using one channel; this is channel 5 at the transmit-
ter. Assign DIRECT 5 to any two outputs, e.g. Q and R. Now plug in one landing ap, and set
it up accurately at the transmitter. The other landing ap is connected and adjusted later,
i.e. during the servo matching procedure.
The nal point in the Basic Setup Assistant is to dene the direction of gyro effect, and the
integral iGyro activates itself to allow this. By physically moving the model you can check
whether the gyro’s effect is in the correct direction; reverse it if necessary.
PowErBox royAl SrS