
Replacement Part List


32
• Read the operator’s manual. If one has not been provided, get one and study it before
operating the equipment.
• Learn the location and understand the functions of all controls before attempting to
operate the equipment.
• Know the meaning of all identification symbols on the controls and gauges.
• Check to determine that the manufacturer’s furnished safety warning labels are securely
attached to the trowel and all warnings can clearly read. Replace labels and decals if
they are missing or become worn or unreadable.
• Know the location and type of emergency shutdown control the trowel is equipped with.
• Never start or operate the trowel without protective guards and
panels in place.
• Know the capabilities and limitations of the trowel.
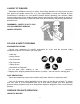
SAFETY DEVICES
Know what safety devices your trowel is equipped with … and see that each item is
securely in place and in operating condition.
For example:
• Emergency stop switch or other “Shut-Down” devices
• Guards, Shields & Panels
• Alarms or Warning Lamps
• Drain Covers, Plugs, and Caps
• Pressure Relief Devices
• Lights
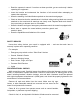
PRE-OPERATIONAL CHECKS
Walk around the trowel. Carefully inspect for evidence of physical damage, such as cracks,
bends, or deformation of plates and welds. Check for loose, broken or missing parts on the
trowel, including brackets, vibration isolators, nuts and bolts. Hardware should be replaced
with original equipment manufacturer’s (OEM) parts, and should be properly tightened to the
manufacturer’s recommendations.
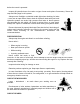
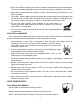
Remove all trash and debris from the trowel. Make sure oily rags,
leaves, or other flammable material are removed and not stored on the
trowel. Avoid potential fire hazards!
Clean all oil or grease from operator areas such as control handles,
foot pedals, or platforms to prevent slipping.
Check for fuel, oil, and hydraulic fluid leaks. All leaks must be corrected