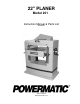
22" PLANER Model 201 Instruction Manual & Parts List M-0460224 (800) 274-6848 www.powermatic.
This manual has been prepared for the owner and operators of a Powermatic Model 201 Planer. Its purpose, aside from machine operation, is to promote safety through the use of accepted correct operating and maintenance procedures. Completely read the safety and maintenance instructions before operating or servicing the machine. To obtain maximum life and efficiency from your planer, and to aid in using the machine safely, read this manual thoroughly and follow all instructions carefully.
TABLE OF CONTENTS Safety Rules....................................................................................................................................................4-5 Safety: Decals ....................................................................................................................................................6 Specifications .....................................................................................................................................................
! SAFETY RULES As with all machines, there is a certain amount of hazard involved with the use of this planer. Use the machine with the respect and caution demanded where safety precautions are concerned. When normal safety precautions are overlooked or ignored, personal injury to the operator can result. Read, understand and follow the safety and operating instructions found in this manual. Know the limitations and hazards associated with this planer. Electrical grounding.
If stock stops feeding: If the board being planed stops feeding, disengage or turn the feed off and turn the power off. Wait until the cutterhead comes to a complete stop before lowering the table to remove the board. NEVER lower the table with the power on and the stock still in the machine, as a kickback can occur. Hand safety. Keep hands outside the machine. NEVER reach under the guards to try to clear stock that stops feeding. Do not clear chips and sawdust with hands; use a brush.
Familiarize yourself with the following safety notices used in this manual: ! CAUTION: (This means that if precautions are not heeded, it may result in minor or moderate injury and/or possible machine damage) ! WARNING: (This means that if precautions are not heeded, it could result in serious injury or possibly even death). ! SAFETY Familiarize yourself with the location and content of this decal on your machine. ! 1. 2. 3. 4. 5. Read instruction manual before operating machine.
SPECIFICATIONS: Model 201, 22” Planer Table with standard extensions........................................................................................................................ 28” x 38” Maximum cutting width ............................................................................................................................................. 22" Maximum thickness................................................................................................................................
RECEIVING Open shipping crate and check for shipping damage. Report any damage immediately to your distributor. Read the instruction manual thoroughly for assembly, maintenance and safety instructions. Contents of crate: 1 planer 1 dust chute w/ hardware 4 special hex head screws w/ hex nuts 4 foot pads w/ hardware 1 knife-setting gauge 1 6mm hex wrench 1 8mm hex wrench 1 10mm hex wrench 1 12mm & 14mm wrench 1 22mm & 24mm wrench INSTALLATION Remove the screws holding the base of the machine to the skid.
INSPECTION Before putting power to the machine, check that all screws are tight, that all mechanical functions work freely and that the cutterhead turns freely without knife contact with the chipbreaker or pressure bar. ADJUSTMENTS Tools required Philips screwdriver Hex wrenches (provided) Open-end wrench (provided) DEPTH OF CUT Depth of cut is controlled by raising or lowering the table. This is done by using the handwheel (A), shown in Figure 3. 1. Loosen the lock knob (B). 2.
OPENING HOOD To open the hood for access to the cutterhead, remove the two hex screws with the 22mm wrench provided. See Figure 6. KNIFE INSTALLATION & ADJUSTMENT ! CAUTION: Use care when placing hands near knives as they are extremely sharp and can cause severe cuts. Installing knives on a planer is an exacting process. If the knives are not to be jointed and ground, end-to-end and knife-to-knife relationship must be held within .001" (.03mm) for accurate and smooth planing.
! WARNING: After installing knives, re-check all gib screws. Loose gib screws can result in knives being thrown out of the cutterhead, causing severe damage to the machine and possible serious or fatal injury to the operator or bystanders. THE FEED SYSTEM OF YOUR PLANER (Figure 9) 1. 2. 3. 4. 5. 6. Anti-kickback fingers Infeed roll Chipbreaker Cutterhead Pressure bar Outfeed roll ANTI-KICKBACK FINGERS Anti-kickback fingers help prevent stock from being thrown from the machine.
To adjust the infeed roll: 1. Place a bed and feed roll gauge (accessory #2230002) under a knife in the cutterhead and raise the table until the gauge contacts the knife at the apex of its curve. See Figure 10. NOTE: If a bed and feed roll gauge is not available, use a finished block of wood with notches cut out for the table rolls, and a feeler gauge. See Figure 11 for an example of a wood block used for a gauge. 2. Move the gauge to the extreme left side of the infeed roll and check the measurement.
If it is too high, a shallow "clip" will occur at each end of the board. If it is too low, stock will not feed through. Use a bed and feed roll gauge to set the full length of the pressure bar to be .000-.001" (.02mm) above the arc of the cutterhead. Figure 13 shows the height adjustment screw (C) and the spring tension adjustment screw (D) for the pressure bar. This initial setup is a starting point and final adjustment may have to be made during a test cut.
4. Repeat the process for the left side, and then recheck the right side. It is important that both ends of the table rolls be the same height to help prevent skewing of the board as it feeds through the machine. 5. Re-tighten the hex nuts (C-Fig. 15) on both ends of the table roll. Repeat for other roll. TABLE ADJUSTMENTS The planer table is raised and lowered by twin screws supported on bearings, and is guided by machined surfaces on the side panels.
Learning to read a board for imperfections will save hours in adjusting a planer to operate properly. Following are some problems that may arise and their probable solutions: FEED RESTRICTION: This is caused either by the table rolls being set too low for roughing operations or from a low pressure bar. About 90 percent of the time, the pressure bar is too low. As the sharp edge of the planer knives wear, you must compensate for this wear by raising the pressure bar an equal amount on each side.
CHATTER: Chatter marks usually appear on thin material. See Figure 21. Even at their lowest point, the table rolls are too high to handle thin material. Solve the problem by either using a slave board or making an auxiliary table out of Formica countertop material, cleating at each end of the table to keep it stationary. TAPERS: If the machine planes a taper across the full width of the board, as shown in Figure 22, the table is not parallel with the cutterhead.
MAINTENANCE Periodic or regular inspections are required to ensure that the machine is in proper adjustment, that all screws are tight, that belts are in good condition, that dust has not accumulated in the electrical enclosures, and that there are no loose or worn electrical connections. Buildup of sawdust and other debris can cause your machine to plane inaccurately. Periodic cleaning is not only recommended but mandatory for accurate planing.
TROUBLE-SHOOTING: OPERATING PROBLEMS (201 Planer) PROBLEM POSSIBLE CAUSE SOLUTION Snipe 1. Table rollers not set properly. 2. Inadequate support of long boards. 1. Adjust rollers to proper height. 2. Support long boards with extension rollers. 3. Adjust feed roll tension. 4. Sharpen knives. 5. Butt end to end each piece of stock as they pass through. (NOTE: Snipe can be minimized but not eliminated.) 3. Uneven feed roll pressure front to back. 4 Dull knives 5. Lumber not butted properly.
TROUBLE-SHOOTING: MECHANICAL & ELECTRICAL PROBLEMS (201 Planer) PROBLEM POSSIBLE CAUSE Uneven depth of cut side to side 1. Knife projection 1. Adjust knife projection. 2. Cutterhead not level with bed. 2. Level bed. Board thickness does not match depth of cut scale 1. Depth of cut scale incorrect. 1. Adjust depth of cut scale. Chain jumping 1. Inadequate tension. 2. Sprockets misaligned. 3. Sprockets worn. 1. 2. 3.
Machine will not start/ restart or repeatedly trips circuit breaker or blows fuses 7. Motor starter failure. 7. (continued) If voltage between starter and motor is incorrect, you have a starter problem. If voltage between starter and motor is correct, you have a motor problem. 8. Motor failure. 8. If electric motor is suspect, you have two options: Have a qualified electrician test the motor for function or remove the motor and take it to a quality electric motor repair shop and have it tested. 9.
PARTS LIST: Gearbox Assembly (Model 201 Planer) No. Part No.
Gearbox Assembly (Model 201 Planer) 22
PARTS LIST: Cutterhead Assembly (Model 201 Planer) No. Part No.
No. Part No. Description 57 58 59 60 61 62 63 64 65 66 67 68 69 70 71 6012179 6012180 6012273 6012274 6012275 6012276 6012277 6012278 6012279 6012083 6012280 6012281 6012097 6012296 6012295 Knife (set of 4) .....................................................................................................1 Gib Screw.......................................................................................................... 32 Spring........................................................................
Cutterhead Assembly (Model 201 Planer) 25
PARTS LIST: Top Cover Assembly (Model 201 Planer) No. Part No. Description 1 2 3 4 5 6 7 8 9 10 11 12 13 14 15 16 17 18 19 20 21 6012181 6012091 6012182 6012183 6012184 6012066 6012185 6012079 6012186 6012187 6012188 6012189 6012067 6012097 6012190 6012191 6012192 6012282 6012283 6012284 6012285 Dust Hood............................................................................................................1 Screw, M6 x 1.0P x 10Lg ...................................................................
Top Cover Assembly (Model 201 Planer) 27
PARTS LIST: Column Assembly (Model 201 Planer) No. Part No.
Column Assembly (Model 201 Planer) 29
PARTS LIST: Table Assembly (Model 201 Planer) No. Part No.
Table Assembly (Model 201 Planer) 31
PARTS LIST: Base Assembly (Model 201 Planer) No. Part No.
No. Part No. Description 53 54 55 56 57 6012048 6012116 6012117 6012118 6012108 6012119 6012120 6012121 6012122 6012123 6012124 6012125 6012126 6012127 6012128 6012129 6012130 6012269 6012270 6012271 6012272 Socket Head Cap Screw, M10 x 1.5P x 20Lg ...................................................... 1 Washer ............................................................................................................... 1 Belt, A56 ......................................................................
Base Assembly (Model 201 Planer) 34
ELECTRICAL SCHEMATIC (Model 201 Planer) 7.
ELECTRICAL SCHEMATIC (Model 201 Planer) 7.
ELECTRICAL SCHEMATIC (Model 201 Planer) 7.
To order parts or reach our service department, please call our toll-free number between 8:00 a.m. and 4:30 p.m. (CST), Monday through Friday. Having the Model Number and Serial Number of your machine available when you call will allow us to serve you quickly and accurately. Locating the stock number of the part(s) required from your parts manual will also expedite your order. Phone No.: (800) 274-6848 Fax No.
03/03 Rev. A WMH Tool Group P.O. Box 1349 Auburn, WA 98071-1349 Phone (800) 274-6848 Fax: (800) 274-6840 E-mail: powermatic@wmhtoolgroup.com Website: www.powermatic.