
User Manual

POWX0782 EN
Copyright © 2013 VARO P a g e | 18 www.varo.com
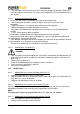
HAZARD! Be sure to fasten the inner saw flange correctly! The saw may
block, or the saw blade may come lose, if the flange is not correctly
fastened. The inner saw flange is correctly mounted when the bevelled
collar (Q1) points to the right and the spring groove points to the left (Fig.
21).
Mount the new saw blade (18) and check the rotating direction (the arrow on the saw
blade must point in the same direction as the arrow on the saw blade guard!).
HAZARD! Only use saw blades that conform to the applicable standards
and that can be used at the maximum speed indicated in the technical data
sheet.
DO NOT use:
- Wrong saw blades
- Saw blades made of high-speed steel (HSS)
- Damaged saw blades
- Saw blades with missing teeth
HAZARD!
Only use OEM components for installing the saw blade.
- Do not use loose reduction rings; the saw blade could come loose.
- Saw blades must be mounted in such a way that they cannot wobble, and that they cannot
come loose during operations.
Install the outer saw flange (E2).
The two flanges must fit over the surfaces of the saw shaft.
Insert the shaft bolt (E1) (left-turning thread) and tighten with a hexagonal spanner.
HAZARD!
Do not lengthen the spanner, so that you can exercise more power.
Do not hit on the spanner with a hammer, for tightening the shaft.
The spanner must be removed, after the shaft that has been tightened.
Install the saw table and mount the corresponding screws.
10.2.6 Tightening the drive belt
The drive belt, which is located behind a plastic cover at the right-hand side of the saw head,
must be tensioned when there is more that 8 mm of play (when pushing on the middle
between the two wheels), or if drive power is no longer transmitted.
10.2.7 Checking the tension
Turn the saw head completely towards the top.
Set the support arm to 0° (vertical) and tighten the bevelling lock nut.
Loosen the bolt with which the saw blade guard is attached and then remove the saw
blade guard.
Release the topmost saw blade screw and remove the topmost sawing table.
Remove the cover (F1) next to the motor.