
Use and Care Manual


17
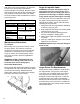
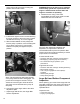
(1 to 9). Only move the lower cable diagonally
one hole at a time from its original position.
Note: The upper cable end must be in the
upper single center hole of the adjustment
plate. Do not change the position of the upper
cable.
5. Connect the upper cable to the control handle.
6. Start the engine and engage the auger to test
the operation of the auger.
Note: With the auger control handle at the full
released position, the cable should be barely
tight. Some slack in the cable may be
required to ensure the auger pulley tension
pulley is not engaging the belt. There should
be no auger movement with the auger handle
released. If the auger is turning when the
auger handle is released, loosen the belt
tension by readjusting the cable as
necessary. Do not over tension the cable.
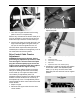
Auger Belt Removal
WARNING! Entanglement Hazard - Before
performing any service procedures, make
sure the engine is off and remove the spark
plug wire from the spark plug to ensure the
engine cannot accidently start.
Note: Record component position before
disassembly, to assist in reassembly.
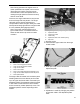
1. Disconnect the upper cable from the auger
control handle.
2. Remove 2 hex head screws and remove belt
cover.
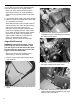
3. Loosen the belt guide pin hex head screw
(installed on engine crankcase) and rotate the
pin away from the pulley.
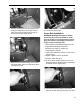
4. Left Side - Loosen the hex screws attaching
the auger housing to the main frame.
5. Right Side - Remove the hex screw, lock
washers and flat washers attaching the auger
housing to the main frame.