
Use and Care Manual
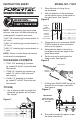


MODEL NO. 71397
INSTRUCTION SHEET
Complete Doweling Jig Kit
QUESTION...
1•847•780•6120
NOTE: These doweling jigs can be used
with any size stock, but each individual jig
is designed for a specific size stock.
71497: 3/8" doweling jig to center dowels in
3/4" stock
71496: 1/4" doweling jig to center dowels in
1/2" stock
71498: 1/2" doweling jig to center dowels in
1" stock.
NOTE: Failure to follow these instructions
could result in misalignment
PACKAGING CONTENTS
1 - 71497: 3/8" doweling jig (contains
jig, cobalt 3/8" drill bit, stop collar and
hex wrench)
1 - 71496:1/4" doweling jig (contains jig,
cobalt 1/4" drill bit, stop collar and
hex wrench)
1 - 71498: 1/2" doweling jig (contains
jig, cobalt1/2" drill bit, stop collar and
hex wrench)
TO USE
1. Use a square to draw a straight line
where the two pieces will be joined.
See Figure1.
Figure 1
2. Place the body of the jig flat on
the workpiece
3. With the body flat on the workpiece,
set the hairline cursor in the center of
the pencil mark. See Figure 2.
Figure 2
Body of
jig at
againist the
workpiece
Hairline
cursor in
center of
pencil mark
4. Clamp the jig to the workpiece. MAKE
SURE the hairline cursor and pencil
mark are still aligned.
5. Determine the depth of the hole to
be drilled based on the length of the
dowel being used.
6. Set the stop collar and tighten the
clamp screw. See Figure 3.
Figure 3
Stop Collar
Tighten
to Lock
7. Drill the hole. MAKE SURE the set up
and drill are as straight as possible.
See Figure 4.
Figure 4
IMPORTANT:
Keep setup and
drill as straight as
possible
8. Glue and assemble the pieces as per
the dowel instructions.