Commercial Treadmill Owner’s Manual C934 C O M M E R C I A L P R O D U C T S D I V I S I O N
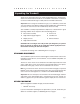
C O M M E R C I A L P R O D U C T S D I V I S I O N IMPORTANT SAFETY INSTRUCTIONS IMPOR TANT SAFETY INSTRUCTIONS IMPORT When using the C934 treadmill, always follow basic precautions, including the following: • To ensure your safety and to protect the unit, read all the instructions before assembling and using the treadmill. • To ensure the proper use and safety of the treadmill, make sure that all users read this manual.
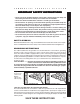
C O M M E R C I A L P R O D U C T S D I V I S I O N • Never step off the treadmill while the running belt is moving. Keep your body and head facing forward. Never attempt to turn around on the treadmill. • Never turn ON the treadmill when someone is standing on the machine. • Never block the air openings on the hood while operating the treadmill. Keep the air openings clean and free of lint, hair, or anything that might impeded the free flow of air.
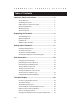
C O M M E R C I A L P R O D U C T S D I Table of Contents Important Safety Instructions .........................................2 Safety Approval ...................................................................... 3 Grounding Instructions ........................................................... 3 Radio Frequency Interference (RFI) ....................................... 6 European Applications ........................................................... 6 Obtaining Service ........
C O M M E R C I A L P R O D U C T S D I V I S I O N Table of Contents Exercising on the Treadmill ...........................................36 Using the Security Clip .......................................................... 36 Using the Handrails ............................................................... 36 Using the Heart Rate “Touch” Capability ................................ 36 Keypad Tips ...........................................................................
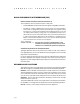
C O M M E R C I A L P R O D U C T S D I V I S I O N RADIO FREQUENCY INTERFERENCE (RFI) Federal Communications Commission Part 15 The treadmill has been tested and found to comply with: • The IEC EMC Directive (international electromagnetic compatibility certification) • The limits for a Class A digital device, pursuant to Part 15 of the FCC Rules. These limits are designed to provide reasonable protection against harmful interference in a commercial installation.
C O M M E R C I A L P R O D U C T S D I V I S I O N OBTAINING SERVICE Do not attempt to service the treadmill yourself except for the maintenance tasks described in this manual. The treadmill does not contain any user-serviceable parts. For information about product operation or service, visit the Precor Web Site at www.precor.com or contact an authorized Precor Commercial Products Customer Support Representative at 1-888-665-4404.
C O M M E Notes: page 8 R C I A L P R O D U C T S D I V I S I O N
C O M M E R C I A L P R O D U C T S D I V I S I O N Unpacking the Treadmill Thank you for purchasing the Precor C934 treadmill. Built to the exacting standards of the health club environment, the treadmill is intended for commercial use and can withstand the rigors of daily club use with little maintenance. Important: Before using the treadmill, we urge you to familiarize yourself and your staff with the entire Owner’s Manual.
C O M M E R C I A L P R O D U C T S D I V I S I O N HARDWARE KIT After unpacking the treadmill, open the hardware kit (refer to Diagram 2) and make sure that you have the following items: ❑ (A) four 2-inch long socket head screws — mount upright supports to base ❑ (B) four barrel spacers — place on 2-inch screws ❑ (C) ten ¾-inch long socket head screws ❑ (D) sixteen flat washers ❑ (E) two 1½-inch socket head screws — handrail clamp assembly ❑ (F) four large diameter wash
C O M M E R C I A L P R O D U C T S D I V I S I O N Setting Up the Treadmill You do not need any special knowledge or experience to set up the treadmill. However, because of the size and weight of the treadmill, you will need to obtain assistance. INSTALLATION REQUIREMENTS Follow these installation requirements when installing the treadmill. If you do not install the treadmill according to the following guidelines, you could void the Precor limited warranty.
C O M Diagram 3 M E R C I A L P R O D U C T S D I V I S I O N Lift the rear of the unit and roll it to its assembly location. Rear cover of unit Lift the unit by placing hands on opposite sides of the rear cross brace found under treadmill’s running belt. 3. Move the treadmill. Diagram 3. To properly lift the rear end and roll it on its front wheels, review Diagram 3.
C O M Diagram 5 M E R C I A L P R O D U C T S D I V I S I O N Route the cable. Display cable Right side mounting bracket Route cable through hole. Right side upright support 6. Route the display cable. Diagram 5. Unwrap the cable and remove any kinks. Have an assistant hold the right upright support close to the base while you route the cable through it.
C O M M E R C I A L P R O D U C T S D I V I S I O N 8. Attach the left side upright support to the base assembly. Refer to Diagram 6. Align the upright support with the base assembly mounting bracket and secure it by following steps 7a and 7b. Install the display console. Diagram 7 Display console Display console mounting brackets Upright support 9. Secure the display console to the upright supports. Diagram 7. a.
C O M M Diagram 9 E R C I A L P R O D U C T S D I V I S I O N Raise the incline. Side rail Incline lift QUICKSTARTTM key Important: With the handrails attached, the width of the treadmill is 33½ inches (85 cm). It will not fit through a standard 32-inch doorway. 10. Prepare the unit for handrail installation. Diagram 9. For an easier installation, raise the incline to its maximum height by taking the following steps: a.
C O M M Diagram 11 E R C I A L Secure the handrails. P R O D U C T S D I V I S I O N 2 ¾-inch screw (C) with washer (F) Side bracket Handrail clamp Slide handrail into position. 1 Lower portion of handrail ¾-inch screws (C) with washers (D) 3 12. Attach handrails to the side and base brackets. Diagram 11. Important: Attach one handrail at a time. Take the following steps on one side of the treadmill and then, attach the opposite handrail. a.
C O M M Diagram 12 E R C I A L Connect the heart rate cables. P R O D U C T S D I V I S I O N 1 Display console Left handrail Heart rate cable connections (male connector, female receptacle and vice versa for the opposite cable) 2 Security clip 13. Connect the heart rate cables. Diagram 12. Cables protrude from the ends of both handrails and connect the metal strips on the handrails to the receiver inside the display.
C O M M E R C I A L P R O D U C T S D I V I S I O N c. Place your left hand on the left handrail’s heart rate grip and place your right hand on the right handrail grip. The letters “Hr” begin to blink in the upper right display indicating that a signal is being transmitted. Within about 15 seconds a heart rate appears. Note: If the blinking “Hr” does not appear, turn the unit OFF. Recheck the cable connections and ask someone else to try the test (steps a through c). d.
C O M M Diagram 15 E R C I A L P R O D U C T S D I V I S I O N Secure the fasteners. Second: Alternately tighten four side upright screws. 2 First: Alternately tighten four front panel screws. Third: Alternately tighten the four screws that secure the console to the uprights. 3 1 17. Tighten all mounting screws with the hex key (H) provided. Diagram 15. Start at the front of the treadmill with the four screws that attach the upright supports to the front panel.
C O M M Diagram 17 E R C I A L P R O D U C T S D I V I S I O N Level the unit. 1 2 19. Lower the treadmill incline. Make the treadmill’s running bed level by returning the incline to zero. To do this, you need to take the following steps: a. Turn the unit ON. b. Stand to the side of the unit and press QUICKSTART. After a few seconds, the running belt begins moving. c. When the lift stops moving, press the red Stop button and turn the power switch OFF. 20. Level the unit.
C O M M Diagram 18 E R C I A L P R O D U C T S D I V I S I O N Adjust the rear deck. 21. Adjust the rear deck. Diagram 18. To raise the rear deck, insert the ¼-inch hex key (H). Make sure that the key is fully engaged and turn it clockwise. Turning the hex key counterclockwise lowers the unit. 22. Plug in the power cord. Connect the power receptacle into an appropriate power outlet. Refer to Grounding Instructions on page 3.
C O M M E R C I A L P R O D U C T S D I V I S I O N CHECKING THE ALIGNMENT OF THE RUNNING BELT The belt is aligned at the factory before shipment. However, during shipment or by using the treadmill on an uneven surface, the belt might move off center. Proper belt alignment is important because it allows the belt to remain centered and assures smooth operation. Follow these steps to check the alignment: 1. The treadmill has adjustable rear feet.
C O M M E R C I A L P R O D U C T S D I V I S I O N Club Information These next few pages provide information that lets you customize the treadmill for your Club. It is not information that your customer needs or, necessarily, should see. This section covers the following information about how to: • • • • select the unit of measure: U.S.
C O M M E R C I A L P R O D U C T S D I V I S I O N To access the Club settings, the following must occur: ❑ Check to be sure that the treadmill is turned ON. ❑ Check that the Precor banner appears on the display. ❑ Press the appropriate key sequences. (To cancel entries, press RESET.
C O M M E R C I A L P R O D U C T S D I V I S I O N DETERMINING THE CLUB SPEED LIMIT You can set the maximum speed for the treadmill. This limits how fast the running belt moves and, consequently, how many adjustments a user can make to the treadmill’s speed. The speed is displayed in miles per hour (mph) or kilometers per hour (kph) depending upon the units of measure (Metric or U.S. standard) that are selected. The ▼▲ keys let you choose a speed between: 0.5 to 11.
C O M M E R C I A L P R O D U C T S D I V I S I O N VIEWING THE ODOMETER, HOURS OF USE, SOFTWARE VERSION AND ERROR LOG While the Precor banner is being displayed, press: Stop, ENTER, QUICKSTART Note: You need to press ENTER within ¹⁄₃ second after pressing the Stop button to initiate the Club Custom mode. (The RESET key may be used in place of the Stop button.
C O M M E R C I A L P R O D U C T S D I V I S I O N USING CSAFE STANDARD EQUIPMENT The C934 is fully compatible with CSAFE protocols. If the unit is connected to a CSAFE master device, the user will be prompted to enter a user ID. Five zeros appear on the display. The left zero blinks to indicate that it is awaiting input. The following table provides information about the keypad functions: User ID Entry: Program Keys INCLINE ▼ or ▲ moves the blinking LED from field to field.
C O M M E R C I A L P R O D U C T S D I V I S I O N The C934 Display The C934 is designed so users can work out with minimal instruction or training. The directions on the console and the prompts on the display will guide a user through the entire workout session. Before the treadmill is used, however, we recommend that you, as club owner or manager, familiarize yourself with it so you can instruct your customers to use it safely and effectively.
C O M M E R C I A L P R O D U C T S D I V I S I O N SMARTRATE® DISPLAY A user must enter an AGE (during the course Setup prompts) and wear a POLAR® chest strap, while in a course program, before the blinking segment in the bar graph can show the zone that his or her heart rate is in, either: Weight Loss or Cardiovascular.
C O M M E R C I A L P R O D U C T S D I V I S I O N TIME: Acceptable entries range between INFINITE and 240 minutes. (See “Note” below.) The display blinks to indicate that it is awaiting a selection. Use the ▼ and ▲ keys to change the selection. To continue in Setup mode, press ENTER. Note: The Club manager has the ability to set a time limit on the length of a workout. Refer to Club Information on page 23.
C O M M E R C Press QUICKSTART at the,... AGE prompt I A L P R O D U C T S D I V I S I O N The following occurs: The age (1 through 99) that appears on the display becomes the designated age that the C934 uses for SmartRate®. A correct age entry between 1 and 99 is very important if the user plans to utilize the heart rate characteristics of the treadmill. The QUICKSTART key acts the same as the ENTER key at this point because all the Setup prompts have been answered.
C O M M E R C I A L P R O D U C T S D I V I S I O N CALORIES: Provides the cumulative number of calories being burned by the user. INCLINE: Displays the selected percent of incline during a workout. The INCLINE ▲ and ▼ keys affect the treadmill’s lift and let the user set an incline between 0 percent and 15 percent. The displayed values change in 0.5 percent increments. Refer to INCLINE ▲▼ keys on page 33.
C O M M E R C I A L P R O D U C T S D I V I S I O N Diagram 21 Display console keypad. QUICKSTART: When pressed at the Precor banner, the running belt begins moving after a three second delay. SmartRate® is inactive and default values apply. Keypad keys The keypad keys let the user: • control your workout session, • answer prompts prior to starting a course, • determine which display features appear, • prematurely end a course, and • adjust the incline and speed levels.
C O M M E R C I A L P R O D U C T S D I V I S I O N QUICKSTART: This key lets the user bypass the Setup prompts and start working out immediately using the Manual course. Default values apply. QUICKSTART Default Values Prompts Default Value COURSE Manual TIME Club dependent (usually 30 minutes - see page 25.) WEIGHT 150 lbs. (68 kg.) AGE 0 : A valid AGE must be entered to utilize the SmartRate® display.
C O M M E R C I A L P R O D U C T S D I V I S I O N CHANGING THE DISPLAY FEATURES USING THE SELECT KEY The SELECT keys let the user choose which features appear on the display. When a user enters a course, the TIME and COURSE PROFILE features are preselected. Each SELECT key affects four different display features. The left SELECT key, causes the indicator light to appear next to TIME, DISTANCE, CALORIES, and INCLINE.
C O M M E R C I A L P R O D U C T S D I V I S I O N Exercising on the Treadmill Once the C934 is set up, it is ready to use. There are no complex instructions to follow or mandatory programming steps required to operate the treadmill. The easy-to-understand prompts let the user select a course and specify how long he or she wishes to work out. The speed and incline levels can be adapted to meet fitness goals. Important: Club owners, managers, personal trainers.
C O M M E R C I A L P R O D U C T S D I V I S I O N KEYPAD TIPS Important: The keys on the keypad are touch-sensitive. A light “touch” is all that is required to activate the key function. Key presses to the ▼ or ▲ key are ignored when the Precor banner is being displayed. RESET — exits the Setup Mode or accesses the Workout Summary while in Pause mode. QUICKSTART — bypasses further selections and starts the running belt. Default values apply (see QUICKSTART on page 34).
C 4 5 O M M E R C I Select a course. A Begin working out. 5. Enter the course selection, answer prompts, and enter your Weight and Age. Continue your workout. 6. (Cool down) 7 End your workout. 7. (Review WORKOUT SUMMARY) 8 Remove the security clip and step off the treadmill. page 38 P R O D U C T S D I V I S I O N 4. To display the course selections, press ENTER and then, press any ▼ or ▲ key. (Pause) 6 L 8.
C O M M E R C I A L P R O D U C T S D I V I S I O N COOLING DOWN AFTER A WORKOUT Cooling down is an important aspect of your workout because it helps reduce muscle stiffness and soreness by transporting excess lactic acid out of the working muscles. Cooling down for at least three minutes helps provide a smooth transition that allows your heart rate to return to its normal (non-exercising) state.
C O M M E R C I A L P R O D U C T S D I V I S I O N PAUSE, WORKOUT SUMMARY, AND EXIT FEATURES Pausing and exiting are integral parts of your workout and can be accessed any time during a course. Pause mode — can be accessed while in a course or during cool down. Note that the Pause mode has a time limit and the club has the option to change the setting. If you enter Pause mode during your cool down, it is of limited duration.
C O M M E R C I A L P R O D U C T S D I V I S I O N Courses The C934 lets the user choose between six courses. This section provides information about the special features and functions of the treadmill’s courses and how to best utilize the: • • • • SmartRate® feature Cross Country course Weight Loss course Heart Rate course • Manual course • Interval course • Random course Note: To choose a course (other than Manual), begin at the Precor banner and press ENTER.
C O M M E R C Diagram 22 Target Zones. I A L P R O D U C T S D I V I S I O N HEART RATE TARGET ZONES 200 190 YOUR HEART RATE 180 170 160 150 REC OMM END 140 130 120 100 RECO MME ED C ARD NDED IOVA SCU WEIG LAR ZON HT LO 90 E MAX.
C O M M E R C I A L P R O D U C T S D I V I S I O N The Manual course profile appears as a flat line. Use the ▼▲ keys to adjust the incline or speed. (See pages 33 and 34 for more information on key function.) As the user proceeds with his or her workout, a blinking segment represents his or her position on the course. CROSS COUNTRY COURSE The Cross Country course is a preprogrammed 30-minute course. The incline is predetermined.
C O M M E R C I A L P R O D U C T S D I V I S I O N THE WEIGHT LOSS COURSE The Precor Weight Loss course incorporates the latest findings on fat-burning and weight loss through exercise. It is based on research at the world-renowned Cooper Institute for Aerobics Research and it is designed to help the user burn the most fat during a 28-minute workout, while minimizing the risk of discomfort and injury. The Weight Loss program is similar to the Interval course.
C O M M E R C I A L P R O D U C T S D I V I S I O N HEART RATE COURSE Once the user sets a target heart rate and the running belt’s speed, the C934 Heart Rate Course monitors the user’s heart rate and automatically maintains it within a few beats per minute (bpm) of the selected target. Blinking lights on the SmartRate® bar graph appear to show the “zone” that the user is in.
C O M M E R C I A L P R O D U C T S D I V I S I O N Maintenance The C934 is built to withstand the rigors of the health club environment. However, as club manager or owner, you are responsible for cleaning and maintaining the unit’s integrity. If you fail to maintain the treadmill as described below, it could affect or void the Precor limited warranty.
C O M M E R C I A L P R O D U C T S D I V I S I O N ALIGNING THE RUNNING BELT The correct alignment of the running belt is critical to the smooth operation of the treadmill. The belt is properly aligned at the factory. However, during shipping and handling or by use on an uneven surface, the belt may move off center and require a few simple adjustments.
C O M M E R C I A L P R O D U C T S D I V I S I O N STORING THE POLAR® CHEST STRAP Store the chest strap transmitter in a place where dust and dirt cannot accumulate on it such as, a closet or drawer. Be sure to keep the chest strap protected from extremes in temperature. Do not store it in an area that may be exposed to temperatures below 32 degrees Fahrenheit.
Precor is a registered trademark of Precor Incorporated. Copyright 2003 Precor Incorporated. Precor Web site: www.precor.com Specifications subject to change without notice. Exploded Views C934 Precor Incorporated. 20031 142nd Avenue NE P.O. Box 7202 Woodinville, WA USA 98072-4002 P/N 45788-102 11/23/03 Rev.
Precor is a registered trademark of Precor Incorporated. Copyright 2003 Precor Incorporated. Precor Web site: www.precor.com Specifications subject to change without notice. Exploded Views C934 Precor Incorporated. 20031 142nd Avenue NE P.O. Box 7202 Woodinville, WA USA 98072-4002 P/N 45788-102 11/23/03 Rev.
Precor is a registered trademark of Precor Incorporated. Copyright 2003 Precor Incorporated. Precor Web site: www.precor.com Specifications subject to change without notice. Exploded Views C934 Precor Incorporated. 20031 142nd Avenue NE P.O. Box 7202 Woodinville, WA USA 98072-4002 P/N 45788-102 11/23/03 Rev.
Precor is a registered trademark of Precor Incorporated. Copyright 2003 Precor Incorporated. Precor Web site: www.precor.com Specifications subject to change without notice. Exploded Views C934 Precor Incorporated. 20031 142nd Avenue NE P.O. Box 7202 Woodinville, WA USA 98072-4002 P/N 45788-102 11/23/03 Rev.
Precor is a registered trademark of Precor Incorporated. Copyright 2003 Precor Incorporated. Precor Web site: www.precor.com Specifications subject to change without notice. Exploded Views C934 Precor Incorporated. 20031 142nd Avenue NE P.O. Box 7202 Woodinville, WA USA 98072-4002 P/N 45788-102 11/23/03 Rev.
Precor is a registered trademark of Precor Incorporated. Copyright 2003 Precor Incorporated. Precor Web site: www.precor.com Specifications subject to change without notice. Exploded Views C934 Precor Incorporated. 20031 142nd Avenue NE P.O. Box 7202 Woodinville, WA USA 98072-4002 P/N 45788-102 11/23/03 Rev.
Precor is a registered trademark of Precor Incorporated. Copyright 2003 Precor Incorporated. Precor Web site: www.precor.com Specifications subject to change without notice. Exploded Views C934 Precor Incorporated. 20031 142nd Avenue NE P.O. Box 7202 Woodinville, WA USA 98072-4002 P/N 45788-102 11/23/03 Rev.
Precor is a registered trademark of Precor Incorporated. Copyright 2003 Precor Incorporated. Precor Web site: www.precor.com Specifications subject to change without notice. Exploded Views C934 Precor Incorporated. 20031 142nd Avenue NE P.O. Box 7202 Woodinville, WA USA 98072-4002 P/N 45788-102 11/23/03 Rev.
Thank Y ou and W elcome to Pr ecor You Welcome Precor We are confident that you will be pleased with your purchase and that your new Precor equipment will help satisfy your customers’ fitness needs, while helping you meet your business goals. To allow us to serve you better, please take a few moments to complete and return your warranty registration. YOU MAY ALSO REGISTER ONLINE AT www.precor.
TELL US ABOUT YOUR NEW PRECOR PRODUCTS Purchased from (Dealer name): Date of Purchase: Month Year Day Product Serial Number(s): Please indicate the type and number of products purchased: ❑ #: ______ Elliptical Fitness CrossTrainer (EFX®) The serial number is located on the shipping box and on the product. ❑ #: ______ Treadmill ❑ #: ______ Stair Climber ❑ #: ______ Cycle ❑ #: ______ Strength Station ❑ #: ______ StretchTrainerTM TELL US ABOUT YOUR F ACILITY FACILITY Name of Facility ❑ Mr.
Commercial Equipment Limited Warranty PLEASE READ THESE WARRANTY TERMS AND CONDITIONS CAREFULLY BEFORE USING YOUR PRECOR INCORPORATED PRODUCT. BY USING THE EQUIPMENT, YOU ARE CONSENTING TO BE BOUND BY THE FOLLOWING WARRANTY TERMS AND CONDITIONS. Limited Warranty. Disclaimer and Release. Precor Incorporated warrants all new Precor products to be free from defects in materials and manufacture for the warranty periods set forth below.
C934 Commercial Treadmill featuring Heart Rate and SmartRate® Systems Product Specifications: Length: Width: Height: Weight: Shipping weight: Running surface: Motor: Power: Speed: Incline: Frame: Regulatory Approval: Electronic Specifications 79 inches (201 cm) 34 inches (85 cm) 55 inches (140 cm) 280 lbs (127 kg) 345 lbs (156 kg) 57 inches x 20 inches (145 cm x 51 cm) 3.0 hp continuous duty 120/240 VAC (50/60Hz) 0.5 to 11 mph (1 to 18 kph) 0.