
Specifications


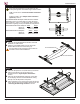


AM300/AM300-B
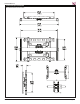
Page 14 Visit the Premier Mounts website at http://www.mounts.com Installation Instructions
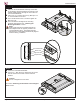
Step 3
Place the Universal Bracket assembly on the back
of the display, with the threaded mount studs on the
Adapter Plates passing through the mount slots on
the Universal Brackets.
®
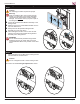
Place one (1)
5
/16″ washer and one (1) M8 nylon nut
on each threaded mount stud.
¯
Use a socket wrench and ½″ socket to tighten all
M8 nylon nuts.
°
Use a screwdriver and tighten the mounting
hardware determined in the “Selecting the
Mounting Hardware” section.
Note!
Make certain that the two Alignment Stubs on
each Adapter Plate are properly seated in the
Universal Bracket slots. The Alignment Stubs
help keep the Universal Bracket assembly aligned
and level during installation.
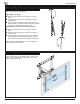
Step 4
Center the Universal Bracket Bar.
®
Use the
5
/32″ Allen wrench to tighten the set screws
that are located on the back of each Universal
Bracket.
Caution!
Do not overtighten the set screws.
Proceed to “Attaching the Flat Panel to the Swingout
Arm” section.
Mounting Bracket Installation (cont’d)
Universal Bracket
Adapter Plate
Mount Stub
Alignment Stub