Use and Care Manual and Installation Instructions Electric Range TABLE OF CONTENTS Important Safety Instructions Inside Front Cover Use and Care Surface Cooking 34 Using your O 5-7 Changing the Oven Light Bulb {Some Models) 6 Using your Broiler 8 Clock and Timer (Some Models) 9 Outlet Circuit Breaker 9 Appliance Outlet 9 Care and Cleaning 10-13 Installation Blackguard Installation 16-17 Maximum and Minimum Clearances 8 Electrical Installation 19 Anti-Tip Bracket Installation 20 Before You Call for Service I
IMPORTANT SAFETY INSTRUCTIONS A WARNING: READ ALL INSTRUCTIONS BEFORE USING THIS APPLIANCE, A WARNING: If the information in this manual is not followed exactly a fire, electrical shock, or explosion may result causing property damages, personal injury or death. Use this appliance only for its intended use as described in this guide, To reduce the risk of the appliance tipping, it must be secured by a properly installed anti-tip device.
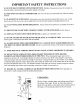
IMPORTANT SAFETY INSTRUCTIONS 6. 4 WARNING: SERIOUS HAZARDS ARE ASSOCIATED WITH REACHING INTO STORAGE CABINETS ABOVE THE RANGE WHEN THE SURFACE ELEMENTS AND/OR OVEN ARE IN OPERATION. The range should not be used as a step stool to the cabinet above. 7. SERIOUS HAZARDS OR INJURIES MAY RESULT FROM THE MISUSE OF APPLIANCE DOORS OR DRAWERS. Do not allow anyone to climb, stand, hang, step, or sit on the door, storage drawer, or cook top.
IMPORTANT SAFETY INSTRUCTIONS 19. DO NOT HEAT UNOPENED CONTAINERS OF FOOD. Buildup of pressure may cause the container to burst and result in serious personal harm and/or damage to the range. 20. KEEP OVEN VENT DUCT UNOBSTRUCTED. The oven vent duct is located under one of the rear surface elements. 21. PLACEMENT OF OVEN RACKS, Always place oven racks in desired location while oven is cool. If rack must be moved while oven is hot, use pot holder but do not let pot holder contact hot heating element in oven.
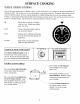
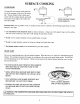
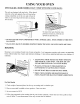
SURFACE COOKING 5 CONTROLS Each of the range elements has an “To finite Control” switch which allows you to choose just the right temperature for cooking any food. The switches can be set at the numbers or any point in between. To operate, push the knob in and turn to the desired setting. Set most cooking operations on a higher setting; then turn to a lower setting to finish cooking. A glowing red element indicates that heat and energy are being wasted.
SURFACE COOKING COOKWARE To assure the best cooking results match the size of the saucepan to the size of the surface unit. The pan should be flat to allow good 1 te contact with the cooking element, and should not extend over the edge of the surface unit more than 1 inch. | POOR CONTACT GIVES POOR RESULTS { Specialty Pans, such as griddles, woks, or canning vessels need to conform to the following requirements to avoid damage to the range. * Only fiat bottom woks should be used on surface elements.
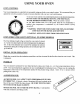
USING YOUR OVEN OVEN CONTROL Your oven temperature is controlled very accurately using an electric oven control system. We recommendation that you operate the oven for a number of weeks to become familiar with your new oven's performance. vv To use your oven. turn the oven control dial clockwise to the desired temperature. DO NOT TURN TO THE BROIL SETTING AND THEN BACK TO THE DESIRED TEMPERATURE.
USING YOUR OVEN BAKING Every oven has its own personal characteristics which may be different than your old oven. The times and temperatures to which you have been accustomed may vary slightly because of these differences. BAKING HINTS 1. Always follow the package instructions. Use the recommended pan size. Cooking times may vary in high altitude areas. 2. Baking results will be better if pans are centered as much as possible. 3. Do net place large cookie sheets or pans on a rack in the bottom position.
USING YOUR OVEN OVEN RACKS ( SOME MODELS MAY COME WITH ONLY ONE RACK) The racks are designed with stop locks. When placed correctly on the rack supports, they will stop before coming completely out of the oven and will not tilt when you are removing food {rom them or placing food on them. To remove the racks from the oven, pull them toward you, tilt front end upward and pull them out. * DO NOT USE THE OVEN COMPARTMENT FOR A STORAGE AREA. ITEMS STORED IN THE OVEN CAN IGNITE.
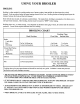
USING YOUR BROILER BROILING Broiling is a fast method for cooking tender cuts of meats, poultry, ham and fish by direct heat from a broil element. Foods are placed under the upper heating element of the oven. Broiling results and timing depend upon the distance between the food and the broil element. Broil with the door closed, for a cleaner, cooler kitchen. The smoke from broiling is consumed as it is drawn over a rod-type broiler element.
CLOCK AND TIMER (Optional on Some Models) ELECTRONIC CLOCK AND TIMER TO SET TIME OF DAY: Depress “CLOCK” button (a tone will sound). Depress “UP” button to set the time up, or depress “DOWN” button to set the time down. Tapping the “UP” or “DOWN” button will increase or decrease the time by | minute. Holding in the “UP” or “DOWN™ button will increase or decrease the time in 10 minute intervals.
CARE AND CLEANING DETERMINING OVEN INTERIOR BEFORE CLEANING OVEN INTERIOR, A WARNING: KEEP APPLIANCE AREA CLEAR determine whether you have a continuous AND FREE FROM COMBUSTIBLE MATERIALS, cleaning or a regular porcelain oven interior. GASOLINE AND OTHER FLAMMABLE VAPORS AND LIQUIDS. PORCELAIN OVEN INTERIOR Porcelain has a smooth finish, and is a type of glass fused to metal. With proper care, the porcelain enamel walls in these ovens will retain their good looking finish for many years.
CARE AND CLEANING Oven racks are removed by pulling forward. tilting and lifting up. Racks may be washed with detergent and water. Scour heavily soiled areas with u soap-filled steel wool pad. Oven windows may be washed with a damp cloth dipped in detergent and warm water, or a solution of baking soda and water, CLEANING CONTINUOUS CLEANING OVEN The continuous cleaning oven surfaces on the oven walls and oven top, clean continuously during normal baking temperatures.
CARE AND CLEANING OUTER SURFACE, FINISH GLASS, PAINT AND PLASTIC (knobs, decorative trim, etc.) ~ These materials are used in areas where heavy soil will not accumulate, Use detergent and damp cloth to clean the control panel Rinse with a damp cloth and dry. Be sure to wring excess moisture from the cloth when wiping around controls. Excess water in or around the controls may cause damage to the appliance. DO NOT USE steel wool, abrasives, ammonia, acids or commercial oven cleaners.
CARE AND CLEANING OVEN AND SURFACE HEATING ELEMENTS Both the oven and the surface heating elements clean themselves when they are turned on. Food spilled on a hot element will burn off, TO REMOVE SURFACE ELEM 8: Surface elements can be removed to make cleaning easier. To avoid the possibility of a burn or electric shock, always be certain that the controls for all surface units are at the “OFF” position and all coils are cool before attempting to lift or remove a surface unit.
CARE AND CLEANING CLEANING BROILER PAN (Some Models) Clean using hot, sudsy water, a mild abrasive cleaner, a soap filled abrasive pad or commercial oven cleaner, following the manufacturer’s instructions. i TO REMOVE OVEN DOOR Se LOCK The oven door on 20” model ranges is not removable. The 247, 30”, and 36” ranges have lift-off doors. To remove lift-off doors: 1. Open the oven door to the full open position. FIGURE #1 2. Pull hinge lock open as far as possible as shown in Figure 1. 3.
CARE AND CLEANING LIFT-UP COOK TOP To make cleaning easier, the entire cook top may be lifted up and supported in the up position. WARNING: BE SURE ALL SURFACE UNITS ARE TURNED GFF BEFORE RAISING THE COOK TOP. The recessed area beneath the lift-up cook top may be wiped clean with a hot soapy rag. DO NOT USE STEEL WOOL PADS, COMMERCIAL OVEN CLEANER, SILICONE OVEN SPRAYS, COARSE PADS OR COARSE BRUSHES ON THE RECESSED AREA BENEATH THE COOK TOP.
INSTALLATION INSTRUCTIONS PORCELAIN BLACKGUARD INSTALLATION 1 Move range main top forward about two inches and position blackguard near the blackguard support. . If blackguard has a clock, connect plug (B) from blackguard to plug (B) from back of range and push plug assembly down through square cut-out in the blackguard support. . Attach blackguard to blackguard support with (4) (A) wing nuts. . On the front of the blackguard, two nuts are provided on the threaded hinge pins. Remove these nuts.
INSTALLATION INSTRUCTIONS PORCELAIN BLACKGUARD Fasteners included for assembly A a VENT RAIL BLACKGUARD Fasteners included for assembly (im THERMOPLASTIC END CAP BLACKGUARD Fasteners included for assembly Awe von B--n {fan
INSTALLATION INSTRUCTIONS BE SURE RANGE IS PROPERLY INSTALLED AND GROUNDED BY A QUALIFIED TECHNICIAN. BEFORE YOU BEGIN — DISCONNECT THE POWER TO THE RANGE AT THE MAIN CIRCUIT BREAKER AND READ THESE INSTRUCTIONS COMPLETELY AND CAREFULLY, BE SURE TO LEAVE THESE INSTRUCTIONS FOR THE LOCAL INSPECTORS USE.
ELECTRICAL INSTRUCTIONS BE SURE RANGE IS PROPERLY INSTALLED AND GROUNDED BY A QUALIFIED TECHNICIAN ELECTRICAL REQUIREMENTS TO THE RANGE This range requires a single phase, 3 wire 120-240 vomit A.C, Electric Circuit with a 60 hertz frequency. Voltage and wattage rating is given on the number plate, located directly under the main top cooking surface. Installation must conform with local codes, or, in absence of local codes, with the National Electric Code, EXPANSION No.
INSTALLATION INSTRUCTIONS NATL-TIP BRACKET INSTALLATION NOTICE: Parts supplied are for wood, concrete or ceramic tile floors. The plastic anchors are for mounting to concrete or ceramic tile floors. Contact a qualified floor covering installer for the best procedure for drilling mounting holes through your type of floor covering. Remove parts from package. TOOLS NEEDED: Check that all parts were included.
BEFORE YOU CALL FOR SERVICE Before you call for service, review this list. Ii may save you time and expense. This list includes comment occurrences that are not the result of defective workmanship or materials in the appliance. Find your problem here OVEN AND SURFACE UNITS WILL NOT WORK AT ALL. Possible cause The plug on the range is not properly plugged into the electrical outlet.
Dear Homemaker: Your range will give you years of satisfactory service and pleasure when properly cared for and used. Producing an efficient range that conserves energy requires a considerable investment of time, effort and money. Your range is engineered to surpass all performance and safety requirements. However, safety is also YOUR responsibility through proper use and care, With this in mind, it is important that you read this booklet.