Use & Care Manual and Installation Instructions Electric Range Table of Contents Important Safety Instructions - Inside Front Cover Use and Care Surface Cooking 1 Ceramic Glass Cooktop 2 Using your oven 3-5 Changing the Light Bulb (some models) 4 Using your Broiler 6 Clock and Time (some models) 6-7 Outlet Circuit Breaker 7 Appliance Outlet (some models) 7 Care and Cleaning 7-10 Installation Backguard Installation 11-12 Maximum and Minimum Clearances 13 Electrical Installation 14 An
IMPORTANT SAFETY INSTRUCTIONS WARNING: READ ALL INSTRUCTIONS BEFORE USING THIS APPLIANCE WARNING: If the information in this manual is not followed exactly, a fire, electrical shock or explosion may result causing property damages, personal injury or death. Use this appliance only for its intended use as described in this guide. WARNING: Do not store or use gasoline or other flammable vapors and liquids in the vicinity of this or any other appliance.
IMPORTANT SAFETY INSTRUCTIONS 8. GREASE IS FLAMMABLE AND SHOULD BE HANDLED CAREFULLY. Avoid letting grease deposits collect around the range or in vent fans. Let quantities of hot fat, a pan of deep fat for example, cool before attempting to move it. If a grease fire occurs in a pan, put out the flame by placing a lid on the pan. DO NOT throw water on a grease fire. Use a dry chemical or foam type fire extinguisher.
SURFACE COOKING Surface Cooking Controls Each of the range burners has an ”Infinite Control” switch that allows you to choose just the right temperature for cooking any food. The switches can be set at the numbers or any point in between. To operate, push the knob in and turn to the desired setting. Set most cooking operations on a higher setting; then turn to a lower setting to finish cooking. A glowing red element indicates that heat and energy are being wasted.
CERAMIC GLASS COOKTOP A ceramic glass cooktop uses radiant surface elements. The cookware should be sized to the burner outline on the glass surface as much as possible. Although most of the heat is directed up into the defined area, the number of the burners used and the size of the cookware may lead to the whole surface of the top becoming hot enough to cause burns if touched.
OVEN VENT The oven is vented through one of the rear surface elements on coil element ranges. When the range is on, warm air is released through the element. This venting is necessary for proper air circulation in the oven and for good baking results. Do not block vent with aluminum foil or other material. Utensils can be placed on the surface element when the oven is on, but they may become hot. The vent on the ceramic glass cook-top range is located on the vertical surface behind the glass top surface.
OVEN COOKING USING ALUMINUM FOIL for baking Use aluminum foil to catch spillovers from pies and casseroles: Models with two oven racks: Pace the foil on the oven rack below the rack with the food. Turn up foil edges and make sure foil is about 1 inch (3 cm.) larger all around than the dish holding the food. Models with one oven rack: Place the foil directly under the dish holding the food. Turn up foil edges and make sure foil is about 1 inch (3 cm.) larger all around than the dish holding the food.
OVEN RACKS (Some models may come with only one oven rack.) The racks are designed with stop locks. When placed correctly on the rack supports, they will stop before coming completely out of the oven and will not tilt when you are removing food from them or placing food on them. To remove the racks from the oven, pull them toward you, tilt front end upward and pull them out. DO NOT USE THE OVEN COMPARTMENT FOR A STORAGE AREA. ITEMS STORED IN THE OVEN CAN IGNITE.
BROILING Broiling is a fast method for cooking tender cuts of meats, poultry, ham and fish by direct heat from a broiler element. Foods are placed under the upper heating element of the oven. Broiling results and timing depend upon the distance between the food and the broiler element. Broil with the door closed, for a cleaner, cooler kitchen. The smoke from broiling is consumed as it is drawn oven a rod-type broiler element. After broiling, the dial must be turned to ”OFF” before baking.
TO SET TIMER continued When 1 minute is remaining on the timer, a one second tone will sound. When the timer reaches zero (0:00), there will be three tones 1 second apart, then a tone every 10 seconds for 10 min. NOTE: The colon flashes when the timer is active whether the timer or the time of day is displayed. To display the time of day when in the timer mode, depress the ”CLOCK” button.
CARE AND CLEANING PORCELAIN ENAMEL COOKTOP AND BODY PIECES If there is a spill-over when the range is warm, wipe up with a dry cloth or paper towel. After the range is cool, finish cleaning with warm water and detergent, or wash with a solution of baking soda dissolved in warm water. Rinse with clear warm water and dry with a soft cloth. CERAMIC COOKTOP Put a few drops of glass-ceramic cooktop cleaner directly on the cooktop.
CARE AND CLEANING OVEN AND SURFACE HEATING ELEMENTS Both the oven and the surface elements clean themselves when they are turned on. Food spilled on a hot element will burn off. TO REMOVE SURFACE ELEMENTS: Surface elements can be removed to make cleaning easier. To avoid the possibility of a burn or electric shock, always be certain that the controls for all surface units are at the ”OFF” position and all coils are cool before attempting to lift or remove a surface unit.
CARE AND CLEANING CLEANING BROILER PAN (Some Models) Clean using hot, sudsy water, a mild abrasive cleaner, a soap filled abrasive pad or commercial oven cleaner, following the manufacturer’s instructions. LIFT-UP COOKTOP To make cleaning easier, the entire cooktop may be lifted up and supported in the up position. WARNING: BE SURE ALL SURFACE UNITS ARE TURNED OFF BEFORE RAISING THE COOKTOP. The recessed area beneath the lift-up cooktop may be wiped clean with a hot soapy rag.
INSTALLATION INSTRUCTIONS PORCELAIN BACKGUARD INSTALLATION (Illustration A) 1. Move range main top forward about two inches and position backguard near the backguard support. 2. If backguard has a clock, connect plug (F) from backguard to plug (F) from back of range and push plug assembly down through square-out in the backguard support. 3. Attach backguard to backguard support with (4) (A) wing nuts. 4. On the front of the backguard, two nuts are provided on the threaded hinge pins.
INSTALLATION INSTRUCTIONS BACKGUARD INSTALLATION B C A #8-18 x 5/8” long screw #10-24 wing nut D #10 x 1” long screw #10-24 x 3/8” machine screw E F #10-24 hex keps nut #10 x 1/2” long screw E VENT RAIL VENT RAIL F F C ILLUSTRATION B ILLUSTRATION C B A D F B F ILLUSTRATION A D 12 ILLUSTRATION D
INSTALLATION INSTRUCTIONS BE SURE RANGE IS PROPERLY INSTALLED AND GROUNDED BY A QUALIFIED TECHNICIAN. IMPORTANT NOTE TO INSTALLER BEFORE YOU BEGIN– DISCONNECT THE POWER TO THE RANGE AT THE MAIN CIRCUIT BREAKER AND READ THESE INSTRUCTIONS COMPLETELY AND CAREFULLY. BE SURE TO LEAVE THESE INSTRUCTIONS FOR THE LOCAL INSPECTORS USE.
INSTALLATION INSTRUCTIONS BE SURE RANGE IS PROPERLY INSTALLED AND GROUNDED BY A QUALIFIED TECHNICIAN ELECTRICAL REQUIREMENTS TO THE RANGE This range requires a single phase, 3-wire 120-240 volt A.C. Electrical Circuit with a 60 Hertz frequency. Voltage and wattage rating is given on the number plate, located directly under the main top cooking surface or beneath the storage drawer assembly on ranges with Ceramic Tops. See Page 10 for storage drawer removal.
INSTALLATION INSTRUCTIONS ANTI-TIP BRACKET INSTALLATION WARNING The anti-tip bracket is installed to prevent the range from tipping forward as the result of excessive downward pressure on the open end of the oven door. All ranges are required to have an approved anti-tip bracket installed. The anti-tip bracket is packed in the oven section of the range. If you did not receive an anti-tip bracket with you purchase, call 1-800-858-5844. A child or adult can tip the range and be killed.
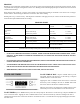
BEFORE YOU CALL FOR SERVICE Before you call for service, review this list. It may save you time and expense. This list includes common occurrences that are not the result of defective workmanship or materials in the appliance. Find your problem here Possible cause OVEN OR SURFACE UNITS WILL NOT NOT WORK AT ALL. The plug on the range is not properly plugged into the electrical Outlet.
Dear Consumer: Your range will give you years of satisfaction service and pleasure when properly cared for and used. Producing an efficient range that conserves energy requires a considerable investment of time, effort & money. Your range is engineered to surpass all performance and safety requirements. However, safety is also YOUR responsibility through proper use and care. With this in mind, it is important that you read this booklet.