
Installation instructions


Installation Instructions
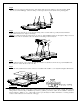
PP-FCMA
Step 1
Carefully remove a 24”(610mm)x48”(1120mm) or two 24”(610mm)x24”(610mm) suspended ceiling tiles.
Step 2
Install the four (4) each ¼”x3” eye bolts securely into the permanent ceiling structure with a minimum separation of
18”x18” square pattern between eye bolts. Cut four (4) required lengths of the safety suspension support wire supplied.
Run one end of the wire through the eye bolt twist minimum eight (8) times and leave a 6” tang for each eye bolt.
Step 3
Install the PP-FCMA plate securely into the “T” bar frame work with the mounting studs face down and the dual knock
out for electrical box located at the rear of the projector position. Install the additional 24” “T” bar main run cross lots
if needed to support the adapter plate and replacement 24”x 24” ceiling tile.
9530-301-001-01