
Use and Care Manual


INSTALLATION INSTRUCTIONS
CHECK SURFACE BURNER IGNITION
Simultaneously push in and turn a top burner knob to the LITE or START position. You will hear a clicking
sound indicating the proper operation of the spark module. Once the air has been purged from the supply
lines, the burner will light. Rotate the knob out of the LITE or START position after the burner lights. Try
each burner in succession until all burners have been checked.
CHECK OVEN BURNER IGNITION
If the range has a “PILOT” or “LITE” setting on the oven thermostat control use the following
method for testing the oven burner ignition.
Push and turn the oven control counterclockwise to the “PILOT” or “LITE” position. Once in the PILOT or
LITE position, push in on the knob as far as possible and hold for 10 seconds. After the 10 second elapsed pe-
riod, release the oven control knob. See note below. The pilot flame will remain lit. Select the cooking tem-
perature by pushing and turning the oven control knob to the desired temperature. Open the oven door and
observe that the burner flame is lit by looking through the observation hole in the front center of the oven bot-
tom. When the selected temperature is reached the oven burner flame will reduce in size and hold the oven
temperature steady at the desired setting.
NOTE: THE FIRST TIME YOUR OVEN IS USED IT MAY BE NECESSARY TO HOLD IN ON THE OVEN
CONTROL KNOB FOR AS MUCH AS 60 SEC. TO ALLOW GAS TO FLOW THROUGH THE OVEN SYS-
TEM.
If the range does not have a “PILOT” or “LITE” setting or the word pilot on the oven thermostat
control use
Method B.
Turn the oven control knob to a setting above 300 F. After 30-60 seconds the oven burner will ignite and burn
until the set temperature is reached. If your range employs an igniter for oven ignition, the burner will cycle
off and on during the cooking process.
24
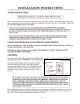
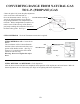
TOP BURNER LOW FLAME ADJUSTMENT
Each top burner can be adjusted separately to allow for var-
ied low temperature setting across the top burner cooking
section. To adjust the low setting:
1. Remove the top burner control knob for the burner that
you wish to adjust.
2. With a small straight blade screwdriver access the low
setting adjustment screw located in the center of the
stem of the burner control knob.
3. With the burner turned on to the low setting rotate the
screw to adjust the burner down to the desired setting.
When adjusted to the minimum flame the burner should
maintain a constant blue flame across all of the top burner
ports. This procedure can be repeated for each top burner if
desired.
LOW SETTING ADJUSTMENT SCREW
CONTROL PANEL