
Operation Manual


9
- If there is no channel (besides the priority channel) in the list the scanning is
not be able to be set on.
- Press A/F(6) button 3 seconds again to stop the scan, the radio go back to
the previous channel before scanning started.
Note: During the scanning, if P (7) is pressed, it will stop scanning and go to
the priority channel.
6) PRIORITY EMERGENCY CHANNEL
“CH 19” is emergency channel for this operating mode.
- Press P (7) button to go to the priority channel. The display will show “
” icon.
- Press P (7) again to quit the emergency channel and go back to the operat-
ing channel before entering into priority channel.
- Press s (5) / t (8) button, it will go the previous or next channel to the priority
channel.
NOTE: When operating in emergency channel, the scan function would be
disable.
7) MONITOR FUNCTION
This function is used to setting the speaker level.
- Press and hold the SQ (4) button for deactivate the squelch, you can hear
the noise from speaker.
- Turn Volume knob to the suitable level.
- the Monitor function is active once you release the SQ (4) button.
8) RECEIVING AND TRANSMITTING
8.1 TRANSMITTING MODE
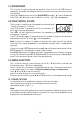
- Pressing PTT (2) button to transmit. The LED lights up red and icon is displayed.
one bar = 0.5-1 watt = low power
two bars = 2-3 watt = high power AM
four bars = > 4 watt = high power FM
8.2 RECEIVING MODE
The LED lights up green in receiving mode. You can ear the signal on the
speaker.
and icons are displayed.
9) AM/FM MODE SETTING
There are two operating mode, AM and FM.
- Press A/F (6) button to alternate AM or FM mode. “AM” or “FM” icon is dis-
played.
10) TRANSMITTING POWER
- Press s (8) 3 seconds (or more) to select transmitting output power.
FM: L = 1W, H = 4W / AM: L = 1W, H = 3W.
Every long press alternate the power level. “H” or “L” is displayed.