Studio 192 and Studio 192 Mobile USB 3.0 Audio Interface and Studio Command Center Owner’s Manual ® www.presonus.
Table of Contents 4.4 Adding Effects — 22 4.4.1 Editing Effects and Effects Presets — 23 1 Overview — 1 4.4.2 Reverb and its Parameters — 23 1.1 Introduction — 1 4.4.3 Delay and its Parameters — 24 1.2 Studio 192 and Studio 192 Mobile Hardware Features — 1 4.4.4 Reverb Effects Presets Library — 25 4.4.5 Delay Effects Preset Library — 25 1.3 UC Surface Features — 2 4.4.6 Digital Effects Types — 26 1.4 Studio One Artist Features — 2 4.5 Main Options — 26 1.
1 1.1 Studio 192 and Studio 192 Mobile Owner’s Manual Overview Introduction 1 Overview 1.1 Introduction Thank you for purchasing the PreSonus Studio 192-series USB 3.0 Audio Interface and Studio Command Center. PreSonus Audio Electronics designed the Studio 192-series interfaces utilizing high-grade components to ensure optimum performance that will last a lifetime. Loaded with high-headroom, Class A, digitally controlled XMAX™ microphone preamplifiers; a 26x32 or 22x26 USB 3.
1 1.3 1.3 Overview UC Surface Features Studio 192 and Studio 192 Mobile Owner’s Manual UC Surface Features UC Surface is a powerful monitor-mixing application that allows you to add professional dynamics processing, EQ, and effects to your analog inputs; create zero-latency monitor mixes; and control talkback and monitoring functions.
1 1.5 1.5 Studio 192 and Studio 192 Mobile Owner’s Manual Overview What is in the Box What is in the Box You Studio 192-series package contains the following: •• One PreSonus Studio 192-series USB 3.0 Audio Interface and Studio Command Center •• PreSonus Studio 192-series Quick Start Guide •• Studio One Key Commands Guide •• 6’ (1.8m) USB 3.
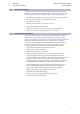
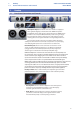
2 2.1 Hookup Front Panel Connections and Controls 2 Hookup 2.1 Front Panel Connections and Controls Studio 192 and Studio 192 Mobile Owner’s Manual Microphone inputs. Your Studio 192-series interface is equipped with eight/two digitally controlled PreSonus XMAX microphone preamplifiers for use with all types of microphones. The XMAX design provides a Class A input buffer, followed by a dual-servo gain stage.
2 2.1 Hookup Front Panel Connections and Controls Studio 192 and Studio 192 Mobile Owner’s Manual •• 48V: The Studio 192-series interfaces provide 48V phantom power for each microphone preamp. This feature can be individually enabled for each channel, using this button. When 48V is active, the blue LED at the top of that channel’s meters will illuminate. WARNING: Phantom power is only required for condenser microphones and can severely damage dynamic mics, especially ribbon mics.
2 2.2 Hookup Back Panel Connections Studio 192 and Studio 192 Mobile Owner’s Manual Headphones Outputs. Your Studio 192-series interface provides two/one headphone outputs, each with its own level control. Each headphone output is provided with its own unique output stream to route audio directly from your DAW (Studio 192: playback streams 11-12 and 13-14, Studio 192 Mobile: playback streams 7-8). From UC Surface, any mix can be routed to either headphone output. Cue (Studio 192 Mobile).
2 2.2 Hookup Back Panel Connections Studio 192 and Studio 192 Mobile Owner’s Manual Line Output 1-8/4. The Studio 192-series interfaces have eight/four line balanced line outputs to route to external devices, such as headphone amps, signal processors, and additional monitors. Each output has an independent playback stream (playback streams 3-10/6). Main Outs. These are the main outputs for the Studio 192-series interface.
2 2.2 Studio 192 and Studio 192 Mobile Owner’s Manual Hookup Back Panel Connections ADAT – S/MUX In and Out. These are the ADAT – Dual S/MUX connections for your external digital devices. When recording or playing back at 44.1 or 48 kHz, each ADAT I/O will provide 8 of the 16 available channels consecutively, from left to right. When recording or playing back at 88.2 or 96 kHz, each connection will provide four of the available eight channels. These inputs and outputs do not function at 176.
2 2.3 2.3 Studio 192 and Studio 192 Mobile Owner’s Manual Hookup Connection Diagrams Connection Diagrams 2.3.1 Studio 192 Alt.
2 2.3 Studio 192 and Studio 192 Mobile Owner’s Manual Hookup Connection Diagrams 3.2.
3 3.1 3 Connecting to a Computer Installation for Windows Studio 192 and Studio 192 Mobile Owner’s Manual Connecting to a Computer Your Studio 192-series interface is a powerful USB 3.0 audio interface that is loaded with professional audio tools and flexible monitoring controls. Before connecting to a computer, please visit www.presonus.com/products/ Studio-192/techspecs to verify the latest system requirements.
3 3.3 Studio 192 and Studio 192 Mobile Connecting to a Computer Owner’s Manual UsingtheStudio192-seriesinterfaceswithPopularAudioApplications Apple Logic 1. Launch Logic. 2. Go to Logic | Preferences | Audio. 3. Click on the Devices Tab. 4. On the Core Audio tab, check Enabled. 5. Select PreSonus Studio 192 from the device menu. 6. You will be asked if you’d like to relaunch Logic. Click try (re)launch. 7. Your Studio 192 features custom I/O labels for faster workflow.
3 3.4 3.4 Studio 192 and Studio 192 Mobile Owner’s Manual Connecting to a Computer Controlling Studio 192-Series Mic Preamps from your DAW Controlling Studio 192-Series Mic Preamps from your DAW Studio 192-series microphone preamps can be controlled from the front panel, UC Surface, or Studio One.
4 3.4 4 UC Surface Monitor Control Software Controlling Studio 192-Series Mic Preamps from your DAW Studio 192 and Studio 192 Mobile Owner’s Manual UC Surface Monitor Control Software UC Surface is a powerful monitor control software that provides everything you need to create high-quality monitor mixes and more with your Studio 192-series interface, using all of the processing features of a StudioLive AI-series digital mixer. These monitoring functions are completely integrated inside Studio One.
4 4.1 4.1 UC Surface Monitor Control Software UC Surface Launch Window Studio 192 and Studio 192 Mobile Owner’s Manual UC Surface Launch Window Sample Rate. Changes the sample rate. You can set the sample rate to 44.1, 48, 88.2, or 96 kHz. A higher sample rate will increase the fidelity of the recording but will increase the file size and the amount of system resources necessary to process the audio. At 44.1 and 48 kHz, all DSP functions are available. At 88.2, 96, 176.
4 4.2 4.2 Studio 192 and Studio 192 Mobile Owner’s Manual UC Surface Monitor Control Software UC Surface Mix Controls UC Surface Mix Controls 4 5 3 6 1 2 1. Mix Select. The Mix Select buttons allow you to choose the mix you’d like to control (Auxes, Mains, FX). UC Surface provides a mix for each of the two effects buses. The returns for these effects are available in each mix to customize the amount of reverb and delay. 2. Copy Mix.
4 4.2 Studio 192 and Studio 192 Mobile Owner’s Manual UC Surface Monitor Control Software UC Surface Mix Controls 4.2.1 Channel Controls 1 2 3 1. Fat Channel Select. Opens the Fat Channel controls for the channel/mix. For Inputs 1-8/4 and 11/7-18/14, this microview displays an overview of the EQ curve you set in the Fat Channel. See Sections 4.2 for more information about the Fat Channel section and its functions. 4 5 2. Solo button. Turns soloing on and off. 6 4. Pan controls.
4 4.3 4.3 Studio 192 and Studio 192 Mobile Owner’s Manual UC Surface Monitor Control Software Dynamics Processing and EQ Dynamics Processing and EQ Every analog input on your Studio 192-series interface is equipped with Fat Channel dynamics processing and filtering. Fat Channel processing is also available on the ADAT 1 input channels at 44.1 and 48 kHz. The Fat Channel’s processing section consists of five parts: High Pass filter, Noise Gate, Compressor, Limiter, and parametric EQ.
4 4.3 Studio 192 and Studio 192 Mobile Owner’s Manual UC Surface Monitor Control Software Dynamics Processing and EQ 6. Gate Release. The release sets the rate at which the gate for the selected channel closes. Gate-release times should typically be set so that the natural decay of the instrument or vocal being gated is not affected. Shorter release times help to clean up the noise in a signal but may cause “chattering“ with percussive instruments.
4 4.3 Studio 192 and Studio 192 Mobile Owner’s Manual UC Surface Monitor Control Software Dynamics Processing and EQ 6. Compressor Release. Sets the compressor release for the selected channel or output bus. This sets the length of time the compressor takes to return the gain reduction back to zero (no gain reduction) after crossing below the compression threshold. Release can be set from 40 to 1,000 milliseconds.
4 4.3 Studio 192 and Studio 192 Mobile Owner’s Manual UC Surface Monitor Control Software Dynamics Processing and EQ -- EQ Frequency. Adjusts the center frequency of each band. -- EQ Gain. Sets level of the center frequency from -15 to +15 dB. -- Q. Sets the Q for the each band. The Q is the ratio of the center frequency to the bandwidth. When the center frequency is constant, the bandwidth is inversely proportional to the Q, so as you raise the Q, you narrow the bandwidth. 3. High Pass Filter.
4 4.4 UC Surface Monitor Control Software Adding Effects Studio 192 and Studio 192 Mobile Owner’s Manual 9. Copy/Paste. To copy the Fat Channel settings to another channel, simply click on Copy, select the channel you’d like to load the settings to from the Channel Select menu, and click Paste. 10. Fat Channel A/B. UC Surface lets you create two complete Fat Channel settings and compare the two.
4 4.4 UC Surface Monitor Control Software Adding Effects Studio 192 and Studio 192 Mobile Owner’s Manual 4.4.1 Editing Effects and Effects Presets To access the effects library for each processor and make adjustments to effects parameters, click on the Edit button above the Flex fader for your effects mix. You will see the effects editor in the Fat Channel area above the mix. From here you can change the effects type, adjust parameters, and load presets. Effects Presets.
4 4.4 UC Surface Monitor Control Software Adding Effects Studio 192 and Studio 192 Mobile Owner’s Manual Decay. Decay is the time (in seconds) required for the reflections (reverberation) to die away. In most modern music production, reverb decay times of between one and three seconds are prevalent. A reverb setting with strong early reflections and a quick decay are a great way to create a stereo effect from a mono source. Predelay.
4 4.4 Studio 192 and Studio 192 Mobile Owner’s Manual UC Surface Monitor Control Software Adding Effects 4.4.4 Reverb Effects Presets Library REVERB EFFECTS POS. TYPE R1 AMBIENCE POS.
4 4.5 Studio 192 and Studio 192 Mobile Owner’s Manual UC Surface Monitor Control Software Main Options 4.4.6 Digital Effects Types UC Surface contains 13 different effects types with which you can create custom presets or redesign the included library of presets. NAME POS PARAM (L1) PARAM (L2) PARAM (L2) PARAM (L2) Ambience T1 Reverb Decay (s) Default: 0.69 Range: 0.29 – 1.09 Small Room T2 Reverb Bright Room T3 Small Hall Decay (s) Default: 0.79 Range: 0.39 ~ 0.
4 4.6 4.6 UC Surface Monitor Control Software Quick Controls: Talkback, Scenes, and More Studio 192 and Studio 192 Mobile Owner’s Manual Quick Controls: Talkback, Scenes, and More The Quick Controls panel provides access to the following controls: •• Talkback routing, on/off •• Scene management •• Quick Scenes •• Mute Groups •• FXA and FXB Mute •• FXB Tap tempo •• Headphone Mix Select •• S/PDIF Source Select You will find the Show/Hide button for the Quick Controls panel at the far right of the mixer.
4 4.6 UC Surface Monitor Control Software Quick Controls: Talkback, Scenes, and More Studio 192 and Studio 192 Mobile Owner’s Manual 4.6.2 Quick Scenes, Mute Groups, and Scene Library Clicking or tapping on the Scenes/Mutes button will open the mute groups and Scene management for UC Surface. From here your can create and enable mute groups and Quick Scenes and access the scene library. Mute groups. A mute group allows you to mute and unmute multiple channels and buses with the press of a single button.
4 4.6 UC Surface Monitor Control Software Quick Controls: Talkback, Scenes, and More Studio 192 and Studio 192 Mobile Owner’s Manual •• Undo. Reverts the mixer to the last recalled scene state. •• Quick Scenes 1-8. Loads the stored Quick Scene. This will override all the current settings on the mixer based on the Scene filters (see next portion for more information on Scene filters). Scene Library UC Surface allows you to create and store a library of scenes. A scene is like a snapshot of your mix.
4 4.7 4.7 UC Surface Monitor Control Software The Settings Page Studio 192 and Studio 192 Mobile Owner’s Manual The Settings Page The Settings page allows you to configure your Studio 192-series interface. To open the Settings page, click on the Settings button in the upper right-hand corner 4.7.1 Device Settings Tab: System Settings The System Settings area allows you to customize the following parameters on UC Surface: Mixer Bypass. Bypasses UC Surface mixer and routing.
5 5.1 5 Studio One Artist Quick Start Installation and Authorization Studio 192 and Studio 192 Mobile Owner’s Manual Studio One Artist Quick Start All PreSonus professional recording products come with Studio One Artist recording and production software. Whether you are about to record your first album or your fiftieth, Studio One Artist provides you with all of the tools necessary to capture and mix a great performance.
5 5.2 Studio One Artist Quick Start Setting Up Studio One Studio 192 and Studio 192 Mobile Owner’s Manual •• Windows users: Launch the Studio One Artist installer and follow the onscreen instructions. •• Mac users: Drag the Studio One Artist application into the Applications folder on your Mac hard drive. Authorizing Studio One When Studio One is launched for the first time on your computer, it will communicate with your My PreSonus account and verify your registration.
5 5.2 Studio One Artist Quick Start Setting Up Studio One Studio 192 and Studio 192 Mobile Owner’s Manual 5.2.1 Configuring Audio Devices 1. In the middle of the Start page, you will see the Setup area. Studio One Artist automatically scans your system for all available drivers and selects a driver. By default, it will choose a PreSonus driver if one is available. Power User Tip: If your device has zero-latency monitoring functionality from within Studio One, you will see the Z-mix icon.
5 5.2 Studio One Artist Quick Start Setting Up Studio One Studio 192 and Studio 192 Mobile Owner’s Manual 5.2.2 Configuring MIDI Devices From the External Devices window in Studio One Artist, you can configure your MIDI keyboard controller, sound modules, and control surfaces. This section will guide you through setting up your MIDI keyboard controller and sound modules. Please consult the Reference Manual located within Studio One for complete setup instructions for other MIDI devices.
5 5.2 Studio One Artist Quick Start Setting Up Studio One Studio 192 and Studio 192 Mobile Owner’s Manual 2. From the menu on the left, select your MIDI controller from the list of manufacturers and models. If you do not see your MIDI controller listed, select New Keyboard. At this point, you can customize the name of your keyboard by entering the manufacturer and device names. 3. You must specify which MIDI channels will be used to communicate with this keyboard.
5 5.2 Studio One Artist Quick Start Setting Up Studio One Studio 192 and Studio 192 Mobile Owner’s Manual 1. In the External Devices window, click the Add button. 2. Select your device in the menu on the left. If your device is not listed, select New Instrument. At this point you can customize the name of your keyboard by entering the manufacturer and device names. 3. Specify which MIDI channels will be used to communicate with this sound module. For most purposes, you should select all MIDI channels.
5 5.3 5.3 Studio One Artist Quick Start Creating a New Song Studio 192 and Studio 192 Mobile Owner’s Manual Creating a New Song Now that you’ve configured your audio and MIDI devices, let’s create a new Song. We’ll start by setting up your default audio I/O. 1. From the Start page, select Create a New Song. 2. In the New Song window, name your Song and choose the directory in which you’d like it saved.
5 5.3 Studio One Artist Quick Start Creating a New Song Studio 192 and Studio 192 Mobile Owner’s Manual 2. Click on the Audio I/O Setup tab. 3. From the Inputs tab, you can enable any or all of the inputs on your PreSonus Studio 192 audio interface that you’d like to have available. We recommend that you create a mono input for each of the inputs on your interface. If you plan on recording in stereo, you should also create a few stereo inputs.
5 5.3 Studio One Artist Quick Start Creating a New Song Studio 192 and Studio 192 Mobile Owner’s Manual Setting Up Z-Mix. Your PreSonus Studio 192-series interface provides zero-latency monitoring through Studio One. To enable zero-latency monitoring, you must enable the outputs for the mixes to be Cue Mix outputs. From the Outputs tab, click on the Cue Mix box next to any output you’d like to use to send a zero-latency monitor mix. For more information on Z-Mix, see Section 5.4. 5.3.
5 5.3 Studio 192 and Studio 192 Mobile Owner’s Manual Studio One Artist Quick Start Creating a New Song Custom Track Color Rec Track Mute Arm Name Solo Monitor Meter ST/Mono Audio Input Source Select Note: MIDI tracks are nearly identical to Audio tracks. The Input Source list for MIDI tracks lists available external MIDI devices as well as any virtual instruments that have been added to the Song. 5.3.3 Recording an Audio Track 1.
5 5.3 Studio One Artist Quick Start Creating a New Song 5.3.4 Studio 192 and Studio 192 Mobile Owner’s Manual Adding Virtual Instruments and Effects You can add plug-ins and instruments to your Song by dragging-and-dropping them from the browser. You can also drag an effect or group of effects from one channel to another, drag in customized effects chains, and instantly load your favorite virtual-instrument preset without ever scrolling through a menu. Opening the browser.
5 5.4 Studio One Artist Quick Start Monitor Mixing with Z-Mix Studio 192 and Studio 192 Mobile Owner’s Manual Drag-and-drop audio and MIDI files. Audio and MIDI files can be quickly located, auditioned, and imported into your Song by dragging them from the file browser into the Arrange view. If you drag the file to an empty space, a new track will be created with that file placed at the position to which you dragged it.
5 5.4 Studio One Artist Quick Start Monitor Mixing with Z-Mix Studio 192 and Studio 192 Mobile Owner’s Manual 5.4.1 Z-Mix Functions Once you have created a cue mix output, you will notice a special Send object in the channels of the Console. This Send object is called a Z-Mix object. In the Small Console view, Z-Mix objects appear in the far left column of the extended channel. In the Large Console view, Z-Mix objects appear below the Send device rack on each channel. 1 2 34 5 1. Activate Button.
5 5.4 Studio One Artist Quick Start Monitor Mixing with Z-Mix Studio 192 and Studio 192 Mobile Owner’s Manual 3. Pan Control. This sets the pan position for the channel in the Z-Mix outputs. Like volume, panning is identical to the main mix by default. 4. Zero Latency switch. Enables zero-latency monitoring for your PreSonus audio interface’s Inputs. Z-Mixes are normally used in a recording situation in which one or more live inputs need to be monitored.
5 5.4 Studio One Artist Quick Start Monitor Mixing with Z-Mix Studio 192 and Studio 192 Mobile Owner’s Manual Click on the Apply DSP to Input Signal button in the upper left hand corner of the Fat Channel plug-in to record the Fat Channel settings with your audio. To listen your recordings through the same Fat Channel processing as the audio you are monitoring, simply drag the DSP Fat Channel plugin down to the channel insert to load an instance of the native Fat Channel plugin.
5 Studio One Artist Quick Start 5.4.2 Punching In Studio 192 and Studio 192 Mobile Owner’s Manual You can choose to hide the preamp controls for your Studio 192-series interface from the Console Options menu. Simply uncheck the box next to “Show audio device controls.” Note: Because preamp control for the DigiMax DP88 is bidirectional, both the ADAT input and the ADAT output must be connected in order for Studio One to display its preamp controls. 5.4.
5 Studio One Artist Quick Start 5.4.2 Punching In Studio 192 and Studio 192 Mobile Owner’s Manual 3. Dial in the Fat Channel sound you would like to use while monitoring, simply drag your DSP plugin down to the insert on the same channel. 4. After you have recorded your audio, set the punch in and out points in the timeline. 5. Enable the Autopunch button the left of the Metronome settings in the transport. 6. Record Arm your track, making sure to disable input monitoring.
6 6.1 Studio 192 and Studio 192 Mobile Owner’s Manual Technical Information Specifications 6 Technical Information 6.1 Specifications Microphone Preamp (XLR Balanced) Type XLR Female (via Combo), Balanced Remote Maximum Input level (min. gain, 1 kHz@0.5% THD+N) +12 dBu, ±0.5 dB Gain Control Range 60 dB, ±1 dB Frequency Response (A-D) 10 Hz to 40 kHz, ±0.2 dB Dynamic Range (min. gain, A-wtd) > 110 dB Dynamic Range (mid. Gain, unwtd) > 105 dB THD+N (min. gain, A-wtd) < 0.
6 6.1 Studio 192 and Studio 192 Mobile Owner’s Manual Technical Information Specifications Headphone Outputs Type ¼” TRS Female, Stereo, Unbalanced Maximum Output Level 150 mW/channel @ 60Ω Frequency Response 20 Hz to 20 kHz, ±0.3 dB Dynamic Range (A-wtd) > 103 dB THD+N (1 kHz, -1 dBFS, unwtd) < 0.
7 7.1 7 Studio 192 and Studio 192 Mobile Owner’s Manual Warranty Information How Consumer Law Relates To This Warranty Warranty Information PreSonus’ warranty obligations for this hardware product are limited to the terms set forth below: 7.1 How Consumer Law Relates To This Warranty THIS WARRANTY GIVES YOU SPECIFIC LEGAL RIGHTS, AND YOU MAY HAVE OTHER RIGHTS THAT VARY FROM STATE TO STATE (OR BY COUNTRY OR PROVINCE).
7 7.1 Warranty Information How Consumer Law Relates To This Warranty Studio 192 and Studio 192 Mobile Owner’s Manual Who This Warranty Protects This Warranty protects only the original retail purchaser of the product (products that have transferable warranties are excluded from this provision provided the customer and the product are registered with PreSonus) How Long This Warranty Lasts A 1-Year Limited Warranty begins on the original date of purchase from the retail purchaser.
7 7.1 Warranty Information How Consumer Law Relates To This Warranty Studio 192 and Studio 192 Mobile Owner’s Manual Exclusion of Damages PRESONUS’S LIABILITY FOR ANY DEFECTIVE PRODUCT IS LIMITED TO THE REPAIR OR REPLACEMENT OF THE PRODUCT, AT PRESONUS’S SOLE OPTION. IF PRESONUS ELECTS TO REPLACE THE PRODUCT, THE REPLACEMENT MAY BE A RECONDITIONED UNIT.
Dinner is Served Added bonus: PreSonus’ previously Top Secret recipe for… Chicken and Andouille Gumbo Ingredients: •• •• •• •• •• •• •• •• •• •• •• •• •• •• •• •• 1 C All-Purpose flour ¾ C Vegetable Oil 1 large onion (diced) 1 small onion (quartered) 6 celery stalks (diced) 1 large green bell pepper (diced) 3 cloves garlic (2 minced, 1 whole) 1 lb link Andouille sausage 4 Chicken leg quarters 4 qt water 4 bay leaves 1 tsp thyme 1 tsp Old Bay seasoning 1-2 C frozen okra, sliced ¼ C fresh parsley, minced 6-
Studio 192 and Studio 192 Mobile USB 3.0 Audio Interface and Studio Command Center Owner’s Manual ® 18011 Grand Bay Ct. • Baton Rouge, Louisiana 70809 USA• 1-225-216-7887 www.presonus.