
User Manual


2 Getting Started
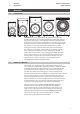
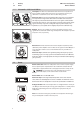
2.2 Level-Setting Procedure: AIR15s and AIR18s
AIR-Series Loudspeakers
Owner’s Manual
4
2.2 Level-Setting Procedure: AIR15s and AIR18s
1. With the power switch in the Off position, connect the IEC plug
to the IEC socket connection on the back of each loudspeaker
and plug it into a grounded AC outlet or surge protector.
2. Turn the level knobs on your full-range loudspeakers
fully counterclockwise to the lowest position.
3. Turn the Output level knob on your AIR-series subwoofer counterclockwise to the
lowest position.
4. Connect your line-level source (e.g., a StudioLive mixer) to the Line
inputs. This is a combo jack that accepts a balanced ¼” TRS or XLR plug.
If you are connecting a stereo source, the left side should be connected
to Input 1 and the right side should be connected to Input 2.
5. Connect Outputs 1 and 2 of your AIR-series subwoofer to the line
inputs of the left and right full-range loudspeakers respectively.
6. Power on your line-level source.
7. Power on your AIR-series subwoofer.
8. Power on your full-range loudspeakers.
9. Turn the line level knob on your full-range loudspeakers to the 12 o’clock position.
10. Turn the Master Volume knob on your AIR-series
subwoofer to the 12 o’clock position.
11. With audio playing from your line-level source, turn the line level knob on your
full-range loudspeakers until you have achieved a comfortable listening volume.
Power User Tip: If more high-frequency output level is required, turn the Line level
knob clockwise on your full-range loudspeakers. In most cases, the level should
be set the same on both loudspeakers. Adjust the Output level control on your
AIR-series subwoofer to balance the low-frequency content level to taste.
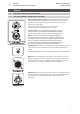
-80 -60 -40 -20 0 10
DIRECT OUT
MIX OUT
M
I
C
L
I
N
E
-80dB