
User Manual


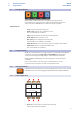
Table Of Contents
- 1 Overview
- 1.1 Introduction
- 1.2 Product Registration
- 1.3 What’s in the box
- 1.4 What’s in your MyPreSonus account
- 1.5 Companion PreSonus Products
- 1.6 Firmware Updates
- 2 Standard Controller Mode
- 2.1 Setup Mode
- 2.2 Pads
- 2.2.1 RGB Colors
- 2.2.2 Triggering Notes
- 2.2.3 Plus and Minus Pads
- 2.3 Touch Strip
- 2.4 A-H Buttons
- 2.5 Knobs 1-8
- 2.6 Navigation Buttons
- 2.7 Transport Buttons
- 2.8 Screen Controls
- 2.8.1 Instrument Mode
- 2.8.2 Song Mode
- 2.8.3 Editor Modes
- 2.8.4 User Mode
- 3 Advanced Studio One Integration
- 3.1 Controls
- 3.1.1 Pad Controllers
- 3.1.2 Touch Strip
- 3.1.3 A-H Buttons
- 3.1.4 Encoders
- 3.1.5 Navigation Buttons
- 3.1.6 Transport Buttons
- 3.1.7 Global Controls
- 3.2 Screen Controls
- 3.2.1 Instrument Mode
- 3.2.2 Song Mode
- 3.2.3 Editor Modes
- 3.2.4 User Mode
- 4 Advanced Ableton Live Integration
- 4.1 Control Functions
- 4.1.1 RGB Colors
- 4.1.2 Triggering Notes or Clips
- 4.1.3 Plus and Minus Pads
- 4.1.4 Touch Strip
- 4.1.5 A-H Buttons
- 4.1.6 Knobs 1-8
- 4.1.7 Navigation Buttons
- 4.1.8 Transport Buttons
- 4.2 Screen Controls
- 4.2.1 Instrument Mode
- 4.2.2 Song Mode
- 4.2.3 Editor Mode
- 4.2.4 User Mode
- 5 Studio One Artist Quick Start
- 5.1 Installation and Authorization
- 5.2 Setting Up Studio One
- 5.2.1 Configuring Audio Devices
- 5.2.2 Configuring MIDI Devices
- 5.3 Creating a New Song
- 5.3.1 Configuring Your Audio I/O
- 5.3.2 Creating Audio and Instrument Tracks
- 5.3.3 Recording an Audio Track
- 5.3.4 Adding Virtual Instruments and Effects

1
1 Overview
1.1 Introduction
ATOM SQ
Owner’s Manual
1 Overview
1.1 Introduction
Thank you for purchasing the PreSonus® ATOM SQ hybrid MIDI keyboard / pad
production and performance controller. ATOM SQ was designed as a versatile
and expressive MIDI pad controller for contemporary music production. Its
unique design is optimized for both classic TR-style 16-step beat sequencing and
drum pattern editing in Studio One or playing instruments and launching clips
in Ableton Live—yet its staggered and RGB-lit 32-pad configuration is instantly
familiar to anyone who’s played a controller keyboard. Advanced features let
you change the keyboard scale, and a built-in arpeggiator and user-configurable
touch strip make the ATOM SQ the most expressive controller you’ll ever use.
PreSonus Audio Electronics is committed to constant product improvement,
and we highly value your suggestions. We believe the best way to achieve our
goal of constant product improvement is by listening to the real experts: our
valued customers. We appreciate the support you have shown us through the
purchase of this product and are confident that you will enjoy your ATOM SQ!
About this manual: We suggest that you use this manual to familiarize yourself with
the features, applications, and workflows for your ATOM SQ before trying to connect
it to your computer. This will help you to get better performances and faster results.
Throughout this manual, you will find Power User Tips that can quickly make
you an ATOM SQ expert and help you get the most out of your investment.
1.2 Product Registration
PreSonus is committed to delivering the best experience for our
customers. My PreSonus is a one-stop portal for all our registered
customers’ needs. From your My PreSonus account, you can view all
your PreSonus hardware and software registrations; download drivers,
installers, and content; contact support; track orders and more.
To register your ATOM SQ:
Go to My.PreSonus.com and follow the onscreen instructions.