FIRESTUDIO LIGHTPIPE 24-bit, 96 kHz Recording Interface with 32 channels of ADAT I/O User’s Manual Version 2.0 © 2009, PreSonus Audio Electronics, Inc. All Rights Reserved.
PRESONUS LIMITED WARRANTY PreSonus Audio Electronics Inc. warrants this product to be free of defects in material and workmanship for a period of one year from the date of original retail purchase. This warranty is enforceable only by the original retail purchaser. To be protected by this warranty, the purchaser must complete and return the enclosed warranty card within 14 days of purchase.
SAFE OPERATION GUIDELINES To avoid damage to your FireStudio Lightpipe and your other audio equipment please review and adhere to the following safety guidelines: Follow the safety guidelines in the manual. Do not drop your FireStudio Lightpipe. Do not install the unit near a heat source (radiators, heat registers, amplifier heat sinks, etc.). Do not expose your FireStudio Lightpipe to liquids. Do not place containers filled with liquids near your FireStudio Lightpipe.
TABLE OF CONTENTS 1 OVERVIEW 1.1 Introduction ............................................................................................................................................ 1.2 Features ................................................................................................................................................. 1.3 What is in the Box .................................................................................................................................. 1.
OVERVIEW 1.1 INTRODUCTION Thank you for purchasing the PreSonus FireStudio Lightpipe. PreSonus Audio Electronics has designed the FireStudio Lightpipe utilizing high-grade components to ensure optimum performance that will last a lifetime. The PreSonus FireStudio Lightpipe is a 24-bit, 96 kHz ADAT Lightpipe-to-FireWire computer recording system for PC and Macintosh computer systems.
OVERVIEW 1.2 FEATURES The FireStudio Lightpipe is a powerful and affordable computer recording system. The FireStudio Lightpipe comes complete with four ADAT/Dual SMUX ports, MIDI and word clock I/O, rock-solid drivers, expandability, a 34X4 mixer matrix application, and powerful music-recording and -production software.
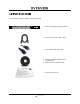
OVERVIEW 1.
OVERVIEW 1.4 SYSTEM REQUIREMENTS Here are the computer-system requirements for FireStudio Lightpipe and Studio One Artist. Macintosh o Operating Systems: Mac OS X 10.4.11 or Mac OS X 10.5.2 or higher o Hardware: Minimum: PowerPC G4 1.25 GHz or Intel Core Solo 1.
GETTING STARTED 2.1 HARDWARE INSTALLATION This installer and driver can be used for any interface in the FireStudio Tube family line (FireStudio Mobile, FireStudio Tube, FireStudio Lightpipe, FireStudio, FireStudio Project, and StudioLive 16.4.2). For more information on the Universal Control application and multiple interface integration, please review Sections 3.1 and 4.1. 2.1.
GETTING STARTED 2.2 STUDIO ONE ARTIST Every PreSonus interface comes complete with Studio One Artist recording software. Whether you are about to record your first album or your 50th, Studio One Artist provides you with all the tools necessary to capture and mix a great performance.
GETTING STARTED Activating Studio One Artist Offline Once you have created a user account, launch Studio One Artist. From the Activate Studio One Menu, click on the Activate Offline link. Follow the instructions to log in to your previously created user account, register the product, and obtain a license file. Next, copy the license file to the computer on which Studio One has been installed, and locate the license file as instructed in the Activate Studio One menu. The activation process is now complete.
GETTING STARTED Start Page: Setup Area Shows Active Audio Driver and Sample Rate and Provides Quick Links to Configure Audio and MIDI In the middle of the Start page, you will see the Setup area. Studio One Artist automatically scans your system for all available drivers and selects a driver. By default, it will choose a PreSonus driver if one is available.
GETTING STARTED 1) From the Setup area in the Start page, you can also set up your external MIDI devices. Before we set up a new Song for recording, let’s take a moment to configure external devices. Connect the MIDI Out of your external MIDI controller to the MIDI In of your FireStudio Lightpipe. Make sure the breakout cable is securely connected to your FireStudio Lightpipe. 2) Click on the Configure External Devices link in the Setup area on the Start page to launch the External Devices window.
GETTING STARTED MIDI instrument controllers (keyboards, MIDI guitars, etc.) send musical information in the form of MIDI data to tone modules, which respond by generating sound, as instructed. Tone modules can be standalone sound devices or can be integrated into a controller, as with a keyboard synthesizer. Studio One Artist refers to all tone generators as Instruments. Once you have set up your MIDI keyboard controller, take a moment to configure your sound module.
GETTING STARTED 2.2.4 Configuring Audio I/O Now that you’ve configured your MIDI devices, let’s create a new Song and set up your default Audio I/O. 1) From the Start page, select “Create a new Song.” 2) In the browser window, name your Song and choose the directory in which you’d like it saved. You’ll notice a list of templates on the left. The FireStudio Lightpipe template will create a Song with a track for each of the available inputs.
GETTING STARTED 6) Click on the Inputs tab in the Audio I/O Setup window, and you will see all of the available inputs on your FireStudio Lightpipe. At this time, you can add the number and type of inputs you plan to use. We recommend that you create a mono input for each of the 32 inputs on your FireStudio Lightpipe. If you plan on recording in stereo, you should also create a stereo bus and assign it to the appropriate set of inputs.
GETTING STARTED Once you have added your Tracks, you can assign the input by simply clicking on the input to which a Track is currently assigned. This will bring up your inputs list. You can also access the Audio I/O Setup from here. If you would like to add a Track for each of the available inputs and have the routing automatically assigned, simply go to Track|Add Tracks for All Inputs.
GETTING STARTED Please Note: MIDI data does not contain audio signals. To hear your sound module, you must connect the audio output of the sound module either to an A/D device connected to the FireStudio Lightpipe, or directly to the FireStudio Lightpipe (if your sound module has an ADAT optical output), and then connect the FireStudio Lightpipe’s audio outputs to a sound system. (You also can listen on headphones, using the FireStudio Lightpipe’s headphone output.
GETTING STARTED 2.3 SAMPLE HOOKUP DIAGRAM With the FireStudio Lightpipe, you can simultaneously record and play back up to 32 channels. Because the FireStudio Lightpipe can send and receive 32 channels simultaneously via its ADAT optical I/O, it is the perfect solution to connect a 32-channel digital mixer to your computer. It is also ideal for recording live performances. All you need are a few cables and a durable rack. 2.3.
GETTING STARTED 2.3.
GETTING STARTED 2.2.
CONTROLS & CONNECTIONS 3.1 UNIVERSAL CONTROL AND THE FIRESTUDIO LIGHTPIPE Like all members of the FireStudio family of interfaces, the FireStudio Lightpipe is compatible with Universal Control. Universal Control is a powerful, flexible, and easy to use control-panel application for creating mulitple mixes from your input and output signals for two of your FireStudio Lightpipe’s output pairs (Main and Headphone). This application also allows you to daisy-chain FireStudio-family interfaces.
CONTROLS & CONNECTIONS 3.1.2 Launcher Window From the Launcher Window, you can set all the basic controls for your FireStudio Lightpipe. Sample Rate Selector Changes FireStudio Lightpipe Sample Rate You can set the sample rate to 44.1, 48, 88.2, or 96 kHz. A higher sample rate will increase the fidelity of the recording but will increase the file size and the amount of system resources necessary to process the audio.
CONTROLS & CONNECTIONS Device Window Button Opens the Device Window Click on this button to open the FireStudio Lightpipe Mixer. To give your FireStudio Lightpipe a custom name, double-click on the default label (FireStudio Lightpipe) to open a text field. When you have finished entering your custom name, hit the Enter key.
CONTROLS & CONNECTIONS Settings: Meter Decay Sets the Response Time for the Meters in the Device Window The Universal Control gives you the option to set the response time for the meters in the Device Window. By default, this is set to Normal. Enable Slow Meter Decay for more accurately meter the peaks and falls of the signal. Enable Fast Metering to monitor your signal in real time.
CONTROLS & CONNECTIONS 3.1.4 The Device Window: FireStudio Lightpipe Mixer The FireStudio Lightpipe’s Device window allows you to create two stereo monitor mixes. The mixes can be renamed and saved. You can also rename your inputs and playback streams. These mixes have no effect on what is being recorded in your host application. This has obvious advantages.
CONTROLS & CONNECTIONS Master Output Section Master Output Fader Changes the Selected Output’s Audio Level Move the Master Fader up and down to increase and decrease the level of the selected output’s audio. The amount of boost or attenuation, measured in decibels, is displayed below the Channel Fader. The range is from –∞ to 0 dB. Two virtual LED meters to the right of the Master Fader display the prefader levels of the audio signal.
CONTROLS & CONNECTIONS Channel Mutes and Solos Adds the Channel to the Mute or Solo Bus Muting a channel silences the channel’s audio. Soloing a channel mutes all other unsoloed channels. Input Selectors Changes the Source of the FireStudio Lightpipe Mixer Channels Choosing “No Input” will hide the channel. “Inputs” are your hardware inputs (ADAT 1, ADAT 2, etc.). “Playback” are your software DAW outputs.
CONTROLS & CONNECTIONS 3.2 FRONT PANEL LAYOUT LED Meters/Clip Indicator. Each channel features four LED level indicators. The green LEDs will light up when your input signal reaches -40 dBFS and -18 dBFS respectively. The yellow LED will light up when the channel’s input signal reaches -6 dBFS (+4 dBu). The red clip indicator LED will illuminate when the channel’s input signal reaches 0 dBFS.
CONTROLS & CONNECTIONS 3.3 BACK PANEL LAYOUT Power Adapter Input. This is where you plug the provide IEC power cable into the FireStudio Lightpipe. FireWire Ports. There are two standard 6-pin FireWire ports on the back of the FireStudio Lightpipe. Either (and only one) should be used to connect your FireStudio Lightpipe to a FireWire port on your computer.
CONTROLS & CONNECTIONS Main Output. These are balanced analog outputs and are normally used to connect your FireStudio Lightpipe to your studio monitors. ADAT–S/MUX Input and Output These are the ADAT–S/MUX connections for your external digital devices. When recording or playing back at 44.1 kHz or 48 kHz, each ADAT port will send or receive 8 of the 32 channels, numbered consecutively from right to left. When recording or playing back at 88.
CASCADING UNITS 4.1 USING MULTIPLE FIRESTUDIO FAMILY INTERFACES The Universal Control allows you to connect your FireStudio Lightpipe to any member of the FireStudio family of interfaces. Once you have installed the Universal Control and FireStudio-family driver on your computer, no further installation is required for any FireStudio product to connect to your system.
CASCADING UNITS the next set, and so on. Because of this, it is important to cascade your FireStudio interfaces in the proper order from your computer so that you know which input belongs to which unit. Please note: The order of the inputs and outputs in your FireStudio chain cannot be altered. You may wish to give each unit a custom name. To do so, simply double-click on the name badge on each unit’s Device Window button to open a text box. Once you have typed the custom name, hit the Enter key.
TECHNICAL INFORMATION 5.1 TROUBLESHOOTING Many technical issues can arise when converting a standard computer into a digital audio workstation (DAW). PreSonus can only provide support for issues that directly relate to the FireStudio Lightpipe interface and Studio One Artist software. It may be necessary to contact the manufacturer of the computer, operating system, and third-party DAW software to obtain additional technical support.
TECHNICAL INFORMATION Recommended FireWire Chipsets The FireStudio Lightpipe will work with a wide range of FireWire cards and configurations. However, due to the plethora of FireWire chipsets currently on the market, it is not possible to thoroughly test each one for compatibility. Most users will not need to alter their current PC configuration to use their FireStudio Lightpipe.
TECHNICAL INFORMATION 5.2 SPECIFICATIONS Analog Outputs Type ......................................................................................................................................¼” TRS Balanced Output Impedance ...................................................................................................................................... 51Ω Headphone Output Type ...........................................................................................................................