
User manual

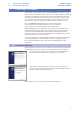
Table Of Contents
- 1 Overview
- 1.1 Introduction
- 1.2 About This Manual
- 1.3 Technical Support
- 1.4 Summary StudioLive Software Library Features
- 1.4.1 UC Surface
- 1.4.2 QMix™ UC for iPhone®, iPod touch®, and Android devices
- 1.4.3 Capture
- 1.4.4 Studio One Artist
- 2 Connecting to a Computer
- 2.1 Installation for Windows
- 2.2 Installation for macOS
- 2.3 Using the StudioLive as an Audio Interface
- 2.4 Using the StudioLive with Popular Audio Applications
- 2.5 Digital Sends and Returns
- 2.5.1 Channel Digital Sends
- 2.5.2 Digital Returns
- 2.5.3 Main Digital Return
- 2.6 Using Plug-In Effects as Inserts
- 3 Networking Your Remote Devices
- 3.1 Connecting your Computer to your Network
- 3.2 Connecting your iPad to your Network
- 3.3 Connecting your iPhone/iPod touch to your Network
- 4 Universal Control
- 4.1 Universal Control Launch Window
- 4.2 TUIO Setup (macOS)
- 5 UC Surface Mix Control Software
- 5.1 UC Surface Mix Controls
- 5.1.1 Channel Controls
- 5.2 Fat Channel Controls
- 5.2.1 Input Controls
- 5.2.2 Mix Detail
- 5.2.3 Noise Gate
- 5.2.4 Compressor
- 5.2.5 Equalizer
- 5.2.6 Limiter
- 5.3 Graphic EQ
- 5.4 Adding Effects
- 5.4.1 Editing Effects
- 5.5 Scenes and Presets
- 5.5.1 Fat Channel Presets
- 5.5.2 GEQ Presets
- 5.5.3 FX Presets
- 5.5.4 Scenes
- 5.5.5 Preset and Scene Management
- 5.6 Quick Panel Functions
- 5.6.1 Talkback
- 5.6.2 Fader Locate
- 5.6.3 FX Mutes
- 5.7 The Settings Page
- 5.7.1. Device Settings Tab
- 5.7.2 MIDI Control Tab
- 5.7.3 Backup Tab
- 6 QMix-UC for Mobile Devices
- 6.1 Aux Mix Page
- 6.1.1 Channel Grouping
- 6.2 Wheel of Me
- 6.3 Settings Page
- 7 Capture
- 7.1 Installation Instructions
- 7.1.1 macOS
- 7.1.2 Windows
- 7.2 Start Page
- 7.2.1 Tagging and Organizing a Session
- 7.2.2 Creating a Session
- 7.2.3 Open a Session
- 7.2.4 Audio Device and Sample Rate
- 7.2.5 Options Menu
- 7.3 The Session Page
- 7.3.1 Track Column
- 7.3.2 Transport
- 7.3.3 Time Display
- 7.3.4 Timeline Ruler
- 7.3.5 Navigating the Session
- 7.3.6 Editing Tools
- 7.3.7 Meter Bridge
- 7.3.8 Markers and the Marker List
- 7.4 Recording a Session in Capture
- 7.5 Virtual Soundcheck
- 7.6 Remote Controlling Capture from UC Surface
- 7.7 Importing and Exporting Audio Files
- 7.7.1 Importing Audio Files into Capture
- 7.7.2 Export Audio Files
- 7.8 Mixing Your Capture Sessions
- 7.8.1 Creating a Mix in Capture
- 7.8.2 Exporting Your Final Mix to an Audio File
- 7.8.3 Mixing a Capture Session in Studio One
- 7.8.4 Mixing a Capture Session in a Different Recording Application
- 7.9 Capture Key Commands
- 8 Studio One Artist Quick Start
- 8.1 Installation and Authorization
- 8.2 Setting Up Studio One
- 8.2.1 Configuring Audio Devices
- 8.2.2 Configuring MIDI Devices
- 8.3 Creating a New Song
- 8.3.1 Configuring Your I/O
- 8.3.2 Creating Audio and MIDI Tracks
- 8.3.3 Recording an Audio Track
- 8.3.4 Adding Virtual Instruments and Effects
- 8.3.5 Drag-and-Drop Audio and MIDI Files
- 8.4 Remote Controlling your StudioLive 16.0.2 USB from Studio One
- 8.4.1 Configuring StudioLive 16.0.2 as a MIDI Device
- 8.4.2 Recalling Scenes and Presets
- 8.4.3 Controlling FXA, FXB, and Main Output Levels
- 8.4.4 Assigning/Unassigning FXA and FXB to the Main Bus

5
2 Connecting to a Computer
2.1 Installation for Windows
StudioLive™ Software
Library Reference Manual
2 Connecting to a Computer
The Universal Control installer includes the ASIO/WDM (Windows) and Core Audio
(macOS) drivers for StudioLive mixers, as well as the UC Surface application. We made
this installer as simple and easy to follow as possible, and it will take you through
each step of the installation process. Please read each message carefully to ensure
Universal Control, the StudioLive driver and UC Surface are properly installed. In
particular, be careful not to connect your StudioLive to the computer too soon.
Please visit www.presonus.com for the latest system requirements
and an updated list of compatible hardware. It is also recommend
that you check your recording software’s system requirements.
Power User Tip: As part of our commitment to the quality of our products, PreSonus
continually updates its product drivers and software. The latest version of your entire
StudioLive 16.0.2 USB Software Library can be downloaded directly from your My
PreSonus account as soon as you register your StudioLive mixer. My PreSonus is also your
portal to support, the PreSonus Shop, and more.
The speed of your processor, amount of RAM, and capacity, size, and speed of your hard
drives will greatly affect the overall performance of your recording system. A faster
processor and more RAM can reduce signal latency (delay) and improve overall
performance.
2.1 Installation for Windows
Before beginning the Universal Control installation setup, please quit all applications,
including antivirus software, and disconnect the StudioLive from your computer.
Follow the onscreen instructions to complete the installation. When the
installer has finished, it will prompt you to reboot your computer.
Click “Finish” to automatically restart your PC. Once your computer has
rebooted, connect the StudioLive. When the Found New Hardware wizard
launches, follow the “Recommended” steps.
Your StudioLive is now synced to your computer and ready to use!