
Manual


42
4 Controls
4.4 Aux and FX Buses
StudioLive™ AI-series Mixers
Owner’s Manual
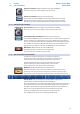
1. To begin, press the FXA Select button and decide to which outputs you’d like to
route your effects mix.
2. To patch your effects mix to any of the subgroups or to the Main outputs, press the
desired output’s button in the Assign section of the Fat Channel.
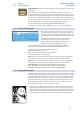
3. Next, press the Mix button in the FXA section. The Fat Channel meters will display
the send level of each of the input channels to FXA. The encoders below each
meter control the channel’s level in FXA’s mix. Use these encoders the same way
that you use the faders to set the output level to your main mix. The higher a
channel’s level is in the effects mix, the more processed (“wetter”) it will sound.
Let’s say that you are using reverb to liven up a relatively dead room. You
might send a little bit of each input to the reverb, but you probably will not
want much of the drums and bass to be processed, as too much reverb could
reduce their impact and leave your mix without a sturdy foundation. So rather
than turning the aux-send level for the kick drum channel all the way up,
turn it so that the meter reads between 20% and 30% saturation. This way,
only a small portion of the kick-drum input will be affected by the reverb.
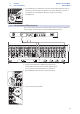
4. By pressing the FXA Select button again, you can add dynamics
processing and EQ to the overall monitor mix. These are great
for adding sustain, removing too much ring, etc.
5. Use the FXA Level knob to increase or decrease the overall effects-mix send level.