
User's Manual


10
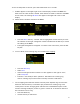
The Choose key (Fig. 6.1) brings up the list of folders containing lens data (Fig 6.2). The
All lenses
folder contains data on all of the lenses stored in the HU3 lens library. The
Library stores up to 255 lenses. Next brings up the contents of the selected folder (Fig
6.3).
The folders
My list A, B
, and
C
are used to store up to 15 lenses (3 screens) so that they
can be accessed quickly without having to scroll through the complete list. Pressing Add
allows a lens to be copied from the lens library to the
My list
folder (fig 6.4).
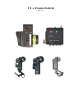
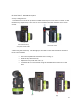
To use a lens from the library, choose a lens folder shown Fig 6.5. Using the Nav key
select the manufacturer (fig. 6.5, the lens type (fig. 6.6), and the lens (fig 6.7) and press
either OK or ENTER. Use the focus knob to set the lens to infinity as shown in Fig 6.8 and
press NEXT/ENTER. The lens name now appears on the main screen (Fig. 6.9).
To calibrate a new lens:
· Name the lens and store it in the lens library.
· Use the Edit function to calibrate the lens.
To name the lens, go to the Lens selection screen (FIG 6.2), select All lenses (Fig 6.2),
select a manufacturer’s folder (FIG 6.5), and Lens Type (FIG 6.6).
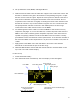
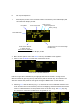
Press the New Lens key (Fig 6.7) and you will be asked to select the focal length (Fig 6.10),
and Serial Number (FIG 6.11). When finished, press Next and the lens name (18mm s/n
123) appears in the lens type folder (Fig 15). Note that the lenses are automatically sorted
in ascending values of the focal length.
Fig 6.4
Fig 6.5
Fig 6.6
Fig 6.7
Fig. 6.8
Fig. 6.9
Fig 6.10
Fig 6.11
Fig 6.12