510171Pr5.qxd 5/2/2000 3:39 PM Page i 000424-510171-(05) CD Color Printer III Users Manual © 2000 All rights reserved.
510171Pr5.qxd 5/2/2000 3:39 PM Page ii Notices: The information in this document is subject to change without notice. NO WARRANTY OF ANY KIND IS MADE WITH REGARD TO THIS MATERIAL, INCLUDING, BUT NOT LIMITED TO, THE IMPLIED WARRANTIES OF MERCHANTABILITY AND FITNESS FOR A PARTICULAR PURPOSE. No liability is assumed for errors contained herein or for incidental or consequential damages in connection with the furnishing, performance, or use of this material.
510171Pr5.qxd 5/2/2000 3:39 PM Page iii Read Me First! Congratulations on the purchase of your new CD Color Printer. To begin printing with your new printer immediately, please refer to the following quick start instructions. For more complete information regarding all aspects of your printers operation, please refer to the printers main Users Manual. HARDWARE SETUP 1.
510171Pr5.qxd 5/2/2000 3:39 PM Page iv The self-test should look like this: 6. Connect the printer to your computer using the proper interface cable. For best results, use a IEEE 1284-Compliant cable and do not connect to an A/B switch box. Also, note that the printer will print fastest if your computers parallel port is set to ECP mode (most new computers are set to ECP). Your computers manual will have information on changing the parallel port mode if you need to switch it to ECP.
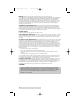
10171Pr5.qxd 5/2/2000 3:39 PM Page v Installation Instructions: Windows 95/98 or Windows NT/2000 Printer Drivers: 1. Insert the included CD into your computers CD-ROM drive. 2. Click on the Start button on the task bar, point to Settings, and select Printers. 3. Double-click on the Add Printer icon. This will launch the Add Printer Wizard. Click Next, then click Next again. 4. Click the Have Disk button. 5. Click Browse, select your CD-ROM drive. 6.
510171Pr5.qxd 5/2/2000 3:39 PM Page vi 6. Select your CD-ROM drive, open the folder named Win95-98 folder, then open the folder named 32 Bit Print Spooler. 7. Double-click on the Setup.exe file then select the Finish button to complete installation. IMPORTANT! Once the printer driver software is installed, the Image Placement values labeled on your printers rear panel must be entered into the printer drivers Calibrate window.
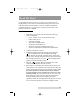
510171Pr5.qxd 5/5/2000 4:50 PM Page vii Please Note The Spare Ink Cartridge Holder provides a convenient place to store an extra ink cartridge and also prevents an opened ink cartridge from drying out. To use this holder, simply set it next to the printer. The Spare Ink Cartridge Holder must always remain in an upright or vertical position. Insert an Ink Cartridge into the holder, copper-end first, until it snaps into place.
510171Pr5.
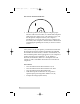
510171Pr5.qxd 5/5/2000 6:21 PM Page ix INDEX Table of Contents Section 1: Getting Started A. Choosing a Good Location...............................................................................1 B. Unpacking and Inspection ...............................................................................1 C. Identifying the Parts..........................................................................................2 D. Applying Power...................................................................
510171Pr5.
510171Pr5.qxd 5/2/2000 3:39 PM Page 1 TOC INDEX Section 1: Getting Started THANK YOU ...for choosing the CD Color Printer III. This printer is the perfect way for you to label all of your custom CDs quickly, easily, and with a touch of class. The CD Color Printer III lets you print razor-sharp text, vibrant spot colors, and even stunning photo-realistic photographs directly onto the surface of printable CDs.
510171Pr5.qxd 5/2/2000 3:39 PM Page 2 TOC INDEX C. IDENTIFYING THE PARTS This illustration shows the extended CD Tray and all of the control buttons and LED indicator lights found on the printer. The Power Button turns the printers power ON and OFF. This button also serves to cancel the current print job if a print error occurs and to reset the printer for the next print job. The CD Tray Button opens or closes the CD Tray for loading and ejecting CDs.
510171Pr5.qxd 5/2/2000 3:39 PM TOC Page 3 INDEX This illustration shows the input ports found on the rear panel of the printer. Both a parallel and a serial interface port are provided. If using the printer with Windows, you will use its Parallel Interface Port. If using the printer with an Apple® Macintosh, you will use its Serial Interface Port (use a USB-toparallel converter cable for a USB-only Mac). Note that the printers auxiliary port is for factory use only unless otherwise directed.
510171Pr5.qxd 5/2/2000 3:39 PM Page 4 TOC INDEX Section 2: Ink Cartridges and Printable CDs A. ABOUT INK CARTRIDGES AND PRINTABLE CDS For full-color printing, a 3-color ink cartridge is available. This cartridge contains the three process-color inks of yellow, magenta, and cyan, which combine to produce up to 16.7 million printable colors. A monochrome ink cartridge is also available for fast, inexpensive black and white printing.
510171Pr5.qxd 5/2/2000 3:39 PM Page 5 TOC INDEX 2. Remove the ink cartridge from its packaging. 3. Remove the tape covering the cartridges printhead. DO NOT TOUCH THE COPPER AREA! 4. Press and release the Ink Cartridge button to move the carrier to the load position. 5. Insert the ink cartridge into the cartridge carrier, copper end first. 6. Push the cartridge back until it snaps into place. 7. Press and release the the cartridge carrier. 8. Close the printers front cover.
510171Pr5.qxd 5/2/2000 3:39 PM Page 6 TOC INDEX C. LOADING BLANK CD MEDIA The CD Color Printer III is capable of printing onto a variety of CD related media including printable CDs and DVDs, and cardboard CD templates. Each of these items is loaded one at a time, before the start of each print job. Loading a Blank CD 1. With the printers front cover shut, press and release the CD Tray button. 2.
510171Pr5.qxd 5/2/2000 3:39 PM Page 7 TOC INDEX D. PRINTING A SELF TEST Now that the printer is set up and print supplies are loaded, a self test should be performed to check for proper operation of the printer. A sample of the self test print is shown below. Refer to the following steps to run a self test: 1. If power is ON, turn it OFF now. The Power light should be OFF. Verify that print supplies are installed and that the CD Tray is closed.
510171Pr5.qxd 5/2/2000 3:39 PM Page 8 TOC INDEX E. REPLACING OR SWITCHING INK CARTRIDGES Once you begin using your CD Color Printer III on a regular basis, you will eventually need to replace an empty ink cartridge or switch between color and monochrome cartridges. To do this from a Macintosh use the same steps described in Part B of this section. To do this from Windows 95/98 or Windows NT, please refer to the following steps: 1.
510171Pr5.qxd 5/2/2000 3:39 PM TOC Page 9 INDEX 4. From within the printer driver setup window, click on the Cartridge button and then on the Change button to move the carrier to the load position. Note that the printer driver must be installed and that the printer must be connected to your computer (see Section 3) in order to complete this step. 5. Remove the installed ink cartridge by grasping the top of the cartridge and firmly pulling it straight toward you.
510171Pr5.qxd 5/2/2000 3:39 PM Page 10 TOC INDEX 7. Push the cartridge back until it snaps into place. 8. Go back to the printer driver setup window and click on either the New Cartridge Installed or the Old Cartridge Installed button to indicate whether you installed a fresh, new cartridge or simply switched between a previously used color cartridge and a previously used monochrome cartridge. The cartridge carrier will return to its home position.
510171Pr5.qxd 5/2/2000 3:39 PM TOC Page 11 INDEX Section 3: Using the CD Color Printer III with Windows A. CONNECTING THE PRINTER TO YOUR COMPUTER The CD Color Printer III is designed to be used with nearly any IBM-PC® or compatible running Windows NT/2000, or Windows 95/98. The printer is equipped with a standard 8-bit Centronics-type parallel port. This port is the means through which it receives data from your computer.
510171Pr5.qxd 5/2/2000 3:39 PM TOC Page 12 INDEX The printer must have its Power light illuminated to receive data. If the light is not on, press the Power button. B. INSTALLING THE PRINTER DRIVER The CD Color Printer III can be used with virtually any Windows application program. This is accomplished by installing in Windows what is called a printer driver. The printer driver is simply software which gives the printer all the information needed for printing.
510171Pr5.qxd 5/2/2000 3:39 PM Page 13 TOC INDEX 3. Double-click on the Add Printer icon. This will launch the Add Printer Wizard. Click Next, then click Next again. 4. Click the Have Disk button. 5. Click Browse, select your CD-ROM drive. 6. For Windows 95/98, open the Win 95 & 98 Driver folder and select the file named CDCOLOR3.INF. For Windows NT/2000, open the NT Driver folder and select the file named OEMSETUP.INF.
510171Pr5.qxd 5/2/2000 3:39 PM TOC Page 14 INDEX C. INSTALLING THE 32-BIT PRINT SPOOLER FOR WINDOWS 95/98 Your CD Color Printer III ships with a print utility program called the 32-Bit Print Spooler. This print spooler is for use only with Windows 95 or Windows 98. Once installed, the print spooler is able to process your print jobs and send them to the printer at consistently faster speeds than if sending print jobs through the Windows system print spooler.
510171Pr5.qxd 5/2/2000 3:39 PM TOC Page 15 INDEX 5. Click Next, then click on the Browse button. 6. Select your CD-ROM drive, then open the folder named 32 Bit Print Spooler. 7. Double-click on the Setup.exe file, then select the Finish button to complete installation. When installed, the 32-Bit Print Spooler icon will appear in the Programs group of the Start menu.
510171Pr5.qxd 5/2/2000 3:39 PM TOC Page 16 INDEX The Current Job tab tells you the name and size of the file printing, the progress of the overall print job, as well as the total number of copies left to print. It also provides buttons which allow you to pause or cancel the print job at any time during the printing process. The Settings tab tells you the port and printer to which you are printing and allows you to configure the timeout settings.
510171Pr5.qxd 5/2/2000 3:39 PM TOC 2. Page 17 INDEX In Windows 95/98, you will see several tabs from which printer settings can be changed including Media, Device Options, Cartridge, and Calibrate. In Windows NT, click on the Advanced tab of the Document Settings window. In Windows 2000 click on the Advanced button for more driver settings. NOTE: Most applications allow you to change these same printer driver options from their Print and/or Printer Setup screens.
510171Pr5.qxd 5/2/2000 3:39 PM TOC Media Page 18 INDEX The media option will be set to CD for printing onto printable surface CDs, DVDs, and cardboard template CDs. When sizing your images for printing, keep in mind that each type of CD media has the following maximum printable areas: CD 4.567 round (116mm). For a complete description of each type of print media and to see how each is installed, refer to Section 2.
510171Pr5.qxd 5/2/2000 3:39 PM TOC Page 19 INDEX Ink Saturation This option controls the ink saturation of the printed image. When printing onto the printer manufacturers TuffCoat CD media, this option can be left at its default setting of 50%. When printing onto other brands of printable CD media, you may need to adjust this control in order to optimize the ink saturation for the printable surface of your specific CD media.
510171Pr5.qxd 5/2/2000 3:39 PM TOC Page 20 INDEX Use 32-bit Spooler Select this option for consistently faster print processing under Windows 95/98. This option is only selectable if operating under Windows 95/98 and if the included 32-Bit Print Spooler software has been installed. When selected, this option allows the printer driver to send all print jobs to the 32-Bit Print Spooler rather than to the Windows system print spooler.
510171Pr5.qxd 5/2/2000 3:39 PM Page 21 TOC INDEX Section 2-E, select either the New Cartridge Installed button or the Old Cartridge Installed button accordingly. These selections are necessary for the printer to accurately keep track of ink cartridge ink levels. NOTE: The ink type shown will be whatever Ink Cartridge is selected in the driver. Also, the ink levels are shown for both color and monochrome cartridges even though only one can be installed at a time.
510171Pr5.qxd 5/2/2000 3:39 PM Page 22 TOC INDEX Printer + Vertical + Horizontal Center Size - Horizontal - Vertical Extended CD Tray HINT: Notice the direction the Vertical and Horizontal adjustment arrows point within the Calibration window are representative of the direction the printed image moves on the CD.
5/2/2000 3:39 PM Page 23 TOC When the second run of the print is compete, you should have a test print that looks like the following: 9 12 15 Find the number whose lines touch 3 6 9 12 15 9 12 15 6 Vertical Calibration 0 -15-12 -9 -6 -3 0 3 6 9 12 15 6 3 -9 -6 -3 -15 -12 -9 -6 -3 0 3 6 9 12 Horizontal Calibration Find the number whose lines touch 15 -15 -12 -9 -6 -3 0 -15 -12 3 -15 -12 -9 -6 -3 0 3 6 9 12 Horizontal Calibration Find the number whose lines touch 15 -15 -12 -9 -6 -3 0 4.
510171Pr5.qxd 5/2/2000 3:39 PM TOC Page 24 INDEX E. PRINTING A CD Now that you have hooked up the printer, loaded the print supplies, and installed the printer driver, you are ready to print your first CD. Follow these steps to print your first image: 1. Go to your favorite graphics application program. Or, install and open the Windows CD creation software included with your printer. 2. Open or create the image file you wish to print.
510171Pr5.qxd 5/2/2000 3:39 PM TOC Page 25 INDEX 3. Once you have created your image and are ready to print, select Print Setup (or the equivalent) from the programs File menu to verify that the printer driver settings are correct for your image. Be sure the proper Ink Cartridge options is selected according to the supplies you have installed in the printer. Once the driver is set, select Print from the programs File menu. 4. The printer driver will then begin to process the image.
510171Pr5.qxd 5/2/2000 3:39 PM TOC Page 26 INDEX Section 4: Using the CD Color Printer III with Macintosh A. CONNECTING THE PRINTER TO YOUR COMPUTER The CD Color Printer III is designed to be used with any Apple Macintosh supporting Color QuickDraw and running system software 7.0 or higher. For best performance, a Macintosh with a 68040 processor and 8MB of RAM (or higher) or a PowerPC with 8MB of RAM (or higher) is recommended. The printer driver is accelerated for use with a PowerPC/G3.
510171Pr5.qxd 5/2/2000 3:39 PM Page 27 TOC INDEX The printer must have its Power light illuminated to receive data. If the light is not on, press the Power button. B. INSTALLING THE PRINTER DRIVER The CD Color Printer III can be used with virtually any Macintosh application program. This is accomplished by installing what is called a printer driver. The printer driver is simply software which gives the printer all the information needed for printing.
510171Pr5.qxd 5/2/2000 3:39 PM Page 28 TOC INDEX appropriate files will automatically install onto your computer. An alert box will then display indicating that installation is complete. 5. Click on OK to exit the installer. Driver installation is now complete. C. THE CHOOSER The Chooser is a Desk Accessory in the Apple menu. Before you can use the printer, you need to select the CD Color Printer III driver using the Chooser.
510171Pr5.qxd 5/7/2000 5:24 PM Page 29 TOC 4. INDEX Select either On or Off to enable or disable the printers Background Printing function. When enabled, this function allows you to work in the foreground of your application program while printing in the background. Please refer to Section 5 for more information on background printing. The next time you open the Chooser, the selected driver will no longer be highlighted.
510171Pr5.qxd 5/2/2000 3:39 PM TOC Page 30 INDEX Print Quality Select the appropriate print quality option for your image. Keep in mind that Fast 600 provides the lowest quality but fastest print, and that Photo 1200 provides the highest quality but slowest print. You may wish to experiment with these options to see which one is best for your particular CD label. Dither Mode Select this option to choose the appropriate dither mode for your image.
510171Pr5.qxd 5/2/2000 3:39 PM TOC Page 31 INDEX Ink Saturation This option controls the ink saturation of the printed image. When printing onto the printer manufacturers TuffCoat CD media, this option can be left at its default setting of 50%. When printing onto other brands of printable CD media, you may need to adjust this control in order to optimize the ink saturation for the printable surface of your specific CD media.
510171Pr5.qxd 5/2/2000 3:39 PM TOC Page 32 INDEX Cartridge Select this button to display options for changing or cleaning an ink cartridge. Select the Change button to move the printers ink cartridge carrier to the load position in order to change ink cartridges. Note that pressing the printers Ink Cartridge button serves this same purpose. See Section 2 for further information on changing ink cartridges. Select the Clean button to send a simple test print pattern to the printer.
510171Pr5.qxd 5/2/2000 3:39 PM Page 33 TOC INDEX When facing the printer, the Vertical adjustment moves the printed image toward the back of the printer if a positive number is entered and toward the front of the printer if a negative number is entered. The Horizontal adjustment moves the printed image toward the left-hand side if a positive number is entered and toward the right-hand side if a negative number is entered.
5/2/2000 3:39 PM Page 34 TOC When the second run of the print is compete, you should have a test print that looks like the following: 9 12 15 Find the number whose lines touch 3 6 9 12 15 9 12 15 6 Vertical Calibration 0 -15-12 -9 -6 -3 0 3 6 9 12 15 6 3 -9 -6 -3 -15 -12 -9 -6 -3 0 3 6 9 12 Horizontal Calibration Find the number whose lines touch 15 -15 -12 -9 -6 -3 0 -15 -12 3 -15 -12 -9 -6 -3 0 3 6 9 12 Horizontal Calibration Find the number whose lines touch 15 -15-12 -9 -6 -3 0 3 6
510171Pr5.qxd 5/2/2000 3:39 PM TOC Page 35 INDEX If creating a label for a CD, set your page size to 4.567 x 4.567 (116 x 116mm). Although your image will appear square on screen, the printer driver will automatically crop your image to the round shape of a CD for printing. The driver will also automatically crop out the center 1.6 (41mm) of your image to accommodate a CDs non-printable center hub.
510171Pr5.qxd 5/2/2000 3:39 PM Page 36 TOC INDEX Section 5: Using the Print Backgrounder for Macintosh The printer driver for Macintosh provides a background print utility called the Print Backgrounder. This print utility is turned on or off through the Chooser. When the Backgrounder is turned on, it allows you to conveniently continue working in the foreground of your application while printing in the background.
510171Pr5.qxd 5/2/2000 3:39 PM TOC Page 37 INDEX your print jobs. Backgrounder processes all print jobs in the order in which they were sent to the printer. C. THE BACKGROUNDER STATUS WINDOW Status of currently processing print job List of queued print jobs On hold print job Print job in which a print error has occurred The Backgrounder status window gives you detailed information about the status of the print job currently processing and about each print job waiting in the queue.
510171Pr5.qxd 5/2/2000 3:39 PM Page 38 TOC INDEX D. BACKGROUNDER MENUS File menu Open Status Window and Close Status Window: Opens and closes the Backgrounder status window. The Backgrounder continues to work if the status window is closed. Log Files: The Backgrounder has the ability to create and maintain a sequential history file, or Log file, of Backgrounder print jobs.
510171Pr5.qxd 5/2/2000 3:39 PM TOC Page 39 INDEX lower left-hand corner of the window indicates that Backgrounder has stopped. You cannot quit from Backgrounder while it is processing a job. Stop Processing must first be selected to cancel the processing job and stop Backgrounder. When Backgrounder stops, the menu changes to Continue Processing. When this option is selected, the server starts processing the top job in the queue.
510171Pr5.qxd 5/2/2000 3:39 PM Page 40 TOC INDEX E. PROBLEMS DURING A BACKGROUND PRINT Errors that are detected during a background print must be reported. The Backgrounder, however, cannot simply present a dialog box as soon as the error occurs, since the dialog could obscure work that is being done in the foreground. Error dialogs appear immediately, however, if the Backgrounder is in the foreground when the error is detected.
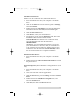
0171Pr5.qxd 5/2/2000 3:39 PM Page 41 TOC INDEX Section 6: Interpreting the Printers Indicator Lights The Power and Busy LED indicator lights located on the top of the printer can tell you a lot about what is happening inside the printer. To accurately interpret what it means when these lights are on, off, or flashing, please refer to the following: Power Light Power Light Busy Light Busy Light Printer on solid off Is ready to receive a print job.
510171Pr5.qxd 5/2/2000 3:39 PM Page 42 TOC Power Light flashing rapidly INDEX Busy Light on solid Printer Has either the wrong cartridge or no cartridge installed. Make sure the proper ink cartridge is installed: Turn the printer OFF, cancel the job from the computer, turn the printer ON, and try again after installing proper cartridge.
510171Pr5.qxd 5/2/2000 3:39 PM Page 43 TOC INDEX Section 7: Maintaining the Printer The CD Color Printer III is designed to require very little maintenance. Nevertheless, there are a few procedures you can perform on a regular basis or as needed to ensure your printers best performance. A.
510171Pr5.qxd 5/2/2000 3:39 PM Page 44 TOC INDEX Section 8: Technical Specifications Model: Print Method: CD Color Printer III Ink-Jet Printing Resolution: 1200 x 1200 dpi, 600 x 600 dpi, or 600 x 300 dpi, driver selectable Print Speed: Depends upon percentage of coverage and print mode selected. About 134 seconds for 100% full-color coverage, Photo 1200. About 68 seconds for 100% full-color coverage, Photo 600 (default). About 27 seconds for 100% full-color coverage, Fast 600.
510171Pr5.qxd 5/2/2000 3:39 PM TOC Page 45 INDEX Appendix A: Interfacing Information A. INTRODUCTION The CD Color Printer III is equipped with both a standard 8-bit centronics-type parallel interface port and a high-speed serial interface port. These communication ports are the means through which the printer receives data from your computer. This section describes the pin assignments and signal specifications for each of these ports as well as for the printers auxiliary interface port.
510171Pr5.qxd 5/2/2000 3:39 PM Page 46 TOC INDEX B. MINI 8-PIN SERIAL INTERFACE The mini 8-pin serial interface connector is the standard interface used by Macintosh. The printers serial port mates with a standard computer to printer serial cable. For best results, always use a high-quality serial cable which is less than 6 feet in length. Pin assignments are as follows: 8 7 4 5 2 Pin Number 6 3 1 Signal Name Signal Description 1 HSKo External Clock Output ± 2V < Vout < ± 3.
510171Pr5.qxd 5/2/2000 3:39 PM Page 47 TOC INDEX C. 6-PIN MINICIRCULAR AUXILIARY INTERFACE The 6-pin minicircular auxiliary interface is used for connecting the printer with auxiliary equipment such as a CD transporter/ auto-loader. Pin assignments are as follows: 6 5 4 3 2 1 Uses 5v logic @ 5mA Pin Number 1 2 3 4 5 6 Signal Description Busy - Output is high when the printer is busy or moving the CD Tray. Tray Out - Output is high when the CD Tray is fully ejected.
510171Pr5.qxd 5/5/2000 6:07 PM Page 48 TOC Index Algebraic .....................................................................................18, 30 Auxiliary Port ...............................................................................3, 47 Backgrounder ...................................................................................36 Busy Light.....................................................................................2, 41 Calibrate ..............................................
510171Pr5.qxd 5/2/2000 3:39 PM Page 49 CD-R Color Printer Limited Warranty TOC A. WHAT IS COVERED Primera Technology, Inc. (Primera) warrants to the original purchaser that the product enclosed with this Limited Warranty statement and used in the country of purchase will conform to the manufacturers specifications and be free from defects in workmanship and materials for a period of one (1) year from the date of original purchase. B. WHAT PRIMERA WILL DO TO CORRECT PROBLEMS.
510171Pr5.qxd 5/2/2000 3:39 PM Page 50 PRIMERA SHALL NOT BE HELD LIABLE FOR THE INTEGRITY AND/OR LONGEVITY OF ANY TEXT, PHOTOGRAPHIC IMAGES, DIGITIZED IMAGES, GRAPHICS, BAR CODES, OR COMBINATION THEREOF THAT ARE PRODUCED, GENERATED, OR OTHERWISE TRANSFERRED TO DISCS BY THE USE OF PRIMERAS HARDWARE OR SOFTWARE NOR IS PRIMERA LIABLE FOR THE INTEGRITY, VIABILITY, OR LONGEVITY OF THE DATA ENCODED ON THE DISC.
510171Pr5.
510171Pr5.qxd 5/2/2000 3:39 PM Page 52 Need Supplies? See your local dealer or call Primera at 763-475-6676 or Fax 763-475-6677 or order direct from our www site: www.primerastore.
510171Pr5.qxd 5/2/2000 3:39 PM Page 53 Signature III Prints Onto Virtually Any Printable-Surface CD-R Media The following are Primera-approved media partners . . .
510171Pr5.qxd 5/2/2000 3:39 PM Page 54 Introducing Signature CD-R Media from Primera Revolutionary New Signature CD-Rs Leave Lasting Impressions! F or the ultimate in CD-R durability and quality choose Signature media. Unlike most printable-surface CD-Rs that take ten minutes or more to dry, Signature CD-Rs dry immediately, saving you time. And other CD-Rs are not water-resistant no matter how long they dry.
510171Pr5.qxd 5/2/2000 3:39 PM Page 55 NEED TECHNICAL SUPPORT? WERE GLAD TO HELP! I f you find that you need some help in operating your new Primera printer, the instructions in the Users Manual should in many cases solve the problem. If you still have difficulty or cant find the right answer to your question, please call Primeras Technical Support Group at (763) 475-6669. Customer and technical support representatives are available Monday through Friday, 8:00 am to 5:00 (CST).
510171Pr5.qxd 5/2/2000 3:39 PM Page 56 Two Carlson Parkway North Plymouth, MN 55447-4446 USA 763-475-6676 Fax 763-475-6677 WWW Home Page: http://www.primeratechnology.com E-mail: sales@primeratechnology.com Signature and Tuff-Coat are trademarks and Primera is a registered trademark of Primera Technology, Inc. ©2000 Primera Technology, Inc. All rights reserved.
510171Pr5.
510171Pr5.