OWNER’S MANUAL Installation•Operation•Maintenance Southwest Windpower, Inc. 1801 West Route 66 Flagstaff, Arizona 86001 Toll Free Phone: 866.805.9463 Phone: 928.779.9463 Fax: 928.779.1485 www.windenergy.com October 2011 Southwest Windpower, Inc.
Southwest Windpower Congratulations on your purchase and welcome to our family! Dear AIR 30 Owner, Thank you for your purchase of AIR 30. You have purchased the most advanced battery charging wind turbine in the world! We believe you will find it easy to install your AIR 30 and are confident you will experience years of dependable service from it. Before going any further, please complete and return the Warranty Registration Card or register on-line at wwww.windenergy.
One - Important Safety Instructions READ THESE INSTRUCTIONS IN THEIR ENTIRETY BEFORE ASSEMBLING, INSTALLING OR OPERATING YOUR AIR BREEZE 1) SAVE THESE INSTRUCTIONS. This manual contains important instructions that must be followed during assembly, installation and maintenance. 2) Read, understand and respect all warnings. 3) Do not install AIR 30 on a windy day. 4) If unusual noise or operation is experienced, turn off machine and contact authorized service personnel.
Contents 1) IMPORTANT SAFETY INSTRUCTIONS _________________ 4 7) AIR WIND TURBINE OPERATION ______________________ 23-25 WARRANTY _________________________________________ 6 7-1 Operational Summary _____________________________ 23 TECHNICAL SPECIFICATIONS ________________________ 7 7-2 Operating Modes ________________________________ 23 2) TURBINE ASSEMBLY ________________________________ 8 7-3 Voltage Regulation _______________________________ 24 3) SITING __________________________________________
AIR 30 5-Year Limited Warranty WIND TURBINE WARRANTY AGREEMENT Hardware Warranty Southwest Windpower, Inc., (“Southwest Windpower”) will repair or replace free of charge any manufacturer defect in part or parts of the Southwest Windpower AIR 30 Wind Turbine determined by Southwest Windpower to be defective in materials and/ or workmanship under normal authorized use consistent with product instructions for a period of five years from the date the product is registered by the original purchaser (“Customer”).
AIR 30 Technical Specifications Model AIR 30 Weight 13 lb / 6 kg Rotor Diameter 46 in / 1.17 m Start Up Wind Speed 8 mph / 3.6 m/s Kilowatt Hours/month 38 kWh/month @ 12 mph / 5.4 m/s avg. wind speed Maximum Wind Speed 110 mph Rated Power 400 watts @ 28 mph / 12.5 m/s wind speed Certifications: CSA (certificate 1954979), CE 24.5 in radius (61 cm) 12 volt and 24 volt AIR 30 wind turbines are eligible to bear the CSA mark with “C” and “US” indicators.
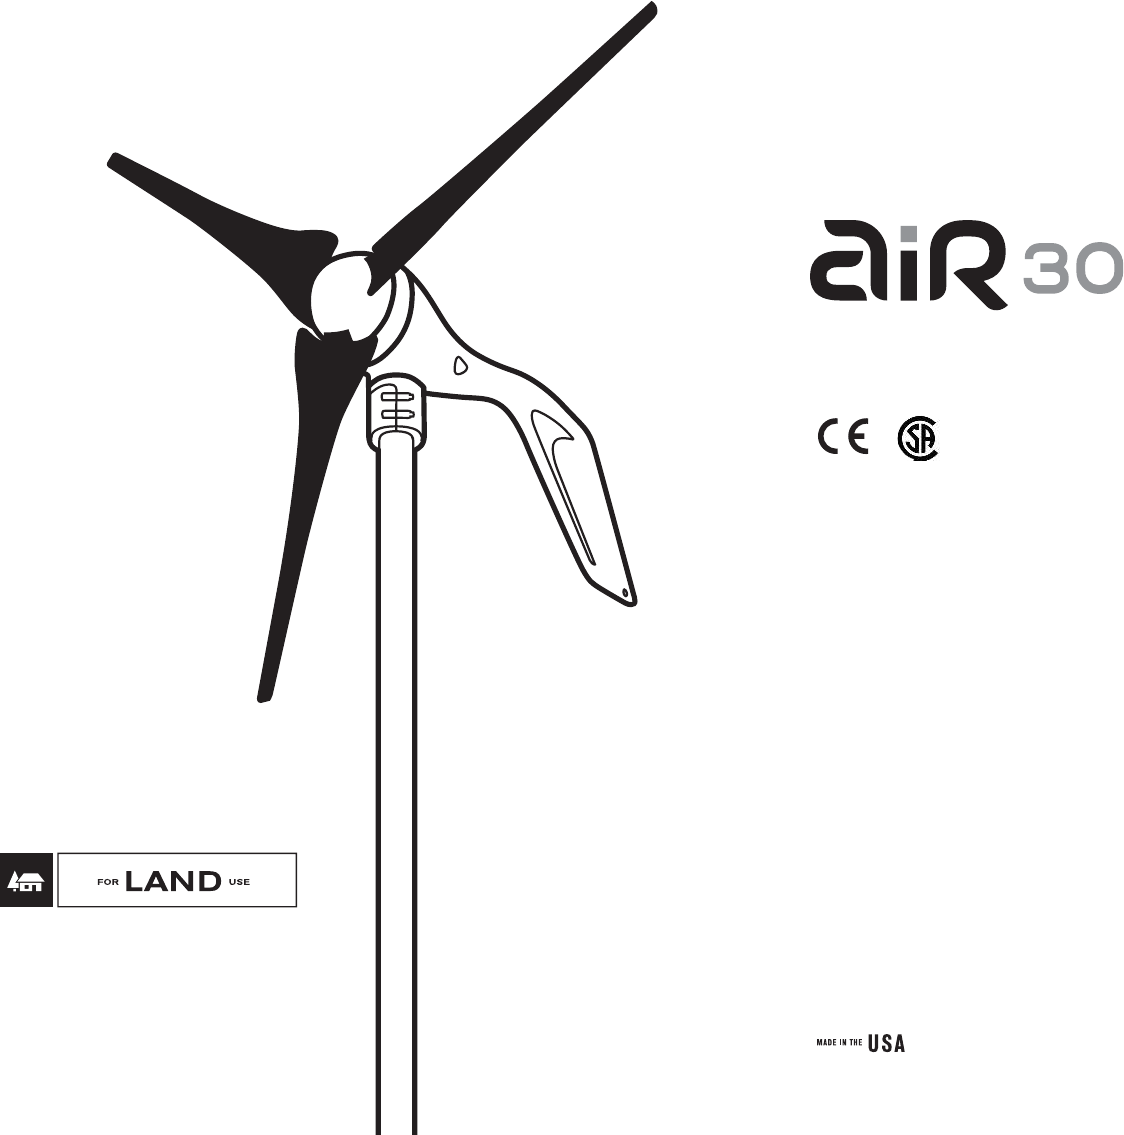
Two - AIR 30 Turbine Assembly Your AIR 30 is delivered partially assembled. Assembly requires mounting the blades on the blade hub, securing the hub to the turbine body and installing the nosecone on the blade hub. The necessary hex key (Allen) wrenches are furnished with AIR 30. Torque Specifications: Blade to hub bolts, 1/4-20 x 0.875 inch, Socket Head Bolt, 72 in-lb (8.0 N·m) Hub to rotor nut, 5/8 -18 inch, Jam nut, 40 lb-ft (55 N·m) Yaw Clamp Bolts, M5 x 35 mm, Socket Head Bolt, 48 in-lb (5.
Three - AIR Wind Turbine Siting Small changes in wind speed can have a dramatic effect on power production. The siting of your wind turbine should be carefully considered. Each installation is different and is often a compromise among tower height, distance from the battery bank, local zoning requirements and obstacles such as buildings and trees. In general the higher the tower, the greater the wind speed and ultimately power production.
Four - AIR Wind Turbine Towers The AIR wind turbine is designed to mount on tubing or pipe with a nominal 1.875 – 1.900 inch outside diameter. This dimension enables constructing a tower from a range of readily available materials including 1 1/2 inch Schedule 40 steel pipe and 2 inch SS-20 galvanized fence tubing (0.090 inch wall thickness). Under no circumstances should plastic pipe be used to construct a tower.
4-1-1 27 ft (8.3 m) Tower Kit (Southwest Windpower part number 1-TWA-10-01) 4-1-2 29 ft (8.8 m) EZ – Tower (Southwest Windpower part number 1-TWA-11-01) The 27 ft (8.3 m) Tower Kit includes a tower clamp/guy wire assembly and all necessary hardware and fasteners to erect a 27 ft tilt-up tower using Schedule 40 steel pipe or tubing with an outside diameter of 1.875 inch. See Fig. 4. The 29 ft (8.
4-1-3 45 ft (13.7 m) Tower Kit (Southwest Windpower part number 1-TWA-10-02) 4-1-4 Roof Mounting Kit (Southwest Windpower part number 1-TWA-19-01) The 45 ft (13.7 m) Tower Kit includes tower clamp/guy wire assemblies and all necessary hardware and fasteners to erect a 45 ft tilt-up tower using Schedule 40 steel pipe or tubing with an outside diameter of 1.875 inch. See Fig. 6.
Five - AIR Wind Turbine Wiring Options The recommended way to connect the turbine to your battery bank is to wire the turbine directly to its own set of battery posts. This will allow the turbine to operate independently. The AIR wind turbine’s internal regulator will monitor the battery and maintain the charge as necessary. Figs. 9 and 10 represent typical single turbine installations. Fig. 10 includes an up-tower junction box for UL (Underwriters Laboratory) compliance.
Fig. 10 represents a system with an Up Tower Junction Box. The junction box may be installed close to the top of the tower to ease installing a Lightning Arrestor or it may be mounted close to the tower base and incorporate the stop switch. Typically installing the box will require drilling holes in the tower to install the box – be careful not to compromise the tower strength.
5-1 Hybrid System Wiring PV Solar Array Fig. 11 represents a typical “hybrid” system with solar panels. Some charging sources (solar panels, fuel-powered generators, additional wind generators, etc.) connected to the same system may cause interference with the AIR wind turbine internal electronics and result in pre-regulation. The interference will not harm the turbine; it will just cause it to spin slowly as if “braked” or it may stop the turbine.
5-2 Multiple Turbine Wiring It is possible to wire multiple AIR wind turbines together. A typical multi-turbine system is depicted in Fig. 12. AIR Wind Turbine Generator There are two methods used to accomplish this task.
5-3 Wire Size All electrical systems lose energy due to resistance in conductors: the wires. We recommend these as the minimum wire sizes; for optimal performance use the largest wires that are practical and affordable. Local, state, and national electrical codes have precedence over these recommendations and must be followed to ensure the safety of your system. •Largewireshavelessresistancebutcanbeconsiderablymorecostly.
48 Volt Systems, AWG / Metric Wire Size mm2 Number of Turbines: 0-90 ft (0-27 m) 90 -250 ft (27-76 m) 2 2 250 -310 ft (76-95 m) 310 -500 ft (95-152 m) 2 10/6 mm 8/10 mm2 1 14/2.5 mm 12/4 mm 2 12/4 mm2 8/10 mm2 6/16 mm2 4/25 mm2 3 10/6 mm2 8/10 mm2 6/16 mm2 4/25 mm2 5-4 Stop Switch (Southwest Windpower part number 2-ARAC-101) Stop Switch Assembly Southwest Windpower recommends the use of a stop switch to provide a convenient and safe method for shutting down your AIR wind turbine.
5-5 Fuses, Circuit Breakers and Ammeter 5-6 Batteries AIR wind turbine’s are capable of producing high amperages. As with all electrical installations, you must protect each of your turbines with a fuse or circuit breaker. Wire your AIR wind turbine with an appropriate size “slowblow” fuse or circuit breaker between it and the batteries. Refer to installation figures at the start of Section 5. If a stop switch is used, the fuse or circuit breaker should be placed between the switch and the batteries.
The following section (5-8) describes grounding the tower in detail. To ground the AIR wind turbine body, connect the AIR wind turbine ground (green) conductor to the tower ground rod. Alternately the ground (green) conductor may be connected to the negative (black) conductor in which case it will be grounded through the battery bank ground rod. Refer to figures 9 through 12. Note that all system grounds should be connected using conductors of the same size as the positive and negative wires.
Six - AIR wind turbine Installation The following are general guidelines for the installation of AIR wind turbine. Because each wind turbine installation is unique, specific step-by-step installation instructions cannot be provided. However, before attempting final installation the following basic steps should be completed: •CompletelyreviewAIRwindturbineOwner’sManual. •AssembleAIRwindturbine.Bladesandhubmaybeleftoffdepending on tower type – see Section 2.0 Turbine Assembly.
6-3 Final Connections Follow system wiring diagram and run wires to disconnect switch, fuse or circuit breaker and ammeter. If a stop switch is utilized (highly recommended) turn switch to OFF until all connections are completed. 6-2 Mounting on Tower After wires are connected to the AIR wind turbine, route the wires down the tower and slide the turbine yaw over tower top.
Seven - AIR Wind Turbine Operation 7-1 Operational Summary Wind turbines operate by capturing the kinetic energy of moving air: the wind. They convert it to rotational motion to turn an alternator that produces electrical power. The electrical power must be regulated to a voltage to charge the system batteries, and there must be a system to prevent overcharging the batteries and resume charging as the battery voltage drops. A means to protect the wind turbine from extreme wind damage must also be provided.
7-3 Voltage Regulation The AIR wind turbine continually monitors the battery voltage and compares it to the voltage regulation set point. Refer to specifications for voltage regulation set points. The voltage regulation set points are factory set to the values listed in the specifications. These values may be adjusted to suit individual applications.
The AIR wind turbine’s internal voltage regulator cannot be completely turned off; however, by setting the voltage regulation set-point to its highest value (potentiometer turned completely clockwise), the AIR wind turbine’s internal regulator may be virtually eliminated from the battery charging system. If a charge controller other than the AIR wind turbine internal controller is utilized, it must be a diversion style regulator.
Nine - AIR Wind Turbine Trouble Shooting Three quick bench tests can verify if your AIR wind turbine is working correctly. Test 1 does not require any equipment. For tests 2 and 3 you will need a battery bank and a power drill. TEST 1 TEST 3 1) Remove the blade/hub assembly from the turbine and place in a safe location. Replace the rotor hub nut on the rotor shaft. 1) With the AIR wind turbine connected to your battery bank, use an electric drill to spin the rotor shaft while observing the LED.
AIR 30 21 20 Ten - AIR 30 Exploded Views & Parts List 19 18 22 11 2X 23 12 10 13 3X 5 17 2X 24 9 16 25 4 15 14 2 8 7 6 1 3 3X 6X 6X AIR 30 Owner’s Manual 27
ITEM NO.
Notes __________________________________________________________________________________________________________________________________ __________________________________________________________________________________________________________________________________ __________________________________________________________________________________________________________________________________ _________________________________________________________________________________________________________________
Notes __________________________________________________________________________________________________________________________________ __________________________________________________________________________________________________________________________________ __________________________________________________________________________________________________________________________________ _________________________________________________________________________________________________________________
Notes __________________________________________________________________________________________________________________________________ __________________________________________________________________________________________________________________________________ __________________________________________________________________________________________________________________________________ _________________________________________________________________________________________________________________
Southwest Windpower, Inc. 1801 West Route 66 Flagstaff, Arizona 86001 Toll Free Phone: 866.805.9463 Phone: 928.779.9463 Fax: 928.779.1485 E-mail: info@windenergy.com Web: www.windenergy.