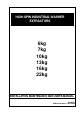
HIGH SPIN INDUSTRIAL WASHER EXTRACTORS 6kg 7kg 10kg 13kg 16kg 22kg INSTALLATION, MAINTENANCE AND USER'S MANUAL 100646 K Publication date: 4 Sep 2009
USER'S MANUAL 1. TABLE OF CONTENTS 1. TABLE OF CONTENTS .................................................................................................. 1 2. WARNINGS AND LABELS............................................................................................. 2 2.1. INSTRUCTIONS FOR MAINTENANCE, ADJUSTMENT AND SAFETY OF PEOPLE..........................3 3. SYMBOLS ON THE MACHINE....................................................................................... 4 4. OPERATION INSTRUCTIONS .
2. WARNINGS AND LABELS TO MINIMIZE THE RISK OF FIRE, INJURY BY ELECTRIC SHOCK OR SERIOUS INJURIES TO PEOPLE OR PROPERTY DAMAGE, PLEASE READ AND FOLLOW THE FOLLOWING INSTRUCTIONS: ♦ This English version is original language version. Without this original version, these instructions are incomplete. ♦ Before installation, operation and maintenance of the machine read carefully the complete instructions, i.e. this „Installation, maintenance and user's manual“, „Programming manual“ and „Spare parts manual“.
WARNING! Always disconnect the washer from the electrical supply before attempting any service. The washer extractor is out of tension if the main plug is taken out or when the main supply is disconnected. When the main switch is turned off the inlet terminals of the machine main switch are still under current! CAUTION! Extreme hot conditions can arise in the surroundings of this air. Watch out for vapor that escapes from the washer extractor venting! CAUTION! Do not cover the washer extractor venting.
3.
EASY CONTROL MICROPROCESSOR GRAPHITRONIC MICROPROCESSOR EASY CONTROL MICROPROCESSOR WITH MECHANICAL BUTTONS PREWASH START (advancing program) MAIN WASH STOP (interupting program) RINSE 1 YES SELECTION RINSE 2 RINSE 3 NO SELECTION EXTRACT INCREASING SEQUENCE TIME DOOR RELEASE DECREASING SEQUENCE TIME FAULT INFO (overview available wash programs and wash sequence functions) PROGRAM SELECT SERVICE (shows actual water temperature and level, number of fullfilled cycles and actual state) CYCLE TIM
4. OPERATION INSTRUCTIONS 4.1. BEFORE WASHING Sort the linen according on the temperature and the instructions of the manufacturer of the fabrics. Check if there aren‘t any strange objects between the linen like nails, screws, needles, etc. in order not to damage the washer-extractor or the linen. Turn sleeves of shirts, blouses, etc. inside out. To get a better washing result, you have to unfold the fabrics and mix the bigger and smaller pieces of fabrics. 4.2.
4.6.
4.8. START THE WASHER 4.8.1. EASY CONTROL MICROPROCESSOR WITH KEYPAD AND MECHANICAL BUTTONS COIN OPERATED MODELS A. After choosing the program with the PROGRAM SELECT button, throw the right amount of coins in the slot indicated on the lower display The display shows the remaining amount that has to be thrown in. If the display shows 00, the washer extractor can be started. The little light by the start button will be flashing. B. Push the START button to start the washer extractor.
When a power failure occurs for a short time, the wash program will continue when the power comes back on. When the failure occurs for a longer time and the door is still closed the display and the light next to the start button starts flashing when power is restored. If the door is still locked the timer will continue the program. For machines initialised as coin operated models, the door will be locked immediately. Press the start button to continue the program.
5.
E43 Voltage Par E44 Model type E45 E46 No Speed Sensor Signal Brake Closed E47 Brake Wear Out E48 Brake Open E49 UnBalance Switch At Wash E50 E52 No Second Acceleration Ramp No Third Acceleration Ramp Board Memory E53 Board Data E57 Lock System E58 No Free Run E59 Run Free Run E60 No reset Drive E61 Continue spin E62 E63E67 E68 Extended speed Motor Drive E69 RS Unbalance E70 RS7 Select E71 RS10 Select E72 KEB ST LOW E73 KEB ST HIGH E74 CFIStuck E75 KEB code E78 Lo
12 E80 Time Out Input16 E81 No Reheat On Hold Signal Failure Soap Dispensing System Heating Failure E82 No Refill Refill failure E83 Cycle Fail E84 No Store PC E85 RTC Low Batt E86 No RTC Comm No successful wash cycle termination Communication failure with PC Real Time Clock, No Battery or battery low power Real Time Clock is not available E100 Weigh No Comm E101 Weigh Low E102 Weigh High E103 Weigh Balance E104 Weigh Overload E105 Weigh Airbags Full stop + tumble.
INSTALLATION AND MAINTENANCE MANUAL 1. TABLE OF CONTENTS 1. TABLE OF CONTENTS ................................................................................................ 1 2. IMPORTANT SAFETY INSTRUCTIONS....................................................................... 2 2.1. SYMBOLS ON THE MACHINE...........................................................................................................4 2.2. IMPORTANT INFORMATION BEFORE INSTALLATION ..............................................
2. IMPORTANT SAFETY INSTRUCTIONS WARNING - SAVE THESE INSTRUCTIONS FOR LATER USE. Failure to comply with the instructions may lead to incorrect use of the appliance, and may result in risk of fire, bodily injuries or death and/or damage to the laundry and/or the appliance. WARNING - Read the IMPORTANT SAFETY INSTRUCTIONS in this manual carefully before operating the appliance.
♦ Do not tamper the washer-extractor controls and do not bypass the safety instructions and the warnings. ♦ Do not use some means on the soap dispenser lid to hold it open by filling or when the machine operates. The discharge or splashing of hazardous liquid can cause serious scalding and burning. ♦ Do not operate the appliance when parts are broken or missing or when covers are open. The appliance must not be operated until the fixed guards are put correctly in place.
! WARNING - Do not open door until cylinder remains stopped and water has been drained completely. If the door safety lock does not work, do not use washer until the door lock mechanism is repaired. ! CAUTION! - Follow all valid basic safety rules and laws. The instructions in this manual cannot account for every possible dangerous situation. They must be generally understood.
3. TECHNICAL SPECIFICATION 3.1.
DRY LOAD CAPACITY (1/10) WASHING FUNCTIONS Washing High extracting G-factor WATER CONNECTION 6 kg / 15 lb 10 kg / 25lb 48 RPM 1000 RPM 300 Water pressure range Recommended pressure Water inlet Maximal water temperature DRAIN CONNECTION Drain valve diameter Flow amount with drain valve MACHINE VENTING Venting connection of outer drum STEAM CONNECTION Steam connection Steam pressure low Steam pressure high CONSUMPTIONS Light soiled fabrics, wash 60°C (1) Without electrical heating With electrical heating
3.2.
DRY LOAD CAPACITY (1/10) WASHING FUNCTIONS Washing High extracting G-factor WATER CONNECTION Water pressure range Recommended pressure Water inlet Maximal water temperature DRAIN CONNECTION Drain valve diameter Flow amount with drain valve MACHINE VENTING Venting connection of outer drum STEAM CONNECTION Steam connection Steam pressure low Steam pressure high CONSUMPTIONS Light soiled fabrics, wash 60°C (1) Without electrical heating With electrical heating Steam consumption 16 kg / 35 lb 22 kg / 50 lb 4
3.3. DIMENSIONS AND PLACEMENT OF COMPONENTS ON THE MACHINE 6 kg / 13 lb, 7 kg / 18 lb, 10 kg / 25 lb 1. Control panel 2. Connection liquid soap 3. Serial plate 4. Air relieve 5. Water supply 6. Air vent holes, Frequency inverter 7. Fuses 8. Main switch 100646_K_PUB_DATE_4_SEP_2009.DOC 13 kg / 30 lb,16 kg / 35 lb, 22 kg / 50 lb Fig.3.3. 9. Electrical supply connection 10. Drain 11. Adjustable feet 12. Steam connection 13. Soap dispenser 14. Plastic box for electrical connection to liquid soap pumps 15.
6 kg / 13 lb 7 kg / 18 lb 10 kg / 25 lb 13 kg / 30 lb 16 kg / 35 lb 22 kg / 50 lb A 660 mm / 25,98“ 660 mm / 25,98“ 660 mm / 25,98“ 835 mm / 32,87“ 835 mm / 32,87“ 900 mm / 35,43“ B 685 mm / 26,97“ 685 mm / 26,97“ 785 mm / 30,91“ 845 mm / 33,26“ 960 mm / 37,8“ 1085 mm / 42,71“ C 1080 mm / 42,52“ 1080 mm / 42,52“ 1140 mm / 44,88“ 1295 mm / 50,98“ 1295 mm / 50,98“ 1430 mm / 56,29“ D 560 mm / 22,05“ 560 mm / 22,05“ 560 mm / 22,05“ 715 mm / 28,15“ 715 mm / 28,15“ 799 mm / 31,45“
4. MACHINE INSTALLATION 4.1. MACHINE INSPECTION When the machine is delivered, it is necessary to do a visual inspection for any damage that may have occurred during transit. If the package or pallet are damaged or signs of possible damage are evident, let the carrier note the condition on the shipping papers before the shipping receipt is signed. Remove the package as soon as possible and check if the information on the serial plate correspond with your order.
INSTALLING, LEVELING FREELY ON THE FLOOR ! WARNING! THE MACHINE MUST RELIABLY REST IN ALL FOUR CORNERS OF THE MACHINE! THE MACHINE MAY NOT ROCK. THE MACHINE MUST BE IN WATER LEVELLED POSITION. The machine is to be located on a not elevated leveled concrete floor that comply with static and dynamic stress of the machine. The friction coefficient must be higher then 0,5 between the rubber feet or sheet and the floor material.
INSTALLING, LEVELING AND SECURE ON AN ELEVATION The machine can also be secured to a mounting base or foundation by means of bolts and anchoring bolts to assure the safety. When a concrete pad or a frame is used then is the maximum height 305 mm / 12“. The pad or frame must be designed so that it can carry the static and dynamic forces. The thickness of iron profiles is minimum 4 mm / 0.158“. For 6kg/13lb, 7kg/18lb, 10kg/25lb machine, remove the four rubber feet from the machine frame.
6 kg / 13 lb X1 X2 X3 X4 X5 X6 X7 14 660 mm / 25,98“ 560 mm / 22,05“ 50 mm / 1,97“ 685 mm / 26,97“ 455 mm / 17,91“ 130 mm / 5,12“ 115 mm / 4,53“ 7 kg / 18 lb 10 kg / 25 lb 13 kg / 30 lb 660 mm / 660 mm / 830 mm / 25,98“ 25,98“ 32,7“ 560 mm / 560 mm / 715 mm / 22,05“ 22,05“ 28,1“ 50 mm / 50 mm / 57,5 mm / 1,97“ 1,97“ 2,26“ 685 mm / 785 mm / 845 mm / 26,97“ 30,91“ 33,26“ 455 mm / 565 mm / 500 mm / 17,91“ 22,24“ 19,68“ 130 mm / 130 mm / 178,5 mm / 5,12“ 5,12“ 7,02“ 115 mm / 115 mm / 135 mm / 4,53“ 4,53“
4.4. ELECTRICAL CONNECTION GENERAL The machine has been designed for connecting to the electrical network according the specification of your order. Before connection check the electrical data stated on the data plate (fig.3.3., pos.3), if they correspond to your electrical network. An individual branch circuit needs to be used for each machine. The way of the connection is described in fig.4.4.A.
RESIDUAL CURRENT DEVICE (RCD) In some countries an RCD is known as an „earth leakage trip“ or „Ground Fault Circuit Interrupter“ (GFCI) or an „Appliance Leakage Current Interrupter“ (ALCI) or „earth (ground) leakage current breaker“. Specifications: – Tripping current: 100mA (if locally not available/allowed use a 30mA trip current, preferably selective type with small time delay set) – Install max. 2 machines on each RCD (for 30mA, only 1 machine) – Type B.
Power supply protection device nominal current (US) Automatic circuit breakers 16A (15A) 20A (20A) 25A (-) 40A (40A) 63A(-) 80A 100A 125A Fuses 10A (10A) 16A (15A) 20A (20A) 32A (30A) 50A (50A) 63A 80A 100A Min. phase conductor 2 section in mm (AWG) Min. Protection conductor section in mm2 (AWG) 1,5 mm² (AWG 15) 2,5 mm² (AWG 13) 4 mm² (AWG 11) 6 mm² (AWG 9) 10 mm² (AWG 7) 16 mm² 25 mm² 35 mm² 1,5 mm² (AWG 15) 2,5 mm² (AWG 13) 4 mm² (AWG 11) 6 mm² (AWG 9) 10 mm² (AWG 7) 16 mm² 16 mm² 25 mm² Tab.4.4.
1. Washing machine (rear view) 2. Laundry protective earth connection 3. Washing machine external protective terminal 4. Protective conductor - washing machine connection 5. Earth mark Fig.4.4.D. MULTIPLE MACHINES IN LINE SINGLE PHASE When multiple single phase machines are connected to the same electrical network, it is necessary to connect the machines according to fig.4.4.E.
4.5. WATER CONNECTION The washer is equipped with 3/4“ BSP (British Standard Pipe Thread) hot and cold water inlet valves, indicated by a sticker next to the inlet. Use the water inlet hoses that accompany the washer as they are properly adapted to the water valves and appliance. NEVER use a rigid connection to the water supply. There are 2 kinds of water inlet hoses, water inlet hoses with at both sides BSP threaded nuts or at one side a BSP nut and a NPT nut on the other end.
4.6. STEAM CONNECTION ! WARNING! INSTALL A STEAM SUPPLY DISCONNECTING DEVICE IN THE VICINITY OF EACH WASHER. DISCONNECT THE STEAM SUPPLY ALWAYS BEFORE ANY SERVICE OR INTERVENTION, GIVING SUFFICIENT TIME TO COOL DOWN THE PARTS TO AVOID INJUIRES. ! WARNING! IT IS NECESSARY TO INSERT A FILTER WITH PERMEABILITY UP TO 300 MICROMETERS IN FRONT OF THE STEAM VALVE. POSSIBLE DIRT BIGGER THAN 300 MICROMETERS MIGHT DAMAGE THE STEAM VALVE AND CAN CAUSE ITS LEAKAGE.
Fig.4.7.B. Recommended drain pipe diameters 4.8. VENTING ! WARNING! VAPOURS ESCAPE FROM THE MACHINE THROUGH THE AIR VENT OPENING! (FIGURE 3.3., POSITION 4), DO NOT COVER. The vent air opening is part of the back flow prevention water system. It also takes care that the tub can not be pressurized by water intake and vapor of the hot water. It allows also proper measuring of the water level. For the safety of everyone make sure that unauthorized persons cannot reach the backside of the machine.
! WARNING! CHECK THAT THE HOSE CONNECTIONS ARE TIGHT (CHECK THE CLAMPS)! ANY LEAKAGE OF CHEMICALS MAY CAUSE SERIOUS BODY INJURIES AS WELL AS SERIOUS DAMAGE TO THE WASHER. IF ONE OF THE NIPPLES ARE OPEN, CLOSE AND SECURE THE OPENING WITH AN APPROPRIATE COVER. ELECTRICAL CONNECTION The power supply of the liquid soap supply system has to be connected to an external electrical source.
4.10. PUTTING THE MACHINE INTO SERVICE ! WARNING! DO NOT OPERATE THE MACHINE WITHOUT REMOVING THE TRANSPORT BRACES. OTHERWISE THIS CAN LEAD TO INJURY TO PEOPLE AND DAMAGE THE MACHINE. DO NOT TRANSPORT THE MACHINE WITHOUT TRANSPORT BRACES MOUNTED. The machine is blocked for transport. This eliminates all possible movement of the tub assembly during transportation. The transport braces must be removed prior putting your machine into service. 1.
CHECKING BEFORE PUTTING INTO SERVICE 1. Make sure the transport braces are removed. 2. Put out all items from wash drum. 3. Check the machine horizontal position. 4. Check connection and clearance of your drain, channel or central drainage. 5. Check protective connection (earth) and electrical supply connection. 6. Open water valves to machine and check hose and connections for leaks. 7. Read carefully the „User's manual“. 8. Check the vibration switch function during extracting. 9.
5. MAINTENANCE AND ADJUSTMENTS WARNING! ALWAYS FOLLOW SAFETY INSTRUCTIONS! DO NOT BYPASS ANY SAFETY DEVICES OR THEIR PARTS. ANY INTERFERENCE TO THE MACHINE FUNCTIONS AND CONSTRUCTION ARE PROHIBITED! USE THE PROPER CHEMICAL AGENTS WHICH AVOID CALCIUM SEDIMENTS ON HEATING ELEMENTS AND OTHER MACHINE PARTS. DISCUSS THIS ISSUE WITH YOUR SUPPLIER OF WASHING PRODUCTS. THE MANUFACTURER OF THE MACHINE IS NOT RESPONSIBLE FOR THE DAMAGE OF HEATING ELEMENTS AND OTHER MACHINE PARTS DUE TO CALCIUM SEDIMENTS.
5.2. ADJUSTMENTS AND PART'S EXCHANGES 5.2.1. ADJUSTMENT OF DOOR SEAL PRESSURE MACHINES 6 kg / 13 lb, 7 kg / 18 lb, 10 kg / 25 lb, 13 kg / 30 lb, fig.5.2.1.A If there is a water leakage around the door area, it is necessary to find out what caused the problem. A reason can be due to the door seal pressure should be adjusted or if the door shift out of position. In some cases the door seal has to be replaced. 1. For increasing (decreasing) the pressure of the door gasket, take off spacers (pos.
1. Door frame bolt 2. Door seal 3. Door glass 4. Bolt of the door hinge 5. Cross beam 6. Distance square washer 7. Door 8. Longitudinal beam 9. Door lock bolt 10. Distance lock washer 11. Door lock cover 12. Lock cover bolt 13. Door lock 14. Upper and lower hinge 15. Shim TAKE OUT HERE INSERT HERE Fig.5.2.1.B Door fastening 5.2.2. REPLACEMENT OF DOOR RUBBER 1. Open the door. Remove the door glass, fig.5.2.1.A, B., pos.3 with rubber (pos.
1. Microswitch 2. Operation plate 3. Sensor Fig.5.2.3. Vibration switch FUNCTIONALITY TEST OF THE OUT OF BALANCE ! ATTENTION! DO NOT USE THE MACHINE IF THIS FUNCTION DOESN’T WORK PROPERLY! THIS FUNCTIONAL TEST CAN ONLY BE EXECUTED BY A QUALIFIED TECHNICIAN WITH PROPER AUTHORIZATION. 1. After installation and once a year the vibration switch has to be verified on his functionality. During the extraction mode carefully activate the out of balance switch by moving the flexible sensor manually.
4. The belts must be in line on the two pulley’s item 5 - 8. If necessary move the motor, forwards, backwards, so that the belts gets aligned. 5. Turn on the bolt, item 7 down for applying tension to the belts, taking care that the nut item 6 give enough freedom. 6. Verify the belt tension like above described. 7. If the belt tension is within the limits, screw the lower nut, item 6 against the motor plate as counter nut. Tighten strongly to secure the whole setup. 8.
6. TROUBLE SHOOTING AIDS 6.1. UNBLOCKING OF THE DOOR LOCK IN CASE OF EMERGENCY If the power blackout takes too long, you can make an emergency unblocking of the door lock.
7. LIST OF RECOMMENDED SPARE PARTS – drain valve – 2-way inlet valve – 3-way inlet valve – steam valve – door lock microswitch – door lock coil – fuses – thermostat sensor – motor contactor – heating contactor – heating element – V-belts – door seal Find more detailed information and order codes in the spare parts catalogue for individual machines at your dealer. 100646_K_PUB_DATE_4_SEP_2009.
8. PUTTING THE MACHINE OUT OF SERVICE 8.1. DISCONNECTING THE MACHINE 1. Switch off the external electric power inlet to the machine. 2. Turn off the main switch on the machine. 3. Shut the external water or steam inlet to the machine. 4. Make sure that the external electric power and steam inlets are shut off. Disconnect all electric, water or steam inlets. 5. Insulate the external electric power inlet conductors. 6. Equip the machine with a sign „OUT OF SERVICE“. 7.
REMARKS: 100646_K_PUB_DATE_4_SEP_2009.
IMPORTANT ! MACHINE TYPE: PROGRAMMER: ELECTRONIC TIMER INSTALLATION DATE: INSTALLATION CARRIED OUT BY: SERIAL NUMBER: ELECTRICAL DETAILS: .............VOLT...............PHASE............HZ NOTE: ANY CONTACTS WITH YOUR DEALER REGARDING MACHINE SAFETY, OR SPARE PARTS, MUST INCLUDE THE ABOVE IDENTIFICATION. MAKE CERTAIN TO KEEP THIS MANUAL IN A SECURE PLACE FOR FUTURE REFERENCE.
about | case studies | contact 0845 077 65 65 Home Laundry Equipment Ozone Laundry Systems Chemicals Services Special Offers Ex Rental Testimonials Contact Us