
User`s manual


Table Of Contents
- 1 Introduction
- 2 Setting Up The Printer
- 3 Operating The Printer
- 4 The Configuration Menus
- 5 Interfaces
- 6 Troubleshooting
- A Printer Specifications
- B Demand Printing
- C ASCII Character Set
- D Communication Notices
Chapter 2 Connect The Interface And Power Cables
40
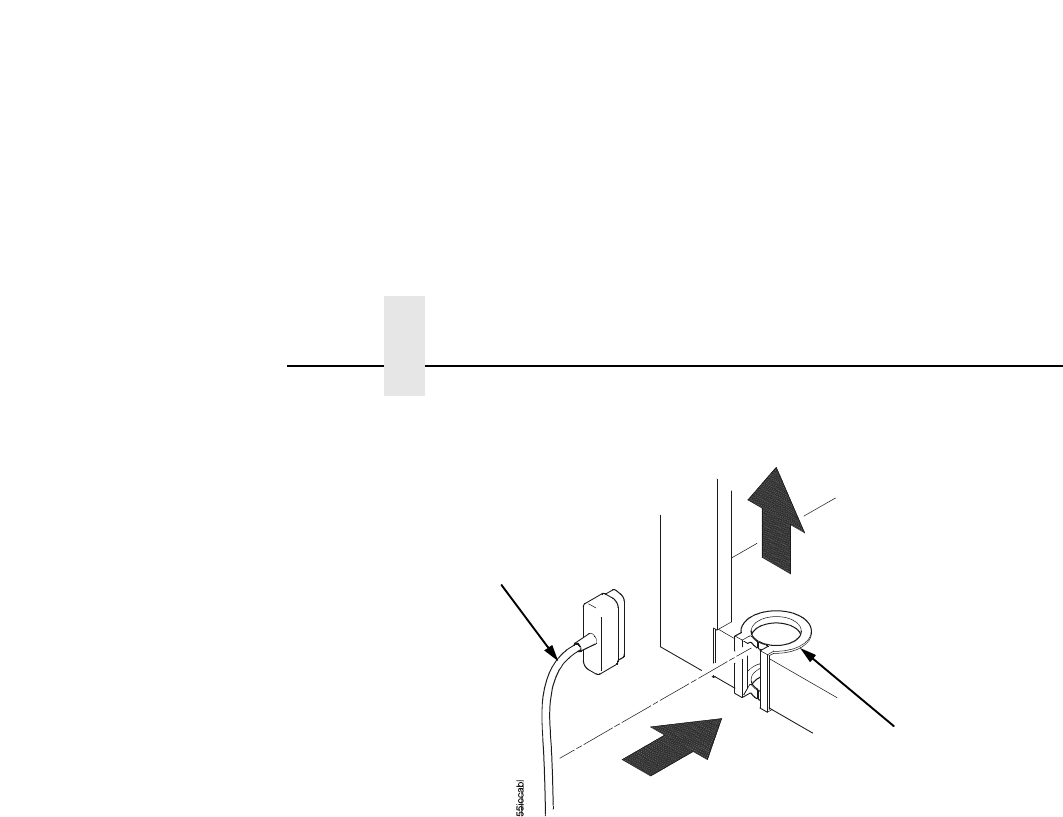
Figure 22. Routing the I/O Cable
6. Hold the I/O cable below its connector and gently push the
cable through the opening in the grommet seated in the notch.
7. Pull the cable up through the notch until it reaches the I/O plate.
Attach the cable connector to the printer interface connector
previously selected in step 4 of this section.
8. Secure the cable to the printer using the upper and lower
standoffs.
9. Guide the power cord up through the hole in the lower right
back corner of the cabinet (see Figure 21). Thread the power
cord inside the bracket where the gas spring is attached.
10. Plug the power cord into the printer AC power connector, then
into the AC power outlet.
I/O Cable
Grommet