Owners Manual • Bedienungsanleitung Manuel de l'utilisateur • Manuale dell'utente PRB0500, PRB0500I 24
EN NOTICE All instructions, warranties and other collateral documents are subject to change at the sole discretion of Horizon Hobby, Inc. For up-to-date product literature, visit www.horizonhobby.com and click on the support tab for this product. WARNING: Read the ENTIRE instruction manual to become familiar with the features of the product before operating. Failure to operate the product correctly can result in damage to the product, personal property and cause serious injury.
EN Introduction Pro Boat® RC models look as good as they perform. Our boats, which include everything from scale sailboats to fully licensed powerboats, exceed expectations and provide years of radio control fun and excitement. Whether your passion leads you towards the pure serenity of sailing or the all-out speed of a Deep-V, Pro Boat models fit your taste, budget and lifestyle.
EN Charging Warnings WARNING: Failure to exercise caution while using this product and comply with the following warnings could result in product malfunction, electrical issues, excessive heat, FIRE, and ultimately injury and property damage. • Read all safety precautions and literature prior to use of this product. • Never leave the battery and charger unattended during use. • Never allow children under 14 years of age to charge battery packs. • Never attempt to charge damaged batteries.
EN Installing the Battery Pack 1. Turn the latch so the tab is parallel with the back of the hull, then lift the hatch up and back from the hull. 2. Remove the radio box cover. 3. Install the included hook and loop tape on the battery pack. Install the battery on the hook and loop strips in the compartment. Tip: Move the pack forward or back to adjust the center of gravity for your boat. Move the pack toward the bow so the bow rides lower in the water.
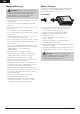
EN Transmitter Battery Installation This transmitter requires 4 AA batteries. 1. Remove the battery cover from the transmitter. 2. Align the battery polarity with the markings in the compartment and Install the batteries. 3. Install the battery cover. Transmitter Controls Battery Level Indicator Reverse Switch Solid Red and Green: Battery voltage is good (above 4V). Solid Red: Battery voltage is critically low (below 4V). Replace transmitter batteries.
EN Getting Started 1. Power on the transmitter. 4. Test the transmitter’s control of the boat with the boat on 2. Connect the battery. the display stand. 3. Power on the ESC switch. 1 5. After launching the boat in the water, start driving slowly, and, if the boat does not go straight, adjust the steering trim dial on the transmitter. 2 3 ST. TRIM POWER 4 ST. RATE 5 TH. TRIM ST. TRIM POWER ST. RATE TH. TRIM Checking the Radio System 2. Power on the transmitter.
EN Binding Failsafe A In the unlikely event that the radio link is lost during use, the receiver will drive the servos to their preprogrammed failsafe positions (normally no throttle and straight steering). If the receiver is powered on before powering on the transmitter, the receiver will enter failsafe mode, driving the servos to their preset failsafe positions. When the transmitter is powered on, normal control is resumed. Failsafe servo positions are set during binding.
EN Boating Tips Avoid boating near other watercraft, stationary objects, waves, wakes and other rapidly moving water, wildlife, floating debris or overhanging trees. You should also be careful to avoid boating in areas where there are many people, such as swimming areas, park waterways or fishing areas. Consult local laws and ordinances before choosing a location to pilot your boat. Maximum speeds are only achieved when the water conditions are smooth and there is little wind.
B EN Maintenance Always replace the flexshaft when it is damaged or shows visible wear or injury and property damage may result. Ensure there is a 1–2mm gap and a washer (H) between the u-joint and the prop strut to allow for flexshaft shrinkage under load. A Lubricating the flexshaft is vital to the life of the drivetrain. The lubricant also acts as a water seal, keeping water from entering the hull through the stuffing box.
EN Checklists Before Boating After Boating • Install fully charged batteries in your boat and transmitter • • Connect the boat’s battery to the ESC Always power off the receiver before powering off the transmitter to maintain control of the boat and to retain transmitter binding • Make sure the boat is bound to the transmitter (otherwise, bind the boat to the transmitter using the included binding instructions) • Disconnect the battery from the receiver and remove the batteries from the boat •
EN Troubleshooting Guide Boat will not connect (after binding) to transmitter Transmitter is too near boat during connecting process Move powered transmitter a few feet from boat, disconnect and reconnect battery to boat Boat or transmitter is too close to large metal object, wireless source or another transmitter Move boat or transmitter to another location and attempt to connect again Boat battery/transmitter battery charge is too low Replace/recharge batteries ESC switch is off Power on ESC swit
EN Limited Warranty What this Warranty Covers Horizon Hobby, Inc. (“Horizon”) warrants to the original purchaser that the product purchased (the "Product") will be free from defects in materials and workmanship at the date of purchase.
EN Warranty Requirements For Warranty consideration, you must include your original sales receipt verifying the proof-ofpurchase date. Provided warranty conditions have been met, your Product will be serviced or replaced free of charge. Service or replacement decisions are at the sole discretion of Horizon.
EN FCC Information This device complies with part 15 of the FCC rules. Operation is subject to the following two conditions: (1) This device may not cause harmful interference, and (2) This device must accept any interference received, including interference that may cause undesired operation. This product contains a radio transmitter with wireless technology which has been tested and found to be compliant with the applicable regulations governing a radio transmitter in the 2.400GHz to 2.
DE HINWEIS WARNUNG: Lesen Sie die GESAMTE Bedienungsanleitung, um sich vor dem Betrieb mit den Produktfunktionen vertraut zu machen. Wird das Produkt nicht korrekt betrieben, kann dies zu Schäden am Produkt oder persönlichem Eigentum führen oder schwere Verletzungen verursachen. Alle Anweisungen, Garantien und dazugehörigen Dokumente können ohne Ankündigung von Horizon Hobby Inc. geändert werden. Eine aktuelle Version ersehen Sie bitte im Support Feld unter: http:// www.horizonhobby.com.
DE Einleitung Die Pro Boat RC Modelle sehen so gut aus wie sie performen. Unsere Boote, angefangen vom Scale- Segelboot bis hin zum voll lizenzierten Powerboot übertreffen weit die Erwartungen und bieten viele Jahre Spaß und Action. Gleichgültig ob Sie das pure Segeln genießen möchten oder die Action eines Deep V Powerbootes, die Pro Boat Modelle passen immer zum Budget und Lifestyle.
DE Warnungen zum Laden WARNUNG: Mangelnde Aufmerksamkeit bei dem Gebrauch dieses Produktes in Verbindung mit den folgenden Sicherheitshinweisen könnte zu Fehlfunktionen elektrischen Problemen, großer Hitze, FEUER, Körperverletzung und Sachbeschädigung führen. • Bitte lesen Sie vor Verwendung des Produktes alle Bedienungsanleitungen und Sicherheitshinweise. • Lassen Sie das Ladegerät und den Akku während des Betriebes niemals unbeaufsichtigt.
DE Einsetzen des Akkupacks 1. Drehen Sie den Verschlußriegel so, dass er sich parallel zur hinteren Kante befindet und heben den Deckel an. 2. Nehmen Sie die RC Abdeckung ab. 3. Kleben Sie den Klettstreifen auf den Akku und setzen den Akku in das Akkufach ein. Tipp: Bewegen Sie den Akku vorwärts oder rückwärts im Boot um den Schwerpunkt zu ändern. Bewegen Sie den Akku nach vorne im Boot taucht der Bug tiefer in das Wasser, bewegen Sie den Akku weiter nach hinten taucht der Bug höher aus dem Wasser aus. 4.
DE Einsetzen der Senderbatterien Zum Betrieb des Senders sind 4 AA Batterien erforderlich. 1. Nehmen Sie den Batteriefachdeckel vom Sender ab. 2. Setzen Sie die Batterien polrichtig den Markierungen folgend ein. 3. Setzen Sie die Batteriefachabdeckung wieder auf. Senderkontrollen Akkustatus Indikator Reverse Schalter Leuchtet Rot und Grün: Akkusspannung ist gut (über 4 Volt) Leuchtet Rot: Akkuspannung ist kritisch niedrig.
DE Für den Start 1. Schalten Sie den Sender ein. 2. Schließen Sie den Akku an. 5. Nachdem Sie das Boot in das Wasser gesetzt haben fahren Sie bitte langsam los. Sollte das Boot nicht geradeaus fahren justieren Sie die Trimmung. 4. Testen Sie die Kontrollen mit dem Boot auf dem Ständer. 3. Schalten Sie den Reglerschalter ein. 1 2 3 ST. TRIM POWER 4 ST. RATE 5 TH. TRIM ST. TRIM POWER ST. RATE TH.
DE Binden Failsafe In dem unvorhergesehenem Fall, dass die Funkverbindung während des Betriebes verloren geht fährt der Empfänger die Servos in die vorprogrammierten Failsafepositionen. (normalerweise kein Gas und Lenkung gerade) A Sollte der Empfänger vor dem Sender eingeschaltet sein, geht der Empfänger in den Failsafe Mode und fährt die Servos in die programmierten Failsafepositionen. Wird dann der Sender eingeschaltet besteht wieder normale Kontrolle.
DE Tipps zum Fahren Wasserbedingungen entsprechend, so dass das Boot nicht umschlägt. ACHTUNG: Stellen Sie sicher, dass Sie ihr Boot mit einem Sicherheitsabstand von mindestes 5 Metern von Menschen und/oder anderen Fahrzeugen im Wasser betreiben. Vermeiden Sie es neben anderen Wasserfahrzeugen, stationären Objekten, Wellen, Strömungen oder anderem sich schnell bewegendem Wasser, Tieren, Treibgut oder überhängenden Bäumen zu fahren. Meiden Sie ebenfalls Gegenden mit vielen Menschen, Parks u.
B DE Wartung Ersetzen Sie immer die Flexwelle wenn sie beschädigt ist oder Abnutzungen aufweist, da sonst Verletzungen oder Sachbeschädigungen auftreten können. Achten Sie bitte darauf, dass ein 1 - 2 mm breiter Spalt und sich eine Unterlegscheibe (H) zwischen der Kupplung und Halter befindet damit die Flexwelle unter Last schrumpfen kann. Das Schmieren der Flexwelle ist für die Lebenserwartung des Antriebes sehr wichtig.
DE Checkliste Vor dem Fahren Nach dem Fahren • Setzen Sie vollständig geladene Akkus und Batterien in Boot und Sender. • Schließen Sie den Akku an den Boots-Regler an. • Stellen Sie sicher, dass das Boot an den Sender gebunden ist (Binden Sie sonst das Boot folgend den Bindenanweisungen in dieser Anleitung) • Schalten Sie immer zuerst den Empfänger aus bevor Sie den Sender ausschalten. Damit bleibt das Modell unter Senderkontrolle und Sie verhindern dass der Empfänger in den Bindemode geht.
DE Hilfestellung zur Problemlösung Boot will sich nicht an den Sender verbinden (Nach dem Bindevorgang). Sender steht zu nah am Boot während des Verbindevorganges. Bringen Sie den eingeschalteten Sender ein paar Meter weg vom Boot und versuchen erneut eine Verbindung. Boot oder Sender sind zu nah an metallischen Objekten, Funkquellen oder anderem Sender. Bringen Sie den Sender und das Boot an einen anderen Ort und versuchen erneut eine Verbindung. Bindestecker stecken gelassen.
DE Garantie und Service Informationen Warnung Ein ferngesteuertes Modell ist kein Spielzeug. Es kann, wenn es falsch eingesetzt wird, zu erheblichen Verletzungen bei Lebewesen und Beschädigungen an Sachgütern führen. Betreiben Sie Ihr RC-Modell nur auf freien Plätzen und beachten Sie alle Hinweise der Bedienungsanleitung des Modells wie auch der Fernsteuerung Garantiezeitraum Exklusive Garantie Horizon Hobby Inc (Horizon) garantiert, dass das gekaufte Produkt frei von Material- und Montagefehlern ist.
DE Wartung und Reparatur Kostenpflichtige Reparaturen Muss Ihr Produkt gewartet oder repariert werden, wenden Sie sich entweder an Ihren Fachhändler oder direkt an Horizon. Rücksendungen/Reparaturen werden nur mit einer von Horizon vergebenen RMA Nummer bearbeitet. Diese Nummer erhalten Sie oder ihr Fachhändler vom technischen Service. Mehr Informationen dazu erhalten Sie im Serviceportal unter www.horizonhobby.de oder telefonisch bei dem technischen Service von Horizon.
DE Konformitätshinweise für die Europäische Union Konformitätserklärung laut Allgemeine Anforderungen (ISO/IEC 17050-1:2004, korrigierte Fassung 2007-06-15); Deutsche und Englische Fassung EN ISO/IEC 17050-1:2010 Declaration of conformity (in accordance with ISO/IEC 17050-1) Horizon Hobby GmbH Christian-Junge-Straße 1 D-25337 Elmshorn erklärt das Produkt: PRB Miss Geico 24 RTR declares the product: (PRB0500I) Geräteklasse: 1 equipment class den grundlegenden Anforderungen des §3 und den übrigen einschlägi
FR REMARQUE Toutes les instructions, garanties et autres documents de garantie sont sujets à la seule discrétion de Horizon Hobby, Inc. Veuillez, pour une documentation produit bien à jour, visiter le site internet http://www.horizonhobby.com.
FR Introduction Les modèles Pro Boat RC sont aussi élégants que performants. Notre gamme de bateaux s'étend des voiliers maquette aux répliques sous licence de bateaux de vitesse de compétition qui dépasseront vos espérances et vous offriront des années d'amusement. Si votre passion vous guide vers le calme de navigation à voile ou l'excitation de la vitesse avec un bateau de course, vous trouverez toujours un modèle Pro Boat adapté à votre style, à vos goûts et à votre budget.
FR Avertissements relatifs à la charge ATTENTION : Une erreur d'attention ou un non respect des consignes durant l'utilisation de ce produit peut entraîner un dysfonctionnement, une surchauffe, un INCENDIE et dans dans le pire des cas, des blessures et des dégâts matériels. Chargeur de batterie Ce chargeur léger et compact (DYN4113) charge rapidement et facilement les batteries Ni-MH de 5 à 8 éléments équipés d'une prise EC3.
FR Installation de la batterie 1. Tournez de verrou de façon à placer la languette à la parallèle de l'arrière de la coque, puis soulevez le cockpit puis retirez-le de la coque. 2. Retirez le couvercle du compartiment radio. 3. Collez sur la batterie la bande auto-agrippante incluse. Installez la batterie sur la bande auto-agrippante située dans la coque. ASTUCE : Placez la batterie plus en avant ou en arrière pour régler le centre de gravité de votre bateau.
FR Installation des piles de l'émetteur Cet émetteur nécessite 4 piles AA. 1. Retirez le couvercle de l'émetteur. 2. Insérez les piles en suivant les polarités indiquées dans le compartiment. 3. Installez le couvercle. Commandes de l’émetteur Indicateur de niveau des batteries Rouge et vert fixes : la tension des piles est bonne (au-dessus de 4 V). Rouge fixe : la tension des piles est extrêmement faible (en dessous de 4 V). Remplacez les piles de l’émetteur.
FR Démarrage 1. Mettez l'émetteur sous tension 2. Connectez la batterie 1 3. Mettez le variateur sous tension. 4. Testez les commandes du bateau en le plaçant sur le ber. 5. Après avoir lâché le bateau sur l'eau, commencez par avancer lentement et si le bateau ne navigue pas droit, réglez le trim de direction de l'émetteur. 2 3 ST. TRIM POWER 4 ST. RATE 5 TH. TRIM ST. TRIM POWER ST. RATE TH.
FR Binding Failsafe fois que le système est affecté.. A Dans l’hypothèse fortement improbable d’une perte de la liaison radio en cours d’utilisation, le récepteur amène les servos à leurs positions de sécurité préprogrammées (Failsafe) (en général pas de gaz et volant droit). Si le récepteur est allumé avant l’émetteur, le récepteur entre en mode de sécurité intégrée, amenant les servos à leurs positions de sécurité préréglées.
FR Conseils relatifs à l'utilisation du bateau Évitez de naviguer à proximité d’autres embarcations, d’objets flottants, de vagues, de sillages et d’eau en déplacement rapide, ainsi que d’animaux sauvages et de débris flottants, ou encore sous des arbres. Évitez en outre de naviguer dans des endroits très fréquentés, notamment les zones de baignade, les cours d’eau des parcs et les lieux de pêche. Reportez-vous aux lois et arrêtés locaux avant de choisir un lieu où piloter votre bateau.
B FR Maintenance Toujours remplacer le flexible quand il est endommagé ou qu'il présente des trace d'usure. Un non respect de cette consigne vous expose à un risque de blessures corporelles ou des dégâts matériels. Assurez vous d'insérer la rondelle (H) de laisser un écart de 1 à 2mm entre le cardan (E) et la chaise d'hélice (G) pour compenser le raccourcissement du flexible sous la charge. A C La lubrification du flexible est vitale pour la durée de vie de la transmission.
FR Listes de contrôles Avant la navigation Après la navigation • Installez des batteries entièrement chargées dans votre bateau et dans l’émetteur. • Connectez la batterie du bateau au contrôleur électronique de vitesse. • Éteignez toujours le récepteur avant d’éteindre l’émetteur pour garder le contrôle du bateau et conserver l’affectation. • Vérifiez que le bateau est affecté à l’émetteur (si ce n’est pas le cas, affectez le bateau à l’émetteur en suivant les instructions d’affectation fournies).
FR Guide de dépannage Il est impossible d’affecter le bateau à l’émetteur (durant l’affectation). Échec de la liaison entre le bateau et l’émetteur (après affectation). Le bateau tend à plonger dans l’eau ou prend l’eau. Le bateau a tendance à tourner dans une direction. 40 L’émetteur est trop proche du bateau lors du processus d’affectation. Éloignez un peu l’émetteur allumé du bateau, déconnectez la batterie de celui-ci, puis reconnectez-la.
FR Le gouvernail ne pivote pas. Le gouvernail, la liaison ou le servo est endommagé. Réparez ou remplacez les pièces endommagées et réglez les commandes. Le câble est endommagé ou les connexions sont lâches. Contrôlez les câbles et les connexions, et procédez aux connexions et remplacements nécessaires. L’émetteur n’est pas bien affecté ou un modèle incorrect est sélectionné. Procédez de nouveau à l’affectation ou sélectionnez le bon modèle sur l’émetteur.
FR manière que ce soit au produit et ce, indépendamment du fait qu’un recours puisse être formulé en relation avec un contrat, la garantie ou l’obligation de garantie. Par ailleurs, Horizon n’acceptera pas de recours issus d’un cas de garantie lorsque ces recours dépassent la valeur unitaire du produit. Horizon n’exerce aucune influence sur le montage, l’utilisation ou la maintenance du produit ou sur d’éventuelles combinaisons de produits choisies par l’acheteur.
FR Informations de conformité pour l’Union européenne Déclaration de conformité (conformément à la norme ISO/IEC 17050-1) N° HH2012072707 Produit(s) : PRB Miss Geico 24 RTR Numéro(s) d’article(s) : PRB0500I Catégorie d’équipement : 1 L’objet de la déclaration décrit ci-dessus est en conformité avec les exigences des spécifications énumérées ci-après, suivant les conditions de la directive ETRT 1999/5/CE, et la directive LVD 2006/95/EC et la directive CEM 2004/108/EC: EN 300-328 V1.7.
IT AVVISO AVVERTENZA: leggere TUTTO il manuale di istruzioni e familiarizzare con le caratteristiche del prodotto prima di farlo funzionare. Un uso improprio del prodotto puo` causare danni al prodotto stesso e alle altre cose e gravi lesioni alle persone. Questo aeromodello e` un prodotto sofisticato per appassionati di modellismo. Deve essere azionato in maniera attenta e responsabile e richiede alcune conoscenze basilari di meccanica.
IT Introduzione I modelli Pro Boat® RC sono belli e vanno bene. I nostri scafi, che includono barche a vela e motoscafi con licenza, vanno oltre le aspettative e danno anni di puro divertimento. Sia che la vostra passione si rivolga alla serenità della barca a vela o alla velocità del Deep-V, i modelli Pro Boat soddisfano i vostri gusti, sia come spesa che come stile di vita.
IT Avvertenze per la carica AVVERTENZA: Se non si utilizza questo prodotto con attenzione e non si osservano le seguenti avvertenze, potrebbero verificarsi malfunzionamenti, problemi elettrici, eccessivo sviluppo di calore, incendi e, in definitiva, lesioni e danni materiali. • Prima di usare questo prodotto, leggere tutti gli avvertimenti per la sicurezza e la documentazione relativa. • Non lasciare mai il caricabatterie e la batteria incustoditi durante l’uso.
IT Installazione della batteria di bordo 1. Girare il chiavistello in modo che la linguetta sia parallela alla parte posteriore dello scafo, poi tirare in su e indietro. 2. Togliere la copertura del vano radio. 3. Fissare la striscia a strappo sia alla batteria che nel vano batteria sullo scafo. Consiglio: Per regolare il centro di gravità della barca, muovere la batteria avanti e indietro. Muovendola in avanti la prua si immerge maggiormente nell’acqua. Muovendola indietro la prua si solleva dall’acqua.
IT Installazione della batteria trasmettitore Questo trasmettitore richiede 4 pile AA. 1. Togliere il coperchio dal vano batteria del trasmettitore. 2. Inserire le pile come si vede dalla figura, facendo attenzione a rispettare le polarità indicate nel portapile. 3. Rimettere il coperchio del vano batteria. Comandi del trasmettitore Indicatore del livello di batteria Interruttore di inversione Rosso e verde fissi: la tensione della batteria è corretta (maggiore di 4 V).
IT Come iniziare 3. Accendere il regolatore (ESC). 5. Dopo aver messo l’imbarcazione in acqua, iniziare a farla muovere lentamente. Se non dovesse 4. Controllare i comandi del procedere diritta, regolare il trim dello sterzo sul trasmettitore con la barca trasmettitore. appoggiata sul suo supporto. 1. Accendere il trasmettitore. 2. Collegare la batteria. 1 2 3 ST. TRIM POWER 4 ST. RATE 5 TH. TRIM ST. TRIM POWER ST. RATE TH. TRIM Controllo del sistema radio 4.
IT Collegamento (binding) Failsafe A Nell'improbabile evento che il collegamento radio venga perso durante l'uso, il ricevitore porta i servi nelle rispettive posizioni failsafe preprogrammate, corrispondenti, in genere, al livello minimo del motore e allo sterzo diritto. Se il ricevitore viene acceso prima del trasmettitore, il ricevitore entra in modalità failsafe e porta i servi nelle rispettive posizioni failsafe preimpostate.
IT Consigli per la navigazione ATTENZIONE: mantenere questa barca ad almeno 5 metri di distanza dalle persone o da altri natanti. Evitare la navigazione in prossimità di altri natanti, di oggetti fissi, onde, scie e correnti d'acqua in rapido movimento, animali, rifiuti galleggianti o alberi sospesi. Evitare inoltre la navigazione in zone frequentate da molte persone, quali piscine, parchi acquatici o aree di pesca.
B IT Manutenzione Sostituire sempre l’albero flessibile quando è danneggiato o mostra evidenti segni di usura, altrimenti si potrebbero fare danni maggiori. Verificare che ci siano 1-2mm di distanza e una rondella (H) tra il montante e il giunto cardanico, per consentire la contrazione dell’albero sotto carico. A La lubrificazione dell’albero flessibile è di importanza vitale per la durata della trasmissione.
IT Liste di controllo Prima della navigazione Dopo la navigazione • Installare batterie completamente cariche nell'imbarcazione e nel trasmettitore • • Connettere la batteria dell'imbarcazione all'ESC.
IT Guida alla soluzione dei problemi La barca non si connette (bind) al trasmettitore (dopo il "binding") Il trasmettitore è troppo vicino alla barca Allontanare il trasmettitore dalla barca e rifare la procedura di connessione La barca o il trasmettitore sono troppo vicini ad oggetti metallici o ad altre fonti di disturbo Spostare trasmettitore e barca in un'altra posizione Il "bind plug" è rimasto installato Rifare la connessione togliendo il "bind plug" al termine Le batterie della barca o del tr
IT Durata della Garanzia Periodo di garanzia Garanzia esclusiva - Horizon Hobby, Inc., (Horizon) garantisce che i prodotti acquistati (il “Prodotto”) sono privi di difetti relativi ai materiali e di eventuali errori di montaggio. Il periodo di garanzia è conforme alle disposizioni legali del paese nel quale il prodotto è stato acquistato. Tale periodo di garanzia ammonta a 6 mesi e si estende ad altri 18 mesi dopo tale termine.
IT Riparazioni a pagamento Se bisogna effettuare una riparazione a pagamento, effettueremo un preventivo che verrà inoltrato al vostro rivenditore. La riparazione verrà effettuata dopo l’autorizzazione da parte del vostro rivenditore. La somma per la riparazione dovrà essere pagata al vostro rivenditore. Le riparazioni a pagamento avranno un costo minimo di 30 minuti di lavoro e in fattura includeranno le spese di restituzione.
IT Identification of Components / Identifizierung der Komponenten Identification des composants / Identificazione dei componenti A B I C F G M Q H O P N J E D K L Miss Geico 24 57
IT Replacement Parts / Ersatzteile / Pièces de rechange / Pezzi di ricambio A PRB0502 Canopy: MG24 MG24: Kabinenhaube Cockpit : MG24 Capottina: MG24 B PRB0503 Canopy Seal: MG24 MG24: Dichtung Kabinenhaube Couvercle étanche : MG24 Guarnizione capottina: MG24 C PRB0501 Hull: MG24 MG24: Rumpf Coque : MG24 Scafo: MG24 D PRB2218 Prop Nut Propeller Mutter Ecrou d'hélice Dado elica E PRB0150 Prop, plastic Propeller Kunststoff Hélice en plastique Elica in plastica F PRB2815 Steerabl
35951 Printed: 7/2012 ©2012 Horizon Hobby, Inc. Pro Boat, DSM, DSM2, Dynamite, Speedpack, Prophet, EC3, the Pro Boat logo and the Horizon Hobby logo are trademarks or registered trademarks of Horizon Hobby, Inc. All other trademarks, service marks or logos are property of their respective owners.