
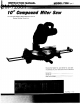
Manual


Special
BEFORE USING THE SAW:
1. Assembly and alignment.
2. Learn the function and proper use of:
A. The on-off switch.
B. The upper and lower blade guards.
C, The arbor lock and handle latch.
D. The bevel clamp, fence clamps, and miter
lock handle.
3. Read and understand all safety instructions and'
operating procedures throughout the manual.
4. Read the warning label on the miter saw,
WHEN INSTALLING OR MOVING
THE SAW:
1, To avoid injury from unexpected saw movement'.
A. Place the saw on a firm level surface where
there is plenty of room for handling and
properly supporting the workplace.
B. Support the saw so the table is level and the
saw does not rock.
C. Bolt or clamp the saw to its support,
2, Before moving the saw, lock the miter, bevel
and power-head positions. Unplug electric cord.
3, To avoid back injury, get help when you need to
lift the saw more than 10 inches. Hold the tool
close to your body. Bend your knees so you can
lift with your legs, not your back. Lilt by using
the hand-hold areas at the bottom of the base.
Never carry the tool by the cord or power head
handle. Damage to insulation could cause an
electric shock. Damage to wire connections
could cause a fire.
BEFORE EACH USE:
1. Inspect your saw. If any part of this miter saw is
missing, or bent, or has failed in any way, or
any electrical parts don't work properly, turn the
saw off and unplug the saw. Replace damaged,
missing, or failed parts before using the saw
again.
2. Plan Your Work to protect your eyes, hands,
face, and ears.
A. Wear safety goggles (not glasses) that
comply with ANStZ87,1(shown on package).
Using any power tool can result in foreign
objects being thrown into the eyes, which
can result in permanent eye damage. Safety
goggles are available at stores. Use of
glasses or use of goggles not in compliance
with ANSiZ87.1 could result in severe injury
from breakage of the eye protection.
WEAR YOUR
B. For dusty operations, wear a face shield
along with safety goggles.
C. To avoid injury from jams, slips or thrown
pieces:
@Choose the right 10-inch diameter blade for
the material and the type of cutting you
ptan to do. Use this miter saw to cut only
wood, wood-like products or soft metals
like aluminum. Other materials may sha-
tter, grab at the blade, or create other
dangers.
e Make sure the direction of rotation arrow
on the blade matches the direction arrow
on the saw. The blade teeth should always
point downward at the front of the saw.
eMake sure the blade is sharp, undamaged
and properly aligned. With the saw un-
plugged, push the power-head all the way
down, Hand spin the blade and check for
clearance. Tilt the power-head to 45 degree
bevel and repeat the check, if the blade hits
anything, make the adjustments shown in
the Maintaining Maximum Cutting Capacity
section,
eMake sure the blade and arbor collars are
clean.
• Make sure the collars' recessed sides are
facing toward the blade.
eMake sure the recessed side of the blade
washer (just under the arbor screw head)
faces the collar.
eUsing 1/2-inch box end wrench, make sure
the arbor cap screw retaining the blade
collars is firmly hand tightened.
eMake sure all clamps and locks are tight
and there is no excessive play in any parts.
• Never cut FREEHAND:
a. Brace your workplace solidly against the
fence and table top so it will not rock or
twist during the cut. Make sure no
debris is caught beneath_the workpiece.
b. Make sure no gaps between the work-
piece, fence and table will let the
workpiece shift after it is cut in two.
co Use jigs, fixtures or a different tool for
unstable workpieces.
3