Slimpar 5 RGBW PLLEDSPAR5 MANUALE UTENTE USER MANUAL Rev.
INDICE: 1. APERTURA DELLA CONFEZIONE p. 3 2. ISTRUZIONI DI SICUREZZA p. 3 3. CARATTERISTICHE p. 3 4. SETUP p. 4 5. ISTRUZIONI PER L’UTILIZZO p. 5 6. MANUTENZIONE p. 6 7. SPECIFICHE TECNICHE p. 6 INDEX: 1. UNPACKING p. 7 2. SAFETY INSTRUCTIONS p. 7 3. FEATURES p. 7 4. SETUP p. 8 5. OPERATION INSTRUCTIONS p. 9 6. MAINTENANCE p. 10 7. TECHNICAL SPECIFICATIONS p.
1. APERTURA DELLA CONFEZIONE Grazie per avere scelto il dispositivo SLIMPAR 5. Tutti i dispositivi SLIMPAR 5 sono stati attentamente testati e spediti in perfette condizioni operative. Controllare attentamente la confezione per verificare la presenza di eventuali danni causati durante il trasporto. Se la confezione appare danneggiata, verificare attentamente che il dispositivo non sia danneggiato ed accertarsi che tutte le attrezzature necessarie per utilizzare l’unità siano arrivate intatte.
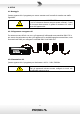
. SETUP 4.1 Montaggio Questo apparecchio è progettato per essere montato su di un traliccio tramite una staffa regolabile. IMPORTANTE!! I cavi di sicurezza devono sempre essere utilizzati. Il cavo di sicurezza deve essere in grado di sostenere 10 volte il peso dell’apparecchio. 4.
. ISTRUZIONI PER L’UTILIZZO 5.1 Mappa del menu ADDR SLAU VER RENO AUTO COLO SOUN 001 – 512 SLA xxxx ON / OFF AUT1 – AUT2 COL1 … COL9 ATF R000 … R255 G000 … G255 B000 … B255 U000 … U255 SOU1 … SOU2 Modalità Slave Versione software Attivazione controllo remoto 2 modalità automatiche Macro colori preimpostate Controllo manuale rosso Controllo manuale verde Controllo manuale blu Controllo manuale bianco 2 modalità musicali 5.
. MANUTENZIONE Per garantire ottime prestazioni, l’apparecchio deve essere pulito frequentemente. Scollegare l’apparecchio dalla corrente e lasciarlo raffreddare. Utilizzare un aspirapolvere o un compressore e una spazzola morbida o un panno per lenti per rimuovere la polvere depositata sulla copertura di vetro. 7. SPECIFICHE TECNICHE • • • • • • • • • • • • • Alimentazione: 100-240V, 50/60HZ LED: 5x8W, RGBW 4 in 1 Durata di vita: 80.
1. UNPACKING Thank you for purchasing the SLIM PAR 5. Every SLIM PAR 5 has been thoroughly tested and has been shipped in perfect operating condition. Carefully check the shipping carton for damage that may have occurred during shipping. If the carton appears to be damaged, carefully inspect your fixture for any damage and be sure all equipment necessary to operate the unit has arrived intact.
4. SETUP 4.1 Mounting With adjustable bracket, this fixture is designed to be mounted on truss.. IMPORTANT!! Safety cables must always be used. The safety cable must be capable of holding 10 times the weight of the fixture. 4.2 Fixture linking To run your light shows of one or more fixtures using a DMX-512 controller or to run synchronized shows on two or more fixtures in master/slave operating mode, you need DMX cables to link the units from DMX IN to DMX OUT. 4.
5. OPERATION INSTRUCTIONS 5.1 Menu map ADDR SLAU VER RENO AUTO COLO SOUN 001 – 512 SLA xxxx ON / OFF AUT1 – AUT2 COL1 … COL9 ATF R000 … R255 G000 … G255 B000 … B255 U000 … U255 SOU1 … SOU2 Slave mode Software version Remote controller 2 auto modes Color macros Manual control red Manual control green Manual control blue Manual control white 2 sound modes 5.
6. MAINTENANCE To maintain optimum performance fixtures should be cleaned frequently. Unplug fixture from power and allow the fixture to cool down. Use a vacuum or air compressor and a soft brush to remove dust collected on the glass cover. 7. TECHNICAL SPECIFICATIONS • • • • • • • • • • • • • Power supply: 100-240V, 50/60HZ LED: 5x8W, RGBW 4 in 1 LED lifespan: 80.
Proel S.p.A. Via alla Ruenia 37/43 64027 Sant'Omero (TE) ITALY Tel. +39 0861 81241 Fax. +39 0861 887862 Mail: info@proel.com Web: www.proel.