User Manual Steam oven PBD35101X
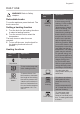
Progress CONTENTS Safety information Safety instructions Product description Before first use Daily use Clock functions Using the accessories 2 3 6 6 7 9 11 Additional functions Hints and tips Care and cleaning Troubleshooting Installation Energy efficiency 14 14 28 31 33 34 Subject to change without notice. SAFETY INFORMATION Before the installation and use of the appliance, carefully read the supplied instructions.
Progress 3 General Safety • • • • • • • • • Only a qualified person must install this appliance and replace the cable. WARNING: The appliance and its accessible parts become hot during use. Care should be taken to avoid touching heating elements. Always use oven gloves to remove or put in accessories or ovenware. Before carrying out any maintenance, disconnect the appliance from the power supply.
Progress • The appliance must be earthed. • Make sure that the parameters on the rating plate are compatible with the electrical ratings of the mains power supply. • Always use a correctly installed shockproof socket. • Do not use multi-plug adapters and extension cables. • Make sure not to cause damage to the mains plug and to the mains cable. Should the mains cable need to be replaced, this must be carried out by our Authorised Service Centre.
Progress 5 • This appliance is for cooking purposes only. It must not be used for other purposes, for example room heating. • Always cook with the oven door closed. • If the appliance is installed behind a furniture panel (e.g. a door) make sure the door is never closed when the appliance is in operation. Heat and moisture can build up behind a closed furniture panel and cause subsequent damage to the appliance, the housing unit or the floor.
Progress PRODUCT DESCRIPTION General overview 1 2 3 4 5 6 7 8 9 16 5 15 4 10 3 11 2 1 14 13 12 Accessories • Wire shelf For cookware, cake tins, roasts.
Progress 7 DAILY USE WARNING! Refer to Safety chapters. Oven func‐ tion Retractable knobs To use the appliance press the knob. The knob comes out. Setting a heating function Moist Fan Baking 1. Turn the knob for the heating functions to select a heating function. 2. Turn the control knob to select the temperature. The lamp turns on when the oven operates. 3. To turn off the oven, turn the knob for the heating functions to the off position.
Progress Oven func‐ tion Application Oven func‐ tion Fast Grilling To grill flat food in large quantities and to toast bread. Pizza Setting To bake pizza. To make intensive browning and a crispy bottom. Application To bake and roast food on one shelf position. Conventional Cooking (Top / Bottom Heat) Display A B C A. Clock functions B. Timer C. Clock function Buttons Button Function Description MINUS To set the time. CLOCK To set a clock function. PLUS To set the time.
Progress 9 Tank empty indicator The indicator shows that the tank is empty and must be refilled. For more information refer to "Steam Cooking". A B C Tank Full indicator The indicator shows that the oven is prepared for steam cooking. If you put too much water into the tank, the safety outlet moves the excess water to the bottom of the oven. Remove the water with a sponge or cloth. Emptying the water tank CAUTION! Make sure that the oven is cold before you start to empty the water tank. 1.
Progress Setting the time. Changing the time You must set the time before you operate the oven. The flashes when you connect the appliance to the electrical supply, when there was a power cut or when the timer is not set. Press the or to set the correct time. After approximately five seconds, the flashing stops and the display shows the time of day you set. To change the time of day press again starts to flash. and again until Setting the DURATION 1. Set an oven function and temperature. 2.
Progress 11 USING THE ACCESSORIES WARNING! Refer to Safety chapters. Inserting the accessories Wire shelf: Push the shelf between the guide bars of the shelf support and make sure that the feet point down. Small indentation at the top increase safety. The indentations are also anti-tip devices. The high rim around the shelf prevents cookware from slipping of the shelf. Accessories for steam cooking Deep pan: Push the deep pan between the guide bars of the shelf support.
Progress Lid (B) Steel grill (E) The injector and the injector tube • Do not put the hot baking dish on cold / wet surfaces. C D "C" is the injector tube for steam cooking, "D" is the injector for direct steam cooking. • Do not put cold liquids in the baking dish when it is hot. Injector tube (C) • Do not use the baking dish on a hot cooking surface. Injector for direct steam cooking (D) • Do not clean the baking dish with abrasives, scourers and powders.
Progress 13 Make sure that you do not crush the injector tube or let it touch a heating element on the top of the oven. 4. Set the oven for the steam cooking function. Direct steam cooking Put the food onto the steel grill in the baking dish. Add some water. Steam cooking in a dietary baking dish Put the food onto the steel grill in the baking dish and put the lid on it. 1. Put the injector tube into the special hole in the lid of the dietary baking dish. C CAUTION! Do not use the lid of the dish.
Progress When you cook food such as chicken, duck, turkey, kid or large fish, put the injector (D) directly into the empty part of the meat. Make sure that you do not cause a blockage of the holes. For more information about steam cooking, refer to the cooking tables for steam cooking in the chapter "Hints and Tips". ADDITIONAL FUNCTIONS Cooling fan When the oven operates, the cooling fan turns on automatically to keep the surfaces of the oven cool.
Progress 15 If you use two baking trays at the same time, keep one empty level between them. Cooking meat and fish Use a deep pan for very fatty food to prevent the oven from stains that can be permanent. deep pan. To prevent the smoke condensation, add water each time after it dries up. Cooking times Cooking times depend on the type of food, its consistency, and volume. Leave the meat for approximately 15 minutes before carving so that the juice does not seep out.
Progress Food Top / Bottom Heat True Fan Cooking Time (min) Com‐ ments Tempera‐ ture (°C) Shelf position Temper‐ ature (°C) Shelf position 160 2 150 2 90 - 120 In a 20 cm cake mould 175 1 160 2 50 - 60 In a bread tin Small cakes one level 170 3 140 - 150 3 20 - 30 In a bak‐ ing tray Small cakes two lev‐ els - - 140 - 150 2 and 4 25 - 35 In a bak‐ ing tray Small cakes three lev‐ els - - 140 - 150 1, 3 and 5 30 - 45 In a bak‐ ing tray Biscuits / pastry stripes one
Progress 17 Food Top / Bottom Heat True Fan Cooking Time (min) Com‐ ments Tempera‐ ture (°C) Shelf position Temper‐ ature (°C) Shelf position - - 120 2 and 4 80 - 100 In a bak‐ ing tray Buns1) 190 3 190 3 12 - 20 In a bak‐ ing tray Eclairs one level 190 3 170 3 25 - 35 In a bak‐ ing tray Eclairs two lev‐ els - - 170 2 and 4 35 - 45 In a bak‐ ing tray Plate tarts 180 2 170 2 45 - 70 In a 20 cm cake mould Rich fruit cake 160 1 150 2 110 - 120 In a 24 cm cake m
Progress Food Top / Bottom Heat True Fan Cooking Time (min) Com‐ ments Temper‐ ature (°C) Shelf po‐ sition Temper‐ ature (°C) Shelf po‐ sition Pizza1) 230 - 250 1 230 - 250 1 10 - 20 In a bak‐ ing tray or a deep pan Scones1) 200 3 190 3 10 - 20 In a bak‐ ing tray Time (min) Com‐ ments 1) Preheat the oven for 10 minutes.
Progress 19 Food Top / Bottom Heat True Fan Cooking Time (min) Com‐ ments Temper‐ ature (°C) Shelf po‐ sition Temper‐ ature (°C) Shelf po‐ sition Veal 190 2 175 2 90 - 120 On a wire shelf English roast beef, rare 210 2 200 2 50 - 60 On a wire shelf English roast beef, me‐ dium 210 2 200 2 60 - 70 On a wire shelf English roast beef, well done 210 2 200 2 70 - 75 On a wire shelf Shoulder of pork 180 2 170 2 120 - 150 With rind Shin of pork 180 2 160 2 100 - 12
Progress Fish Food Top / Bottom Heat True Fan Cooking Temper‐ ature (°C) Shelf po‐ sition Temper‐ ature (°C) Shelf po‐ sition Trout / Sea bream 190 2 175 Tuna fish / Sal‐ mon 190 2 175 Grilling Time (min) Com‐ ments 2 40 - 55 3 - 4 fish 2 35 - 60 4 - 6 fil‐ lets Set the maximum temperature. Preheat the oven for 3 minutes. Use the fourth shelf position. Food Quantity Time (min) Pieces Quantity (kg) 1st side 2nd side Fillet steaks 4 0.
Progress 21 Food Tempera‐ ture (°C) Time (min) Food Tempera‐ ture (°C) Time (min) Roast beef or fillet, me‐ dium 180 - 190 6-8 Saddle of lamb, 1 1.5 kg 160 - 180 40 - 60 Roast beef or fillet, well done 170 - 180 8 - 10 Food Tempera‐ ture (°C) Time (min) Poultry por‐ tions, 0.2 0.25 kg each 200 - 220 30 - 50 Chicken, half, 0.4 0.5 kg each 190 - 210 35 - 50 Pork Poultry Food Tempera‐ ture (°C) Time (min) Shoulder, neck, ham joint, 1 - 1.
Progress Food Accessories Tempera‐ ture (°C) Shelf po‐ sition Time (min) Sweet rolls, 12 pieces baking tray or dripping pan 175 3 40 - 50 Rolls, 9 pieces baking tray or dripping pan 180 2 35 - 45 Pizza, frozen, 0.
Progress 23 Food Accessories Tempera‐ ture (°C) Shelf po‐ sition Time (min) Tartlets, 8 pieces baking tray or dripping pan 170 2 30 - 40 Poached vege‐ tables, 0.4 kg baking tray or dripping pan 180 2 35 - 45 Vegetarian omelette pizza pan on wire shelf 180 3 35 - 45 Vegetables, mediterrean 0.7 kg baking tray or dripping pan 180 4 35 - 45 Drying - True Fan Cooking Cover trays with grease proof paper or baking parchment. and let it cool down for one night to complete the drying.
Progress True Fan + Steam Cakes and pastries Food Tempera‐ ture (°C) Time (min) Shelf position Comments Apple cake1) 160 60 - 80 2 In a 20 cm cake mould Tarts 175 30 - 40 2 In a 26 cm cake mould Fruit cake 160 80 - 90 2 In a 26 cm cake mould Sponge cake 160 35 - 45 2 In a 26 cm cake mould Panettone1) 150 - 160 70 - 100 2 In a 20 cm cake mould Plum cake1) 160 40 - 50 2 In a bread tin Small cakes 150 - 160 25 - 30 3 (2 and 4) In a baking tray Biscuits 150 20 - 35
Progress 25 Meat Use the second shelf position. Use the wire shelf. Food Tempera‐ ture (°C) Time (min) Food Tempera‐ ture (°C) Time (min) Trout, 3 - 4 fish, 1.5 kg 180 25 - 35 Roast pork, 1 kg 180 90 - 110 Tuna, 4 - 6 fillets, 1.2 kg 175 35 - 50 Veal, 1 kg 180 90 - 110 Hake 200 20 - 30 Roast beef - rare, 1 kg 210 45 - 50 Roast beef - medium, 1 kg 200 55 - 65 Roast beef - well done, 1 kg 190 Steam reheating Reheat your dish on the plate. Preheat the oven for 10 minutes.
Progress Fish Use the second shelf position. Food Time (min) Cauliflower florets 25 - 30 Tomatoes 15 Food Time (min) White asparagus 35 - 45 Trout 25 - 30 Green asparagus 25 - 35 Salmon filet 25 - 30 Courgette slices 20 - 25 Carrots 35 - 40 Fennel 30 - 35 Kohlrabi 25 - 30 Food Time (min) Pepper strips 20 - 25 Rice 35 - 40 Celery slices 30 - 35 Unpeeled potatoes, medium 50 - 60 Boiled potatoes, quartered 35 - 45 Polenta 40 - 45 Set the temperature to 150°C.
Progress 27 Food Function Acces‐ sories Shel f po‐ si‐ tion Tem‐ pera‐ ture (°C) Time (min) Comments Small cake True Fan Cooking / Fan Cook‐ ing Baking tray 2 and 4 150 160 20 - 35 Put 20 small cakes per one baking tray. Apple pie Conven‐ tional Cooking Wire shelf 2 180 70 - 90 Use 2 tins (20 cm diameter), di‐ agonally shifted. Apple pie True Fan Cooking / Fan Cook‐ ing Wire shelf 2 160 70 - 90 Use 2 tins (20 cm diameter), di‐ agonally shifted.
Progress Food Function Acces‐ sories Shel f po‐ si‐ tion Tem‐ pera‐ ture (°C) Time (min) Comments Toast 4-6 pieces Grilling Wire shelf 4 max. 2 - 3 minutes first side; 2 3 minutes second side Preheat the oven for 3 minutes. Beef burger 6 pieces, 0.6 kg Grilling Wire shelf and dripping pan 4 max. 20 - 30 Put the wire shelf on the fourth lev‐ el and the drip‐ ping pan on the third level of the oven. Turn the food halfway through the cooking time. Preheat the oven for 3 minutes.
Progress 29 To clean the door gasket, refer to the general information about cleaning. During the cleaning procedure, some water can drip from the steam inlet onto the cavity of the oven. Put a dripping pan on the shelf level directly below the steam inlet to prevent water from falling onto the bottom of the oven cavity. Removing the shelf supports To clean the oven, remove the shelf supports. CAUTION! Be careful when you remove the shelf supports. 1.
Progress Calcium de‐ posit Water hardness Water classifi‐ cation Run decalcifi‐ cation every (French de‐ grees) (German de‐ grees) 120 - 180 mg/l 12 - 18 8 - 10 Hard or calca‐ reous 40 cycles - 1.5 months over 180 mg/l over 18 over 10 Very hard 30 cycles - 1 month 1. Fill in the water tank with 850 ml of water and 50 ml of citric acid (five teaspoons). Turn off the oven and wait for approximately 60 minutes. 2. Turn on the oven and set the function: True Fan + Steam.
Progress 31 forward and remove the door from its seat. 8. Clean the glass panels with water and soap. Dry the glass panels carefully. Do not clean the glass panels in the dishwasher. When the cleaning is completed, install the glass panel and the oven door. The screen-printing zone must face the inner side of the door. Make sure that after the installation the surface of the glass panel frame on the screen-printing zones is not rough when you touch it. When installed correctly the door trim clicks. 4.
Progress What to do if... Problem Possible cause Remedy The oven does not heat up. The oven is deactivated. Activate the oven. The oven does not heat up. The clock is not set. Set the clock. The oven does not heat up. The necessary settings are not set. Make sure that the settings are correct. The oven does not heat up. The fuse is blown. Make sure that the fuse is the cause of the malfunc‐ tion. If the fuse is blown again and again, contact a qualified electrician. The display shows "12.
Progress 33 We recommend that you write the data here: Model (MOD.) ......................................... Product number (PNC) ......................................... Serial number (S.N.) ......................................... INSTALLATION WARNING! Refer to Safety chapters. Building In 548 21 min. 550 80 60 520 600 114 18 20 589 594 min. 560 595+-1 198 60 5 3 523 20 548 70 60 21 min. 550 20 520 18 590 114 min.
Progress Securing the appliance to the cabinet A B Cable Cable types applicable for installation or replacement: H07 RN-F, H05 RN-F, H05 RRF, H05 VVF, H05 V2V2-F (T90), H05 BB-F For the section of the cable refer to the total power on the rating plate. You can also refer to the table: Electrical installation The manufacturer is not responsible if you do not follow the safety precautions from the Safety chapters. Total power (W) Section of the ca‐ ble (mm²) maximum 1380 3 x 0.
Progress 35 Energy saving duration of the cooking. The residual heat inside the oven will continue to cook. The oven contains features which help you save energy during everyday cooking. Use the residual heat to warm up other dishes. Keep breaks between baking as short as possible when you prepare few dishes at one time. General hints Make sure that the oven door is closed properly when the oven operates. Do not open the door too often during cooking.
www.progress-hausgeraete.