
User manual
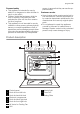


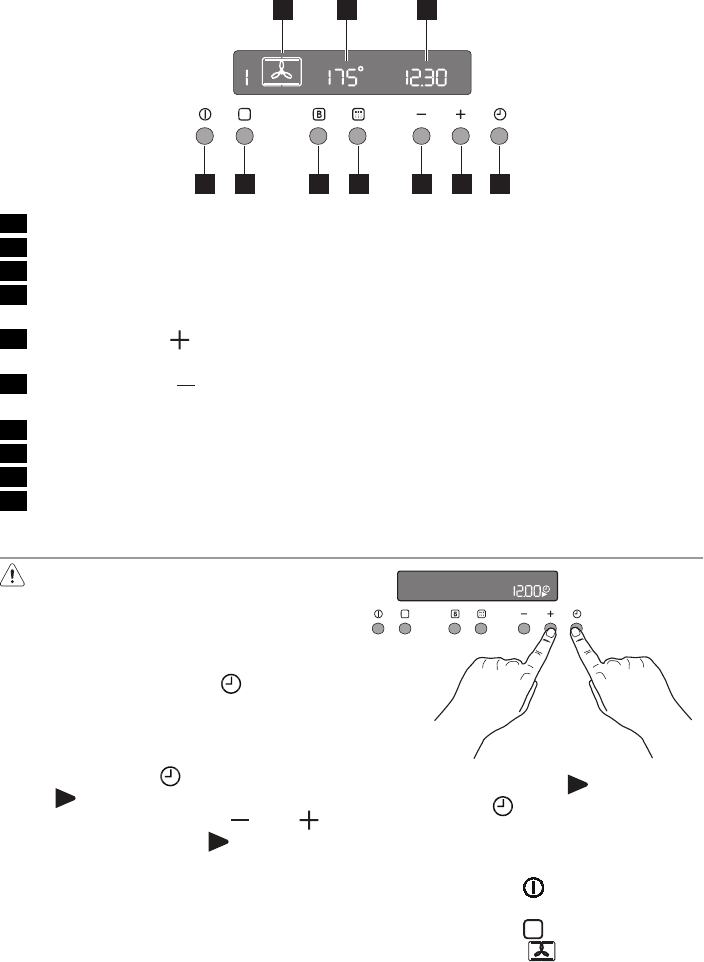
Control Panel
1 2 3
45678910
1 Cooking functions
2 Temperature indicator
3 Time indicator
4 Minute minder / Cooking time function /
End of cooking function
5
Increase button “
” (Time or temper-
ature)
6
Decrease button “
” (Time or temper-
ature)
7 Pyrolytic cleaning function
8 Fast heat-up function
9 Cooking functions button
10 ON / OFF
All the oven functions are controlled by an
electronic programmer.
You can select any combination of cooking
function, cooking temperature and automat-
ic timing.
Note
In the event of a power failure, the program-
mer will keep all the settings (time of day,
programme setting or programme in opera-
tion) for about 3 minutes. In the case of a
longer power failure, all the settings will be
cancelled. When the power supply is re-
stored again, the numbers in the display
flash. If this happens, the clock and timer
must be re-set.
Before first use
Warning! Remove all packaging,
both inside and outside the oven,
before using the oven.
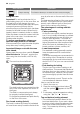
When the oven is first connected to the elec-
trical supply, the display will automatically
show 12:00 and the symbol
flashes.
Ensure the correct time of day is set before
using the oven.
Setting the clock:
1.
Press the button
and, while the sym-
bol
is flashing, set the correct time of
day by pressing buttons “
” or “ ”
The time arrow symbol
will disappear
about 5 seconds after the correct time is
displayed.
1
2
2.
As soon as the symbol
stops flashing,
press button
twice.
Then, proceed as described in point 1.
Before the first use, the oven should be heat-
ed while empty.
1.
Press the button
to switch on the
oven.
2.
Press the button
twice and select the
«Hot air» function
progress 33