
Installation Guide


7
Lowes.com
OPERATING INSTRUCTIONS
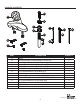
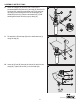
1. After the installation is complete:
a. Remove the aerator on the faucet (A).
b. Turn on the water supply and allow both hot and cold
water to run for at least one minute each.
c. While the water is running, check for leaks.
d. Replace the aerator.
1
A
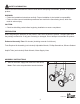
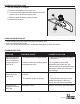
CARE AND MAINTENANCE
• Clean carefully by gently wiping with a grit-free damp cloth.
• Use only mild soap with water.
• Never use acids, harsh chemicals, or abrasive detergents to clean the surface.
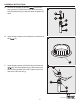
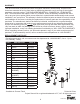
There is a leak from
under the handle or
there is a leak from
the spout when the
faucet is off.
1. The bonnet nut is not tight enough.
2. Rubber washer and sealing gasket
on cartridge are worn.
1. Remove the handle and retighten
the bonnet nut.
2. If the problem occurs after
retightening the bonnet nut, call
customer service for a new cartridge
and replace it after you receive the
new cartridge.
There is a leak from
aerator when the
faucet is on.
1. The aerator does not fit correctly on
the faucet.
2. The aerator washer is missing.
1. Reinstall the aerator.
2. Call customer service for a new
aerator and replace it after you
receive the new aerator assembly.
The aerator has
irregular or reduced
water flow.
The aerator is dirty. Remove the aerator and clear debris.
TROUBLESHOOTING
PROBLEM POSSIBLE CAUSE CORRECTIVE ACTION