
Installation Guide

PREPARATION
ASSEMBLY INSTRUCTIONS
ON
OFF
ON
OFF
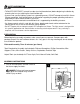
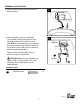
Turn off circuit breakers and wall switch to
the fixture supply line leads.
DANGER: Failure to disconnect power
supply prior to installation may result in
serious injury or death.
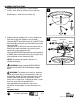
1
1.
4
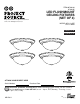
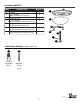
Before beginning assembly of product, make sure all parts are present. Compare parts with
package contents list and hardware contents list. If any part is missing or damaged, do not attempt
to assemble the product.
Estimated Assembly Time: 30 minutes (per fixture)
Tools Required for Assembly (not included): Flathead Screwdriver, Phillips Screwdriver, Wire
Strippers, Pliers, Wire Cutters, Safety Glasses, Stepladder, Electrical Tape
Helpful Tools (not included): A/C Tester Light, Do-It-Yourself Guide, Soft Cloth
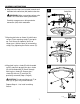
• TURN OFF ELECTRICITY at main fuse box (or circuit breaker box) before beginning installation by
removing the fuse (or switching the circuit breaker off).
• If you are not sure the lighting system has a grounding means, DO NOT attempt to install this fixture.
Contact a qualified, licensed electrician for information regarding the proper grounding methods as
required by the local electrical code in your area.
• All fixtures must be mounted to an outlet box that is supported by the building structure.
• If a dimmer control switch is used with this fixture, obtain professional advice to determine the
correct type to use as well as the electrical rating required.
• Do NOT tamper with or attempt to repair LED component of fixture. The light source is designed for
this specific application and should not be serviced by untrained personnel. If any servicing is
required, call our customer service department.
CAUTION
Lowes.com
SAFETY INFORMATION