
Computer Hardware User Manual

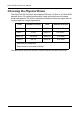

SuperTrak EX Series User Manual
18
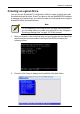
11. Highlight Next Step and press Enter.
The Create Logical Drive Step 2/2 screen appears.
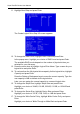
12. To change the RAID Level, highlight RAID Level and press Enter.
In the popup menu, highlight your choice of RAID Level and press Enter.
The available RAID Levels depend on the number of physical drives you
selected for your disk array.
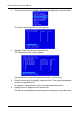
13. Press the arrow keys to highlight Logical Drive Name. Type a name for your
logical drive and press Enter.
14. To use less than the full physical drive capacity for this logical drive, highlight
Capacity and press Enter.
Press the Delete or Backspace keys to erase the current capacity. Type the
new capacity in MB to allocate to this logical drive.
Later, you can assign the unused capacity to a second logical drive.
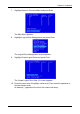
15. To change the Stripe Size, highlight Stripe Size and press Enter.
Highlight your choice of 64 KB, 128 KB, 256 KB, 512 KB, or 1024 KB and
press Enter.
16. To change the Sector Size, highlight Sector Size and press Enter.
Highlight your choice of 512 B, 1 KB, 2 KB, or 4 KB and press Enter.
17. To change the Write Cache Policy, highlight Write Cache Policy and press
Enter.
Highlight your choice of Write Through or Write Back and press Enter.