
User manual


FastTrak TX2000™ Series User Manual
21
drive to be used. Please note that users will lose a small amount of available storage capacity
from both drives in order to arrive at a common drive size.
NOTE: The Gigabyte Boundary feature is automatically disabled when creating a mirrored array
(RAID 1) from an existing drive (versus using two brand new drives). This protects the existing
drive's partition table in order to maintain data integrity.
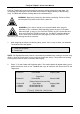
Assigning Drive(s) to Array
1. Under the [ Drive Assignments ] section, highlight a drive using the [↑] or [↓] keys.
2. With the [Space] bar key, change the Assignable option to “Y” to add the drive to the
disk array.
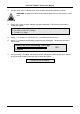
3. Press <Ctrl-Y> to save the disk array information. Depending on the array type
selected, the following scenarios will take place:
a) If choosing a Striping, Spanning, or Mirroring/Striping array, the initial Define
Array Menu screen will appear with the arrays defined. From there you may
ESC to exit and return to the Main Menu of FastBuild.
b) If you selected a Mirroring array for two drives, there is an additional window that
appears as described in order to create the array. To do this you will use either
two brand new drives, or one drive that contains existing data that you wish to
mirror.
Creating A Mirrored Array Using New Drives
As described in the Drive Assignments Option section above, if you selected a mirroring array
and wish to use two new assigned drives, follow the directions here.
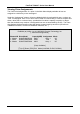
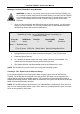
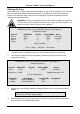
1. After assigning new drives to a Mirroring array and saving the information with <Ctrl-
Y>, the window below will appear.
Do you want the disk image to be duplicated to another? (Yes/No)
Y - Create and Duplicate
N - Create Only
2. Press “N” for the Create Only option.
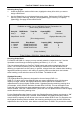
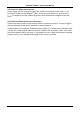
3. A window will appear almost immediately confirming that your Security array has
been created. Press any key to reboot the system
Array has been created.
<Press Any Key to Reboot>