
FastTrak TX Series User Manual


Chapter 5: WebPAM
83
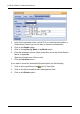
3. Click on the Synchronization tab in Management View.
4. Click on the Disable option.
Logical Drive Initialization
When logical drive is first created, you can select one of three choices for
initialization:
• Quick Initialization – Erases the reserve and master boot sectors of the
physical drives being added to the logical drive.
• Full Initialization – Erases all sectors of the physical drives being added to
the logical drive.
• None – No initialization. This choice is not recommended.
When you select full initialization, the process takes some time, depending on the
size of the physical drives selected for the logical drive. The Initialization tab
enables you to pause the initialization process so that more of FastTrak's
resources are available for other operations. When the other operations are
done, you can resume the initialization of your new logical drive.
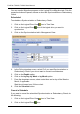
1. Click on the Logical Drive View icon in Tree View.
2. Click on the Logical Drive icon of the logical drive whose initialization you
want to pause.
3. Click on the Initialization tab in Management View.
4. Click the Pause button.
The initialization process stops.
5. Click the Resume button.
The initialization resumes from the point where you paused it.
Logical Drive Activation
This feature enables you to convert a RAID 1 logical drive from offline to critical
status, so you can rebuild the logical drive and access your data. This condition
occurs when a single physical (disk) drive from a RAID 1 logical drive is
connected to the FastTrak Controller card.
Note the this feature does not apply to an offline RAID 0 logical drive.
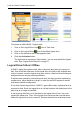
In the example below, icons of a white X within a red circle appear over the
FastTrak, Controller, Logical Drive View, and Logical Drive icons. In
Management View, the status is shown as Offline.
The image below was narrowed to fit on the page.