
VTRAK M-CLASS Product Manual


Chapter 5: Management with the CLU
189
Logical Drive Information
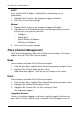
1. From the Main Menu, highlight Logical Drive Management and press Enter.
2. Highlight the logical drive you want and press Enter.
The information and settings screen appears.
3. Highlight any of the following and press Enter to view more information:
• Check Table – Read Check, Write Check, and Inconsistency Check
Tables
• Logical Drive Statistics
Logical Drive Settings and Functions
1. From the Main Menu, highlight Logical Drive Management and press Enter.
2. Highlight the logical drive you want and press Enter.
Alias
1. To set an alias for this disk array, highlight Alias and type an alias into the
field.
Maximum of 32 characters. Use letters, numbers, space between words and
underscore. An alias is optional.
2. Press Ctrl-A to save your settings.
Write Cache Policy
1. To set write cache policy for this disk array, highlight WritePolicy and press
the spacebar to toggle between WriteBack and WriteThru (write though).
2. Press Ctrl-A to save your settings.
Read Cache Policy
1. To set read cache policy for this disk array, highlight ReadPolicy and press
the spacebar to toggle though ReadCache, ReadAhead and None.
2. Press Ctrl-A to save your settings.
Initialization
This function sets all data bits in the logical drive to zero.
1. Highlight Background Activity and press Enter.
2. Highlight Start Initialization and press Enter.
Caution
When you initialize a logical drive, you delete all the data it
contains. Back up all important data before initializing a logical
drive.