
VTRAK M-CLASS Product Manual

VTrak M-Class Product Manual
18
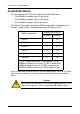
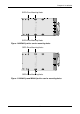
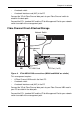
Figure 12.SATA Disk Drives mount at the front of the carrier
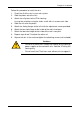
1. Carefully lay the drive into the drive carrier at the front, so that the screw
holes on the bottom line up.
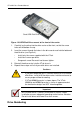
2. Insert the screws through the holes in the drive carrier and into the bottom of
the disk drive (see Figure 4).
• Install only the screws supplied with the VTrak.
• Install four screws per drive.
• Snug each screw. Be careful not to over tighten.
3. Reinstall the drive carrier into the VTrak chassis.
4. Repeat these steps until all of your disk drives are installed.
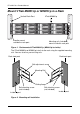
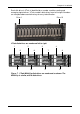
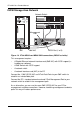
Drive Numbering
Cautions
• If you plan to operate your VTrak with fewer than a full load of
disk drives, install all of the drive carriers into the enclosure, to
ensure proper airflow for cooling.
• A VTrak M500f/i/p carrier is shown above. The VTrak
M300f/i/p and M200f/i/p carrier is similar in appearance but
the two carrier designs are NOT interchangeable.
Important
Be sure each drive is securely fastened to its carrier. Proper
installation ensures adequate grounding and minimizes vibration.
Do not install drives with fewer than four screws.
Serial ATA Disk Drive