
Operation Manual
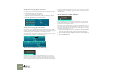
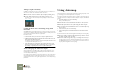
Table Of Contents
- Table of Contents
- The Sequencer
- Routing Audio and CV
- Routing MIDI to Reason
- Using Reason as a ReWire Slave
- MIDI and Keyboard Remote Control
- Synchronization
- Optimizing Performance
- Transport Panel
- Reason Hardware Interface
- The Mixer
- Redrum
- Subtractor Synthesizer
- Malström Synthesizer
- NN-19 Sampler
- NN-XT Sampler
- Introduction
- Panel Overview
- Loading Complete Patches and REX Files
- Using the Main Panel
- Overview of the Remote Editor panel
- About Samples and Zones
- Selections and Edit Focus
- Adjusting Parameters
- Managing Zones and Samples
- Working with Grouping
- Working with Key Ranges
- Setting Root Notes and Tuning
- Using Automap
- Layered, Crossfaded and Velocity Switched Sounds
- Using Alternate
- Sample Parameters
- Group Parameters
- Synth parameters
- Connections
- Dr. Rex Loop Player
- Matrix Pattern Sequencer
- ReBirth Input Machine
- The Effect Devices
- Menu and Dialog Reference
- About Audio on Computers
- MIDI Implementation
- Index

NN-XT Sampler
163
Duplicating Zones
You can duplicate any number of already existing zones (containing samples or
empty).
1. Select the zone(s) you want to copy.
2. Pull down the edit menu or the NN-XT context menu and select “Du-
plicate Zones”.
The selected zones will now be copied and automatically inserted below the
last one in the key map display.
The duplicated zones will contain references to the same samples as the original
zones. They will also have the exact same key ranges and parameter settings.
Removing Zones
To remove one or several zones, select them and do one of the following:
DD
DD
Press [Delete] or [Backspace] on the computer keyboard.
DD
DD
Select “Delete Zones” from the Edit menu or the NN-XT context
menu.
When removing zones, you will remove any samples in them as well.
Rearranging Zones in the List
DD
DD
To move a zone to another position in the list, click on it in the sam-
ples column and drag up or down.
An outline shows you where the zone will appear when you release the
mouse button.
Working with Grouping
About Groups
Grouping has two purposes:
DD
DD
To allow you to quickly select a number of zones that “belong to-
gether.”
For example if you have created a layered sound consisting of piano and
strings, you could put all string samples in one group and all piano samples
in one group. Then you can quickly select all piano samples and make an ad-
justment to them by trimming a parameter.
DD
DD
To group zones that need to share group settings together.
For example, you may want to set a group to legato and monophonic mode
and add some portamento so that you can play a part where you slide be-
tween notes.
Note that there is always at least one group, since the zones you create are al-
ways grouped together by default.
Creating a Group
1. Select the zones you want to group together.
The zones don’t have to be contiguous in order to be grouped. Regardless
of their original positions in the samples column, they will all be put together
in succession.
2. Select “Group Selected Zones” from the Edit menu or the NN-XT
context menu.
The zones are grouped.
Selecting these zones and grouping them...
...will create these two groups instead of
the original one large group.