
Operation Manual
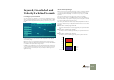
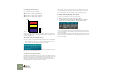
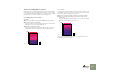

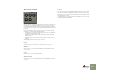
Table Of Contents
- Table of Contents
- The Sequencer
- Routing Audio and CV
- Routing MIDI to Reason
- Using Reason as a ReWire Slave
- MIDI and Keyboard Remote Control
- Synchronization
- Optimizing Performance
- Transport Panel
- Reason Hardware Interface
- The Mixer
- Redrum
- Subtractor Synthesizer
- Malström Synthesizer
- NN-19 Sampler
- NN-XT Sampler
- Introduction
- Panel Overview
- Loading Complete Patches and REX Files
- Using the Main Panel
- Overview of the Remote Editor panel
- About Samples and Zones
- Selections and Edit Focus
- Adjusting Parameters
- Managing Zones and Samples
- Working with Grouping
- Working with Key Ranges
- Setting Root Notes and Tuning
- Using Automap
- Layered, Crossfaded and Velocity Switched Sounds
- Using Alternate
- Sample Parameters
- Group Parameters
- Synth parameters
- Connections
- Dr. Rex Loop Player
- Matrix Pattern Sequencer
- ReBirth Input Machine
- The Effect Devices
- Menu and Dialog Reference
- About Audio on Computers
- MIDI Implementation
- Index

NN-XT Sampler
17 3
Sample Parameters
The Sample parameter area is found below the screen. For details on how to ad-
just them (depending on whether one or more zones are selected) see page
160. Below follows a run-down of the various parameters:
Root Note and Tune
These parameters are described on page 167.
Sample Start and End
By turning the knobs you offset the start and end positions, so that they will play
back more or less of a samples’ waveform. Typical examples of use for this
would be:
DD
DD
Removing unwanted portions from samples.
This could be anything from noise to “dead air” at the beginning or end of a
sample.
DD
DD
To create variations out of a single sample.
These controls can be used to pick out any section of a recording for use as
a sample.
DD
DD
Together with velocity sample start control.
You can for example increase Sample Start and then apply negative velocity
modulation to Sample Start. Then, the harder you play the more you will hear
of the attack portion of the sound.
✪ If you hold down [Shift] when adjusting these parameters, the ad-
justment is always in single frames (samples).
Loop Start and End
A sample, unlike the cycles of an oscillator for example, is a finite quantity. There
is a sample start and end. To get samples to play for as long as you press down
the keys on your keyboard, they need to be looped.
For this to work properly, you have to first set up two loop points which deter-
mine the part of the sample that will be looped.
The instrument samples in the sound banks included with Reason are already
looped. The same will be true for most commercial sample libraries. However, if
you need to, you can use these controls to adjust the looping.
• The size and position of the loop – in the sample – is determined by two pa-
rameters, Loop Start (the beginning of the loop) and Loop End (the end
point of the loop).
• The NN-XT then keeps repeating the section between the Loop Start and
Loop end until the sound has decayed to silence.
Play Mode
By using this knob you can select one of the following loop modes for each
zone:
DD
DD
FW
The sample in the zone will play only once, without looping.
DD
DD
FW-LOOP
The sample will play from the sample start point to the loop end point, jump
back to the loop start point and then loop infinitely between the start and
end loop points. This is the most common loop mode.
DD
DD
FW - BW
The sample will play from the sample start point to the loop end point, then
from the loop end point to the loop start point (backwards), and then loop in-
finitely forwards-backwards between the start and end loop points.
DD
DD
FW-SUS
This works like FW-LOOP with the exception that it will only loop as long as
the key is held down. As you release the key, the sample will play to the ab-
solute end of the sample, that is beyond the boundaries of the loop.
This means that the sound may have a short natural release even if the re-
lease parameter is raised to a high value (which is not true for “FW-LOOP”,
where the release parameter always controls the length of the sound after
the key is released).
DD
DD
BW
The sample will play only once - from the end to the beginning - without loop-
ing.
Lo Key and Hi Key
These parameters are described on page 164.
Lo Vel and Hi Vel
These parameters are described on page 169.
Fade In and Fade Out
These parameters are described on page 171.