
Operation Manual
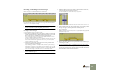
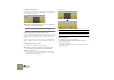
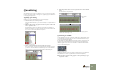
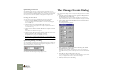
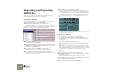


Table Of Contents
- Table of Contents
- The Sequencer
- Routing Audio and CV
- Routing MIDI to Reason
- Using Reason as a ReWire Slave
- MIDI and Keyboard Remote Control
- Synchronization
- Optimizing Performance
- Transport Panel
- Reason Hardware Interface
- The Mixer
- Redrum
- Subtractor Synthesizer
- Malström Synthesizer
- NN-19 Sampler
- NN-XT Sampler
- Introduction
- Panel Overview
- Loading Complete Patches and REX Files
- Using the Main Panel
- Overview of the Remote Editor panel
- About Samples and Zones
- Selections and Edit Focus
- Adjusting Parameters
- Managing Zones and Samples
- Working with Grouping
- Working with Key Ranges
- Setting Root Notes and Tuning
- Using Automap
- Layered, Crossfaded and Velocity Switched Sounds
- Using Alternate
- Sample Parameters
- Group Parameters
- Synth parameters
- Connections
- Dr. Rex Loop Player
- Matrix Pattern Sequencer
- ReBirth Input Machine
- The Effect Devices
- Menu and Dialog Reference
- About Audio on Computers
- MIDI Implementation
- Index

The Sequencer
32
Quantizing to Grooves
The Quantize pop-up menu also contains three items named “Groove 1-3”.
These are three different, slightly irregular rhythmic patterns. If you select one of
these as Quantize value and apply Quantize, your notes will be moved towards
the note positions in the Groove pattern, creating different rhythmic feels.
Creating your own Groove
You can create your own groove and apply this using Groove Quantize:
1. Create or record a rhythmic note “pattern” of some kind.
You may for example record a drum pattern, or use the notes playing the
slices in a REX loop.
2. Select the notes you want to include in the user groove.
The groove can be of any length, but it’s usually most practical to make it
one or two bars long.
3. Select “Get User Groove” from the Edit menu or sequencer context
menu.
Your pattern is stored as the User groove.
4. Select any notes that you want to quantize, make sure “User” is se-
lected as Quantize value, and quantize as usual.
The rhythmic feel of your groove is applied to the notes.
! The User Groove is only stored temporarily - it isn’t included when
you save your Song.
Quantizing during recording
You can have Reason quantize notes automatically when they are recorded. This
is done by activating the “Quantize Notes during Recording” button on the se-
quencer toolbar, before you start recording.
The Quantize value and Strength settings apply as usual.
The Change Events Dialog
The Change Events dialog contains some special editing functions. Proceed as
follows:
1. Select the events to which you want to apply the editing functions
(in the Arrange view or Edit view).
The Change Events functions are mainly used with notes, but the Scale
Tempo function will also affect controllers and pattern changes (see below).
2. Select Change Events from the Edit menu or the context menu for
the selected events.
The Change Events dialog appears.
3. Make settings for one of the functions in the dialog and click the
Apply button next to the settings.
All settings can be made by clicking the spin controls or by clicking in a
value field and entering a value numerically. The functions are described be-
low.
4. If you like, use other settings in the same way.
You can use the transport controls as usual while the dialog is open. This al-
lows you to play back the events to check out the changes.
5. When you are done, close the dialog.