Coating Thickness Instruments ProTek II S SERIES User’s Guide ProTek II SF _____ ProTek II SN _____ ProTek II ST _____
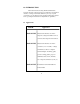
1.0 INTRODUCTION The ProTek II series Coating Thickness Instruments represent the latest technology for the non-destructive measurement of surface coatings on all metals. While they are very easy and convenient to use, the first time user should read this entire manual before operating the instrument to fully utilize its capabilities. 1.1 Applications MODEL ProTek II SF Application Measures the thickness of all non magnetic coatings and finishes on iron, steel and other magnetic metal surfaces.
2.0. EQUIPMENT SUPPLIED 2.1 Standard Accessories The ProTek II Series Gauges are supplied with the following standard accessories: a. Bare test plate for setting ZERO calibration. ProTek II SF supplied with steel plate ProTek II SN supplied with aluminum plate ProTek II ST supplied with steel and aluminum plates b. Two precision plastic shims. c. One 9-Volt DC alkaline battery. d. ProTek II Series Operating Instruction Manual. e. Hard plastic carrying case.
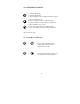
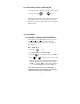
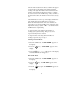
3.0. KEYPAD FUNCTIONS ON 1. Turns the power on 2. Turns the power off 3. Selects displayed value or displayed sub-menu option 1. Enters calibration mode 2. Increases displayed value in calibration mode 3. Increases number of measurements in CAM mode 1. Enter CAM ( average ) mode. 2. Decreases displayed value in calibration mode 3. Decreases number of measurements in CAM mode mils-to-micron-to-mils 3.1.
4.0 OPERATING PROCEDURE 4.1 HANDLE PROBE CAREFULLY 4.2 Taking Measurements 1. Press the ON key to turn on the power. The LCD will momentarily flash SABERN and all of the indicators will be illuminated. The display will then show “-- -- --” along with the selected units of measure indicator: a. mils/thou : English b. um (microns) : Metric To change units of measure press the to section 6.0 for additional details. key. Refer 2.
5.0 CALIBRATION 5.1 Introduction The ProTek II series normally do not require calibration before use. However, whenever the product or part to be checked varies greatly from the supplied test plate, in either shape or thickness, it is best to check or verify the calibration using an uncoated sample of the actual product or part and using one of the plastic calibration shims provided. Check the calibration as noted in section 5.
Setting The “ZERO” Point 3. After pressing the key, the display will flash “2 PT CAL” followed by “00 PLATE”. An audible “beep” will also be heard. Place the probe on the bare metal part and press until the shell contacts the surface. 4. The display will show “CAL” on the left and a thickness reading (near zero) on the right. Remove the probe from the bare metal surface. 5. The display will then show “MORE/SEL” and will “beep”. a.
6.0 CHANGING UNITS OF MEASURE To change the units of measure from mils to microns, and vice versa, press the 0N + key. Each time this combination of keys are pressed the units will change from one to the other. The unit of measure indicator, located in the upper right corner of the display, will also change. 7.
After the first measurement is taken, a number will appear on the left side of the display along with the thickness reading on the right. The number on the left indicates the number of measurements that must be taken to complete the current series for the CAM average. Thus, each time a measurement is taken, the number on the left decreases by one. The CAM indicator on the top of the display will flash on and off indicating that a CAM series is in progress.
4- Press the ON key. The gauge enters to its previous setup without any changes 8.0 CHANGING THE BATTERY. When a battery indicator appears on top of the display, replace the battery. Battery life is approximately 6 months when the ProTek II series gauges are used for about 80 readings per day. BATTERY TYPE: Any high quality 9 volt ALKALINE battery. FOR TECHNICAL ASSISTANCE Contact: AMTRA, INC.