
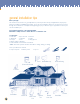
Installation Instructions

12
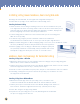
important installation tips
The following are absolute “must-do’s” for every siding installation:
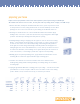
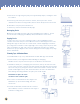
1. Don’t nail too tightly. Always allow a minimum of 1/16" space between the back of the head
and the nailing hem. Space fasteners 12" - 16" apart on center.
3. Perforate the cut edge using snap-lock punch approximately every 8",
ensuring the “tabs” face outward.
2. Leave 1/4" clearance at all openings and accessory channel stops. This allows for normal
expansion and contraction. When installing in temperatures below 32° F, leave 3/8".
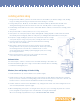
4. NEVER NAIL THROUGH THE FACE OF THE SIDING! Face nailing is driving
a fastener through the panel outside of the center of a nail slot.
5. Center fasteners in nail slots. Fastening at the end of the slot will cause permanent
damage to the siding panel. If you need to lengthen the nail slot, you can do so
with a nail-slot punch.
6. Drive fasteners in straight. Nailing at an angle will distort
siding panels and cause buckling.
7. Be careful not to stretch panels. Apply slight upward pressure until the lock is fully
engaged, then secure allowing panels to move freely without strain.
8. Overlap horizontal siding panels 1".
Excessive overlap can restrict free movement and cause product failure.
9. Use fasteners long enough to penetrate a minimum of 3/4" into the nailable base.
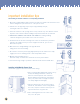
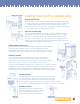
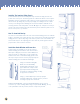
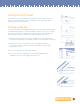
Installing Inside/Outside Corner Posts
(Instructions apply for both horizontal and vertical siding.)
1. Cut to required length allowing 1/4" clearance at top
of wall, and adding a minimum of 1/4" at the
bottom for normal expansion and contraction.
Remove 3/4" from both nail hems at the bottom
of the post. (If more than one length is required,
see overlap diagram at below right.)
2. Place the first fastener at the top of the topmost
full nail slot, and allow the corner to hang. Plumb
the corner, and place a fastener at the top of the
topmost full nail slot of opposite side.
3. Place remaining fasteners in the center of the
slots, 12" to 16" apart.