
User manual


Page 24
IP CAMERA USER MANUAL
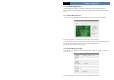
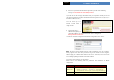
Step 3: Click "Submit" button, the system will pop up a dialog box to show that the domain is
added successfully.
Note: Time of probationary period is one month. If user wants to use it continuatively
after one month, please Step 4: click "Buy Now" in the right of homepage to pay for it.
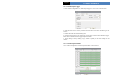
2. Setup in the IP-CAMERA
⑴ DOMAIN
Domain is set in ‘1. Apply the Domain Name’. According to the example above, the
domain is ‘WWW. IP-CAMERA.dns2p.com’.
⑵ USER ID
Username of registered which is set in ‘(1) Register in the Web’. According to the
example above, user ID is ‘abc’.
⑶ PAS S WORD
Password is set in ‘(1) Register in the Web’. According to the example above, password
is ‘123456’.
Note: If the connection fails, press the "INFO" button. Now the system will display:
‘DDNS NONE’. Then you need to check network and information above and try again.
3. Application
Connect IP-CAMERA to the Network Client.
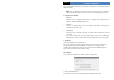
Step 1: After popping up the login interface, fill in "Server" textbox with ‘*.dns2p.com’ to
visit the Network Client of the IP-CAMERA. The domain set in ‘(3
) Domain Setup’.
According to the example above, fill in "Server" textbox with ‘IP-CAMERA.dns2p.com’.
Step 2: Click "save" button to save the above setting.
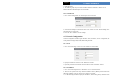
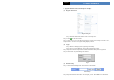
4.5.6 RTSP
Go to “Network Configuration” “RTSP” interface as shown below.
1. Select “Enable RTSP server”.
2. RTSP Port: Access Port of the streaming media. The default number is 554.